Sfp+ transceiver installation, Appendix a, Installing the sfp+ transceiver – PLANET XGS3-24042 User Manual
Page 2: Caution, Connect the fiber cable, Fiber optical patch cables
– 7 –
– 8 –
Figure 2 Remove the blank bracket
2. Install the XGS3-2SFP+ module by inserting it into the
rails and sliding it in until it stops (See Figure 3). Press
it firmly until you feel the module snap into place. Never
force, twist or bend the optional module.
3. Gently push the thumbscrews and turn clockwise to
tighten. Do not over tighten the thumbscrews.
4. Power the Switch and it will automatically detect the new
module.
AC 100V~
240V 2A
DS PS
-48V ~-60V 2.5A
GND -48V 0V
M1
M2
XGS3-2SFP+
Figure 3 Insert the XGS3-2SFP+ modules
5. Check the LED on the module’s front panel to verify that
if there is a link and a proper connection at the port.
Please refer to the Switch’s user’s manual for more about
Switch or module’s management.
5. SFP+ Transceiver Installation
The XGS3-2SFP+ has two vacant 10Gb fiber transceiver
slots. The procedure of installing the SFP+ 10Gb fiber
transceiver is as below:
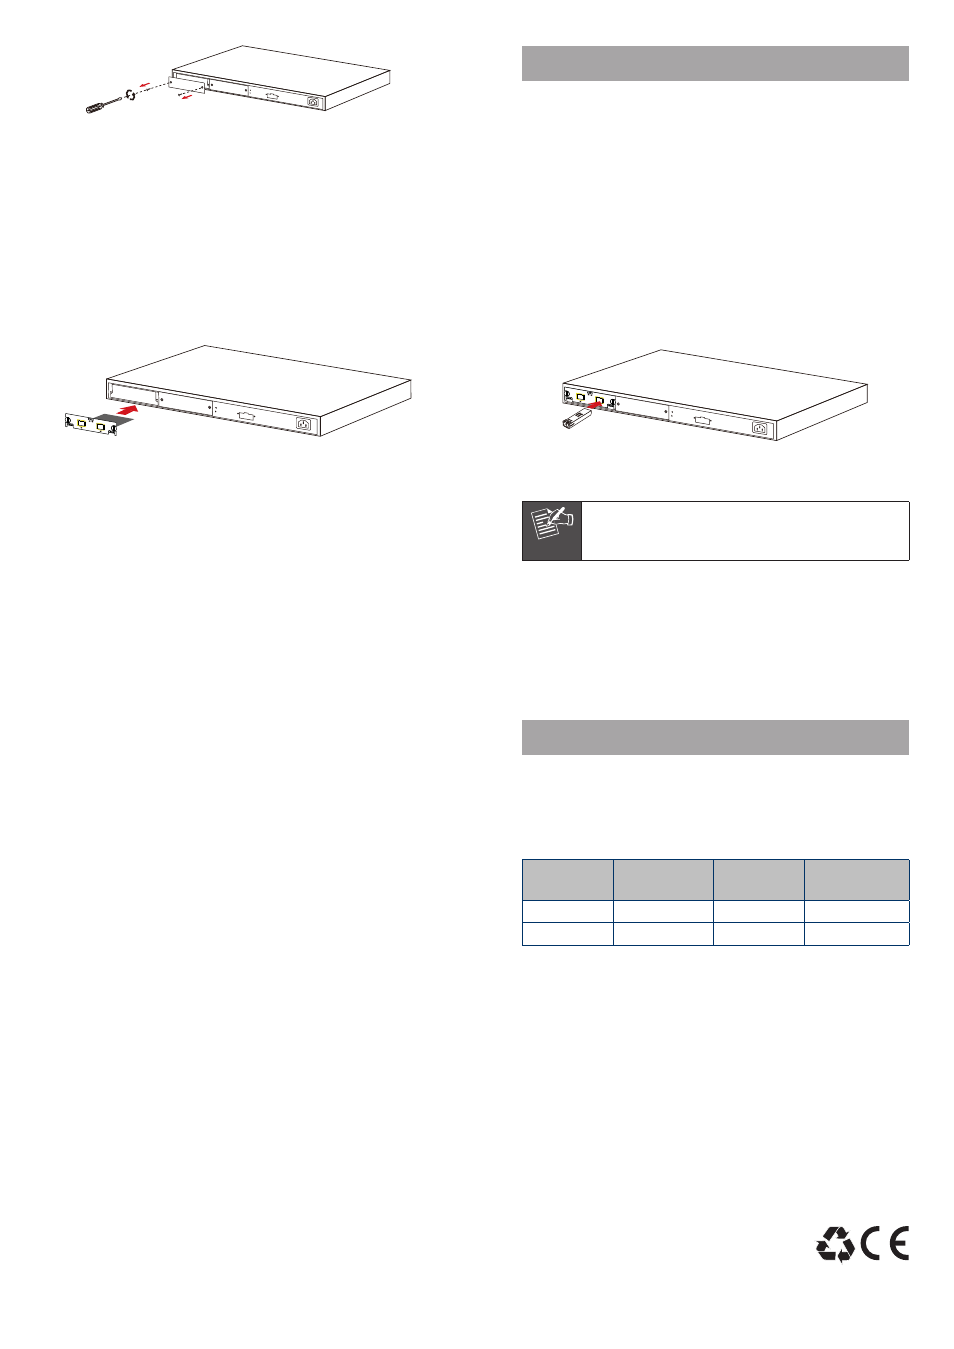
Installing the SFP+ transceiver
1. Put on an ESD wrist strap (or antistatic gloves)
2. Insert the SFP+ transceiver to the guide rail inside the
XGS3-2SFP+ module. Do not to put the SFP+ transceiver
up-side-down.
3. Push the SFP+ transceiver along the guide rail gently
until it comes into contact with the front panel of the
XGS3-2SFP+ module.
AC 100V~
240V 2A
DS PS
-48V ~-60V 2.5A
GND -48V 0V
M1
M2
XGS3-2SFP+
Figure 4 Plug-in the SFP+ transceiver
Note
The SFP+ 10Gb transceiver is hot-swappable.
Caution!
Do not stare directly at the 2 fiber bore in the SFP+
transceiver when the Switch is in operation, otherwise the
laser may hurt your eyes.
Connect the fiber cable
1. Make sure both side of the SFP+ transceiver are with the
same media type, for example: 10GBase-SR to 10GBase-
SR, 10GBase-LR to 10GBase-LR.
2. Check the fiber-optic cable type match the SFP+ trans-
ceiver model.
3. Attach the duplex LC connector on the network cable into
the SFP+ transceiver.
4. Connect the other end of the cable to a device – switches
with XFP or SFP+ installed, fiber NIC on a workstation or
a Media Converter.
5. Check the LNK/ACT LED of the XGS3-2SFP+ module.
Ensure that the SFP+ transceiver is operating correctly.
– 5 –
– 6 –
Appendix A
Fiber Optical Cable Connection Parameters
The wiring details are as below:
Fiber Optical patch Cables:
Standard
Wavelength
Fiber Type
Cable
Specification
10GBase-SR 850nm
Multi-mode
50/125μm
10GBase-LR 1310nm
Single mode 9/125μm