2 poe-152, the injector installation – PLANET POE-152 User Manual
Page 2
– 5 –
– 6 –
2.2 POE-152, the Injector Installation
1. Connect a standard network cable from Switch/worksta-
tion to “Ethernet” port of POE-152.
2. Connect the long cable that will be used to connect to
the remote device to the port “Ethernet + DC”.
3. Connect the AC adapter to “DC 48V” of POE-152. The
power LED will be steady on.
4. Connect with IEEE 802.3af devices, due to the capa-
bility of IEEE 802.3af standard, the POE-152 can directly
con-nect with any IEEE 802.3af end-nodes like wireless
access point, VoIP phones and Internet camera where
support IEEE 802.3af In-line Power over Ethernet port.
The screen in Figure 1 appears
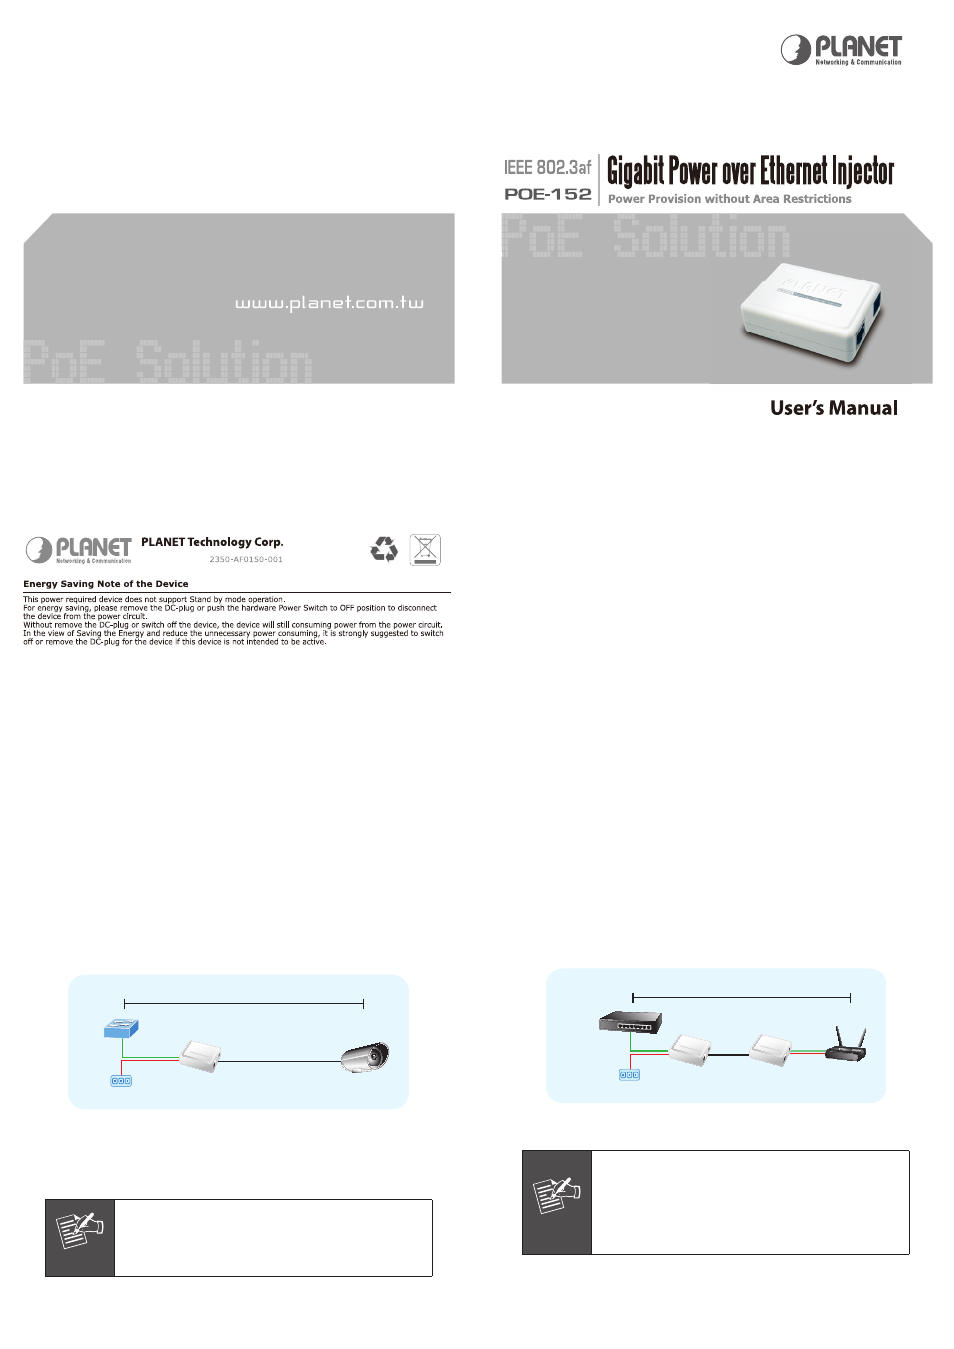
100 meters
Data + Power
Data
Switch
PoE IP Camera
Power
POE-152
Figure 1: Connection to IEEE 802.3af device
Once POE-152 detects the existence of an IEEE 802.3af
device, the LED indicator will be steady, ON to shows it is
pro-viding power.
Note
If the connected device is not fully complying
with IEEE 802.3af standard or in-line power
device, the LED indicator of POE-152 will not
be steady on.
2.3 POE-152 and POE-152S, the IEEE 802.3af
Injector and Splitter Installation
1. Connect a standard network cable from “Ethernet+DC”
of POE-152 to “Ethernet+DC” of POE-152S. The POE
LED of POE-152 / POE-152S will light on continuance.
2. Connect the UTP cable in the package from
“Ethernet”
of POE-152S to the RJ-45 port of remote device.
3. Connect proper DC plug from
“DC OUT” of POE-152S to
remote device.
4. Power on the remote device and the LED indicator on
POE-152S will remains on.
100 meters
Gigabit Switch
Wireless AP
POE-152
POE-152S
Figure 2: Connection architecture over POE-152/152S
Note
1. According to IEEE 802.3af standard, the
POE-152 will not inject power to the cable
if not connecting to IEEE 802.3af devices.
2. Please ensure the output voltage is correct
before applying power to remote device.