PLANET WNAP-7300 User Manual
Product package, Installation precautions, System installation
– 1 –
– 2 –
– 3 –
– 4 –
1. Product Package
WNAP-7300 x 1
Pole Mounting Ring x 2
AC Power Adapter & PoE Injector x 1
Quick Installation Guide (QIG) x 1
Product CD (User’s Manual & QIG included) x 1
Note
If any of them are not included or damaged,
please contact your local vendor for support.
2. Installation Precautions
1. Users MUST use a proper and well-installed surge arrestor
and grounding kit with WNAP-7300; otherwise, a random
lightening could easily cause fatal damage to WNAP-
7300. EMD (Lightning) DAMAGE IS NOT COVERED
UNDER WARRNTY.
2. Users MUST use the “AC Power Adapter & PoE Injector”
shipped in the box with the WNAP-7300.
Use of other options will cause damage to the WNAP-
7300.
3. Users MUST power off the WNAP-7300 first before
connecting the external antenna to it; otherwise, damage
might be caused to the WNAP-7300 itself.
3. System Installation
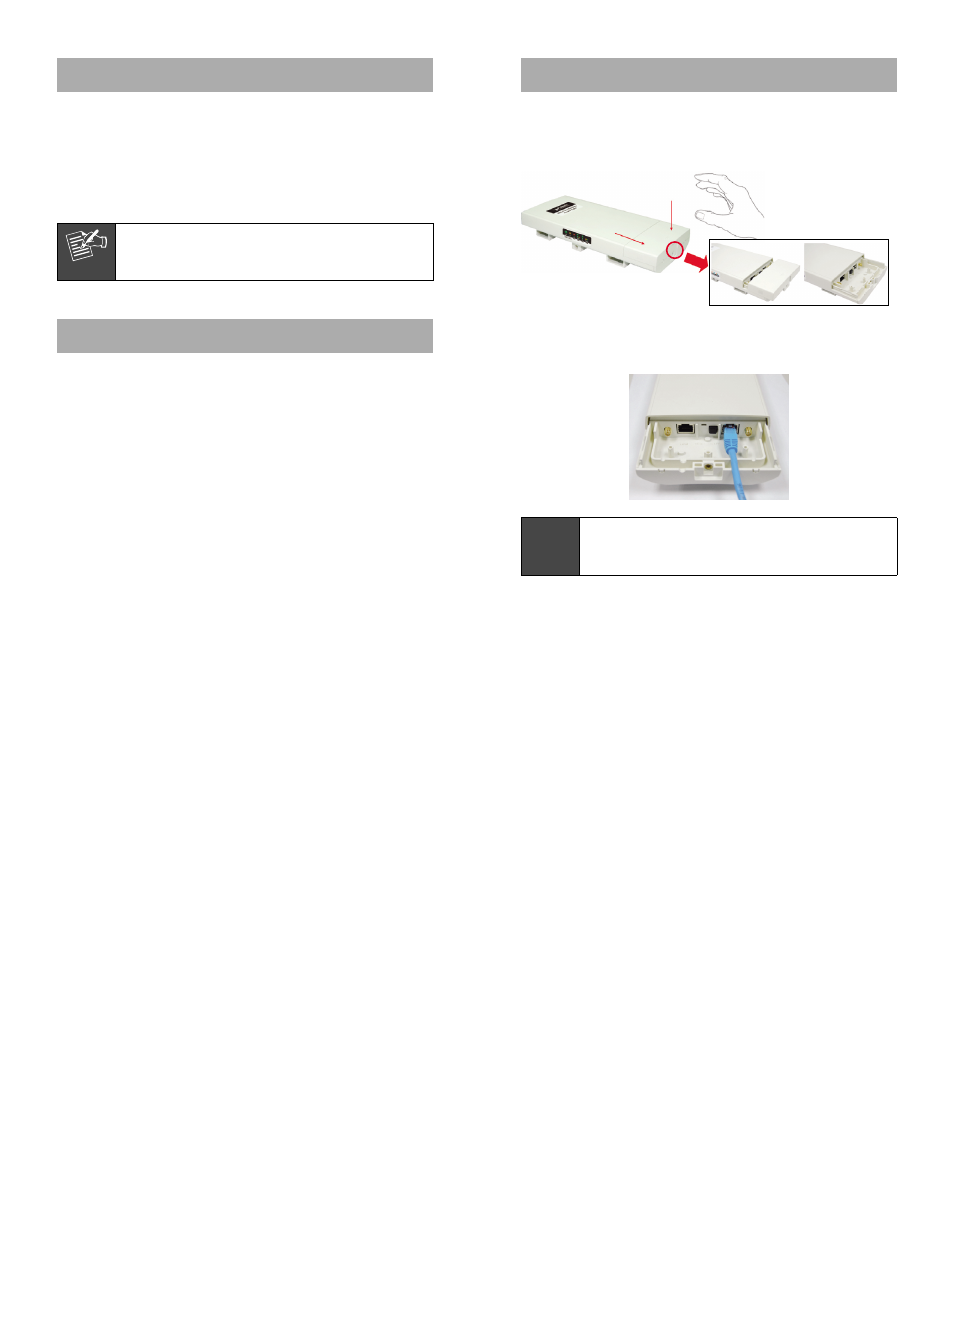
1. The bottom of the WNAP-7300 is the movable cover.
Loosen the screw with a Phillips screwdriver. Grab the
cover and pull it out as the figure shown below.
2. Plug a standard Ethernet cable into the RJ45 port labeled
“LAN 1”. Do not plug the cable into the RJ45 port labeled
“LAN 2”.
Note
Please refer to the User’s manual in CD-ROM
for more information about how to use the
secondary Ethernet port (labeled LAN 2).
3. Press the black PWR button beside the LAN 1 Ethernet
port.
4. Attach and fasten the removable cover to the bottom
of the WNAP-7300. When finished, you can check the
connection as the figure below. Be reminded, the UTP
wire distance toward your WNAP-7300 to the Ethernet
devices, such as Ethernet Switch, is 100 meters, the
passive POE injector can be in any point of this 100
meters UTP distance where there is a shell or protected
location.
5. Turn the WNAP-7300 over. Put the pole mounting ring
through the middle hole of the WNAP-7300.
Note
Unlock the pole mounting ring by a screw driver
before putting it through the WNAP-7300 as the
bottom right picture shows.