Wired network configuration (windows 7), Enter into the web management, Further information – PLANET WNAP-W2200 User Manual
Page 2: Wireless network connection
- 4 -
- 5 -
- 6 -
- 7 -
4. Wired Network Configuration
(Windows 7)
A computer with wired Ethernet connection is required
for the first-time configuration of the Wireless AP.
1. Click “Start” button located at the lower-left
corner of your computer.
2. Click “Control Panel”.
3. Double click “Network and Sharing Center”
icon.
4. Click “Change Adapter Settings”.
5. Double click “Local Area Connection”.
6. Select “Internet Protocol Version 4 (TCP/
IPv4)” and click “Properties”.
7. Select “Use the following IP address”, and then
click “OK” button twice to save the configura-
tion. For example, as the default IP address of the
WNAP-W2200 is 192.168.1.253 and the router is
192.168.1.254, you may choose from 192.168.1.1
to 192.168.1.252.
5. Enter into the Web Management
Default IP Address: 192.168.1.253
Default Username: admin
Default Password: admin
Default SSID: WNAP-W2200_XXXXXX (“X”
means the last 6 digits of the MAC address)
Default Wireless Encryption Type: None
STEP 1: The Web management allows you to access
and manage the Wireless AP easily. Launch
the Web browser and enter the default IP
address http://192.168.1.253
STEP 2: When the login window pops up, please enter
the User Name and Password. The default
User Name and Password are both “admin”.
Then click OK button to continue.
For security reasons it is recommended to change the
password at the first login and memorize it.
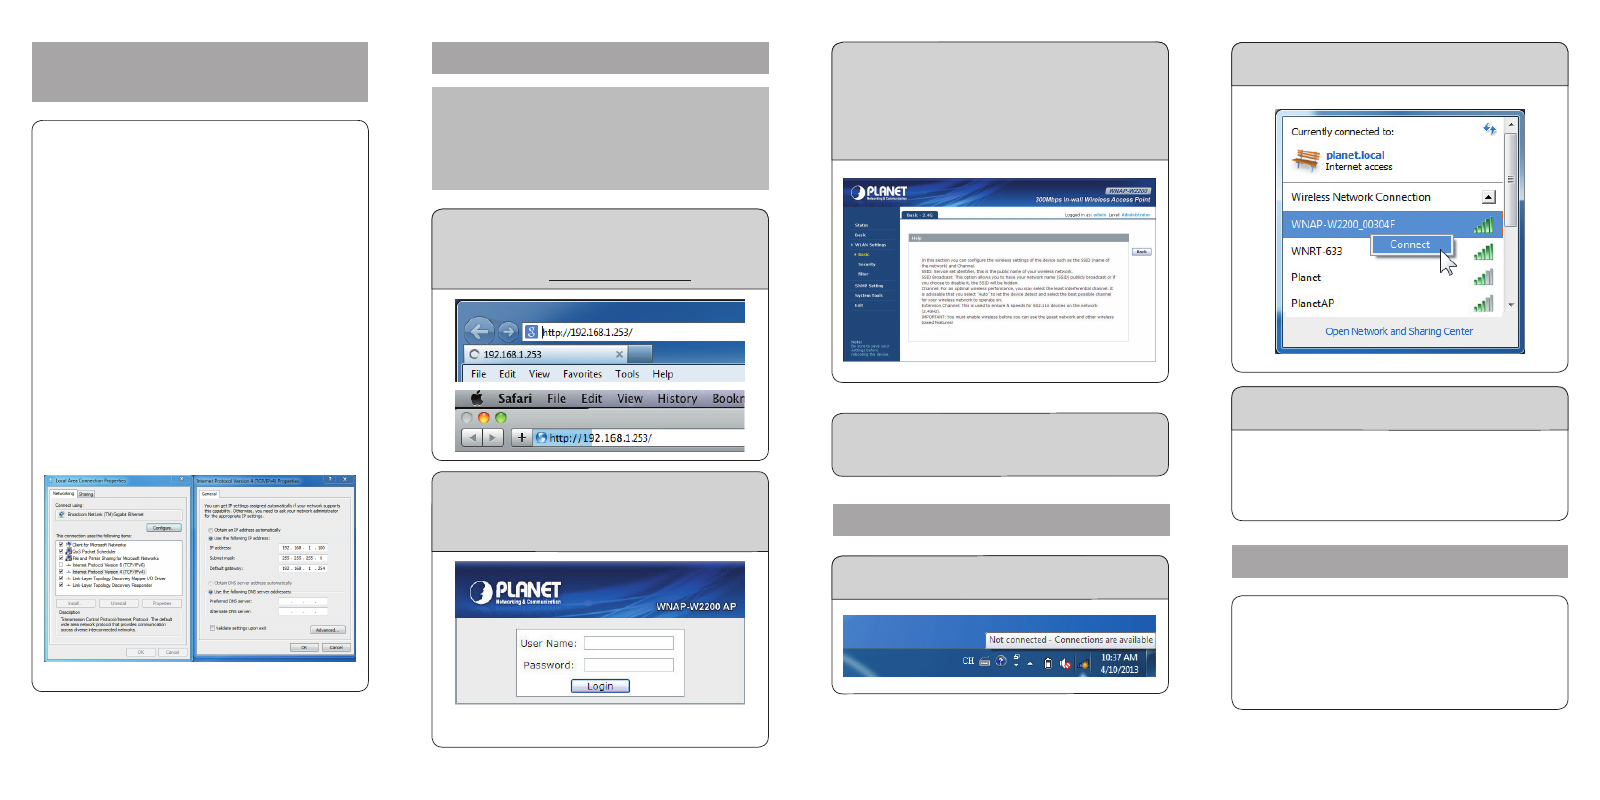
STEP 2: Highlight the wireless network (SSID) to
connect and click [Connect] button.
STEP 3: Enter the encryption key of the WNAP-
W2200 if necessary.
You have already finished the configuration of the
WNAP-W2200. Now you can use your iPhone, iPad,
laptop, and any other Wi-Fi device to connect with it
wirelessly and start surfing the internet.
Further Information:
The above steps introduce simple installations and
configurations for the WNAP-W2200. For further
configurations of LAN, Wireless, Access Control, etc,
please refer to the user’s manual in the CD. If you
have further questions, please contact the local dealer
or distributor where you purchased this product.
2011-E10540-001
STEP 3: After you enter into the Web User
Interface, go to WLAN Settings to
configure your wireless network.
For security reasons, strongly recommended
to configure the Encryption Method and
Passphrase of your wireless network.
STEP 4: Once the basic configuration of the WNAP-
W2200 is done, click “Save” button to
make the change take effect.
6. Wireless Network Connection
STEP 1: Right-click on the network icon displayed
in the system tray.