PLANET WPG-210N User Manual
Hardware installation, Software installation – windows, Software installation – mac os x
SSID SSID
IP
User Name
Login Code
WPG-210N
I
– 1 –
– 2 –
– 3 –
– 4 –
3. Hardware Installation
– 7 –
– 8 –
– 5 –
– 6 –
Front Panel Description
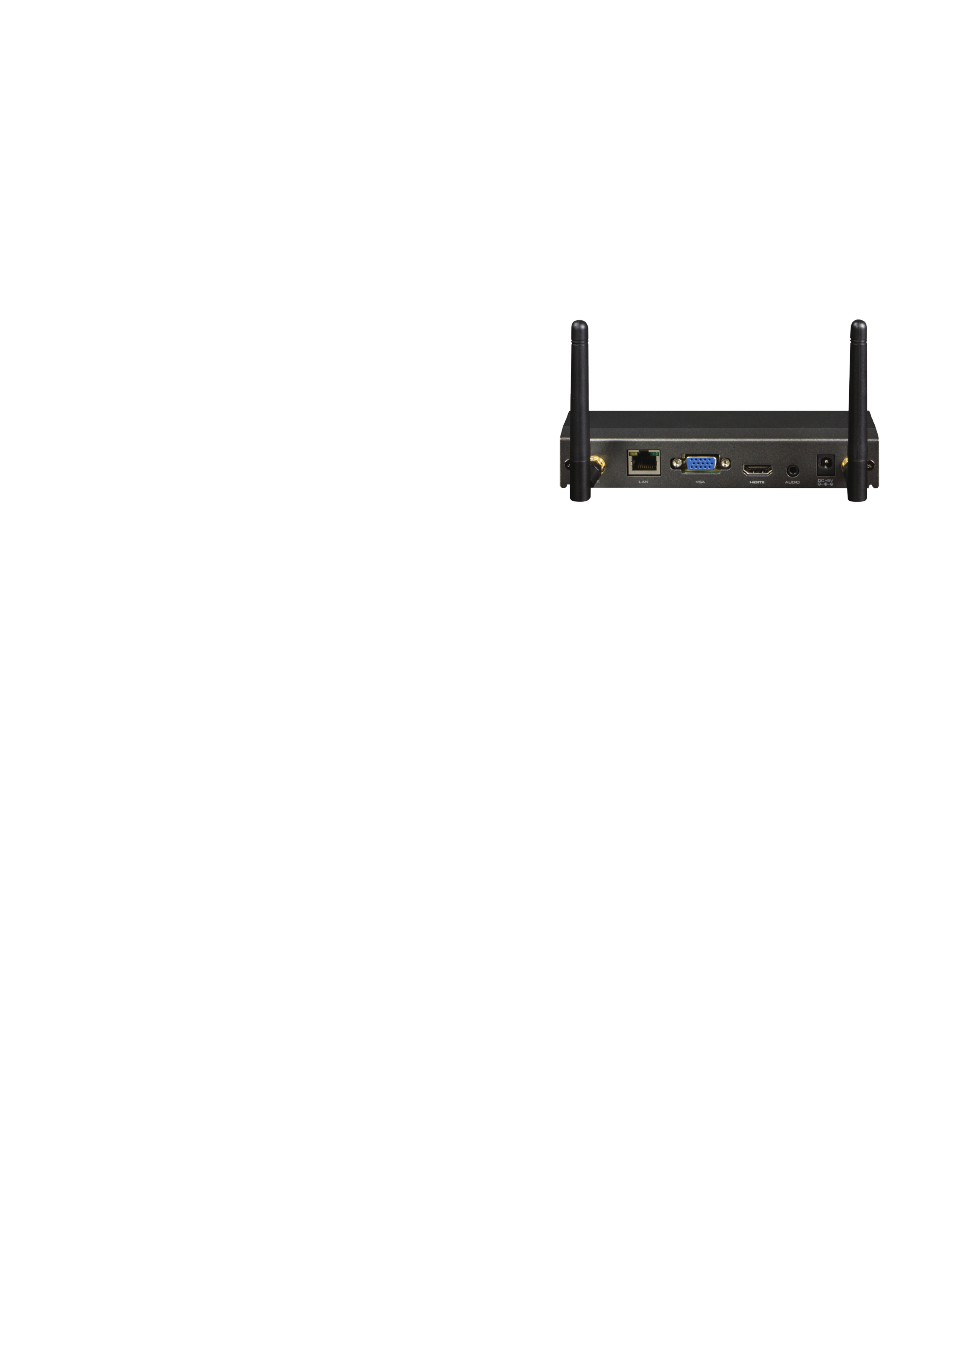
Rear Panel Description
Further Information
The above steps introduce simple installations and
configurations for WPG-210N. For further configurations of the
utility (WPG), Virtual Extended Screen, and Wi-Fi AP-Client etc,
please refer to the user’s manual in the CD. If you have further
questions, please contact the local dealer or distributor where
you purchased this product.
2011-E60060-000
Step 1: Please turn on your projector first, and connect HDMI
or D-sub cable of the projector to WPG-210N. Now
you can power on WPG-210N.
Step 2: When the projector shows the default screen as
below, it indicates WPG-210N is ready now.
LAN Port
(Connect to a client PC of Ethernet)
2 dBi Detachable Antenna x 2
Power Connector
(5V DC Input)
Power LED
2 x USB
15 Pin D-Sub VGA Port
(Connect to the projector)
Audio Out
(Connect to speaker
or headphone)
HDMI Port
(Connect to the projector)
Step 2: Open the web browser and it will redirect to
WPG-210N home page automatically, or you can
enter the default IP address 192.168.1.1 to access
it.
Step 3: Download the client utility (WPG) of Windows
7/Vista/XP and execute it. After installing the
program, you’ll see WPG shortcut on your PC
desktop.
Step 4: Click WPG icon on the desktop to execute the
program. The WPG will start to search the available
access points automatically if you have not
connected your PC to WPG-210N manually.
Step 5: When the default SSID “WPG-210N” is displayed in
the list, please click it to connect and then enter the
Login Code shown on the projector screen.
4. Software Installation – Windows
Step 1: Site survey the wireless signal of WPG-210N, and
connect your PC with it wirelessly.
Default SSID: WPG-210N Default IP Address: 192.168.1.1
Default Username: admin Default Password: admin
* The connection information (SSID) can be found from the
projector screen.
Note
Please make sure the firewall in Windows will
allow the WPG software to pass through.
5. Software Installation – Mac OS X
Note
WPG-210N
Quick Guide
CD-ROM
If there is any item missed or damaged, please
contact the seller immediately.
Thank you for choosing PLANET WPG-210N. Before installing
the device, please verify the contents inside the package box.
1. Package Contents
WPG-210N
Quick Installation Guide
802.11n Wireless
Presentation Gateway
Antenna x 2
Wall-mount Kit
Power Adapter &
World-Wide Adapter Set
Step 6: Click the button to start projection, or choose one
of the numbers (1-4) to project to the split screen.
Step 1: Enable your WiFi and connect to WPG-210N.
Step 2: Open the web browser and enter the default IP
address 192.168.1.1 to access the WPG-210N home
page.
Download the client utility (WPG) of Mac OS X and
execute it.
Step 3: Launch WPG software and enter the login code.
2. Physical Introduction
Power
Power
Adapter
HDMI
VGA