PLANET DVR-461 User Manual
Dvr-461, Quick guide
DVR-461
DVR-461
their respective owners. Copyright © 2009 PLANET Technology Corp. All rights reserved.
PLANET Technology Corporation
11F, No. 96, Min Chuan Road, Hsin Tien, Taipei, Taiwan, R.O.C.
Tel: 886-2-2219-9518
Fax: 886-2-2219-9528
Email: [email protected]
www.planet.com.tw
Quick Guide
Quick Guide
2011-AB5120-000
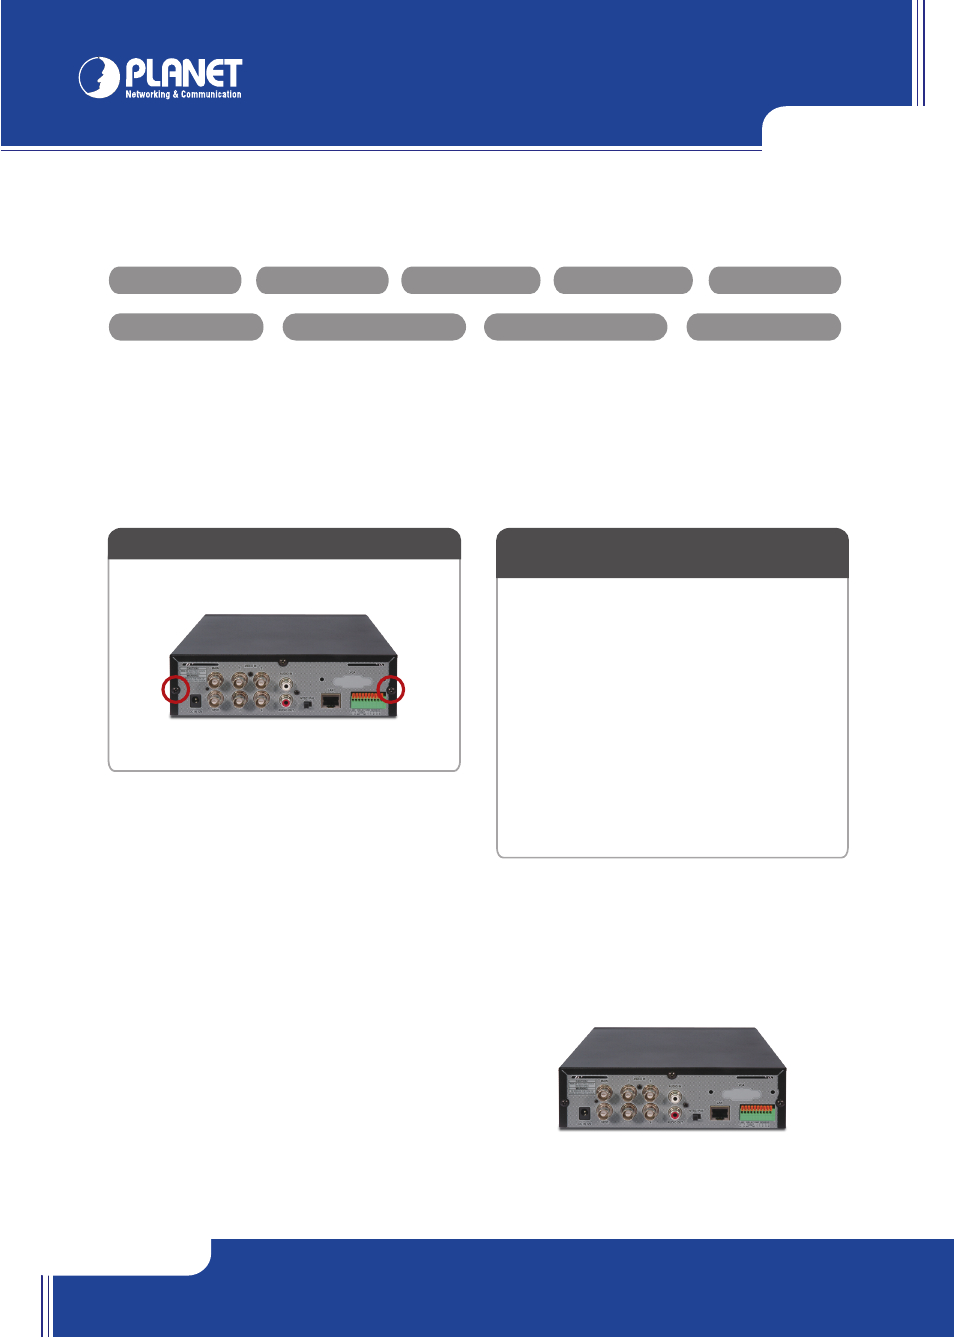
STEP 1: Remove the 3 screws from DVR-461
STEP 2: Follow the direction to remove the
upper case
SATA cable
Quick Installation Guide
DVR-461
CD Disk
Power Adapter
Battery x 2
Remote Control
Power Cord
HDD Screw x 4
For detailed information about DVR-461, please refer to the User’s Manual in the CD disk.
STEP 3: Place the HDD on the HDD plate of the
removed case and connect the power
and the SATA cable firmly
STEP 4: Put back the upper case and tight the
three screws
Note: Before HDD installation, please make sure there is no pre-configured partition in this HDD.
If yes, please delete all the partition before install.
► Hard Disk Installation
► Contents
► Hardware Connection
Please follow the sequence from 1 to 9 to connect the equipments to DVR-461.
MAIN MONITOR
VIDEO IN
AUDIO IN
NTSC/PAL SWITCH
LAN
EXTERNAL I/O
AUDIO OUT
SPOT MONITOR
DC 12V
BNC port for the main monitor connected.
BNC input ports for cameras, 4 in total.
RCA input port for an audio signal.
Switch between NTSC and PAL format. Please adjust this switch before power on.
Network port. Connect to your switch or PC directly.
EXTERNAL I/O port (see below for pin definition)
RCA output port for an audio signal.
BNC port to display full screen image of all installed cameras in sequence.
Socket for a DC 12V power input.
1
2
3
4
5
6
7
8
9
Description
Item
Main Monitor Output
Camera 1~4
Audio Input
Spot Monitor Output
Audio Output
RS485/Relay/Sensor
Power Supply
Network Connection
NTSC/PAL Switch