PLANET ICA-BOX30 User Manual
Package contents, Physical installation, Product specification
– 1 –
– 3 –
– 2 –
– 4 –
Package Contents
1 x ICA-BOX30
1 x Quick Installation Guide
4 x Screw
2 x Power Cable
1 x Water Proof Ring
12 x Washer
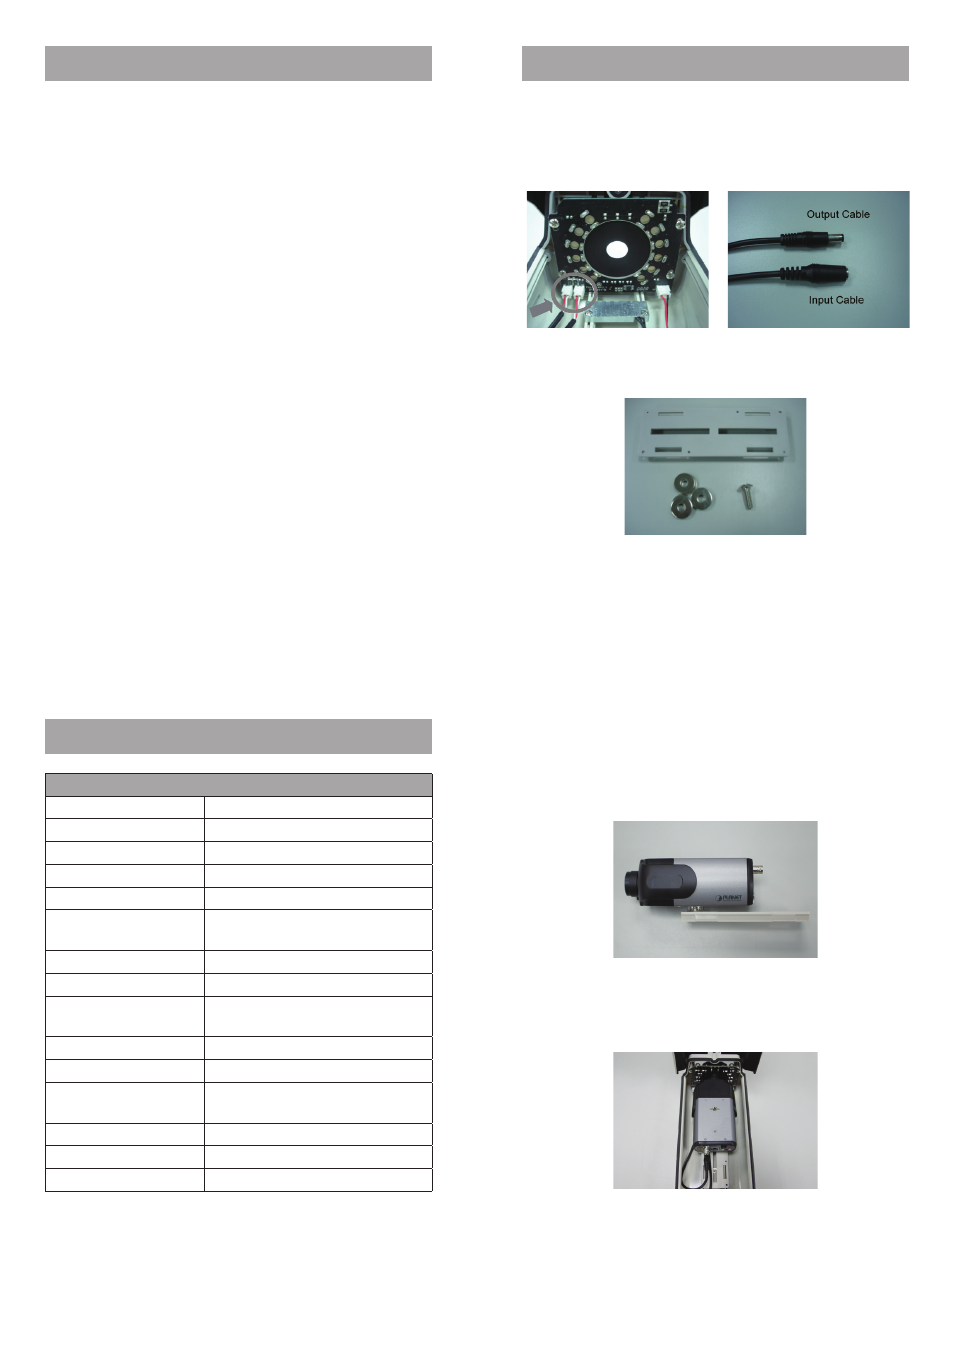
Physical Installation
1. Open the up cover of ICA-BOX30 from its back locker.
2. Connect the power cables as below image.
(Power Input cable connects to J2 and power output
cable connects to J3)
3. Take off the slide board from the track of the housing,
and find out the screw and washers from the package as
below figure.
Product Specification
ICA-BOX30
Type
Indoor / Outdoor
Open
Back Open
Material
Aluminum
Color
Beige
Thickness
1.10 mm
IR LED
22 pcs
Distance up to 30 meters
Heater
Yes
Blower
Yes
Control Temperature
Heater: On:15 / Off:25 degree C
Blower: On:35 / Off:25 degree C
Water Resistance
IP-66
Operating Temperature -20 ~ 60 degree C
Dimension
(W x D x H)
142 x 380 x 115 mm
Weight
1.6 kg
IR Power Consumption 400 mA
Power Request
12V DC, 1.5A x 2
4. Fix the camera on the slide board by screw and washers.
(The sample is PLANET ICA-HM126. You may adjust the
numbers of washer to make the camera higher or lower
to fit the ICA-BOX30.)
5. Put the slide board with the fixed camera back to the
track of housing, and connect the output power cable to
the power-in connector of camera.
6. Refer to camera’s manual to deploy the other cables to
connect to the camera inside.
(Ethernet, power, video, audio cables etc…)