Panasonic Lumix DC-FZ1000 II Digital Camera User Manual
Page 55
DVQX1774 (ENG)
55
Recording
1
Set mode dial to [
]
2
Set the menu
→
[Creative Video] → [4K Live Cropping]
Settings: [40SEC] / [20SEC] / [OFF]
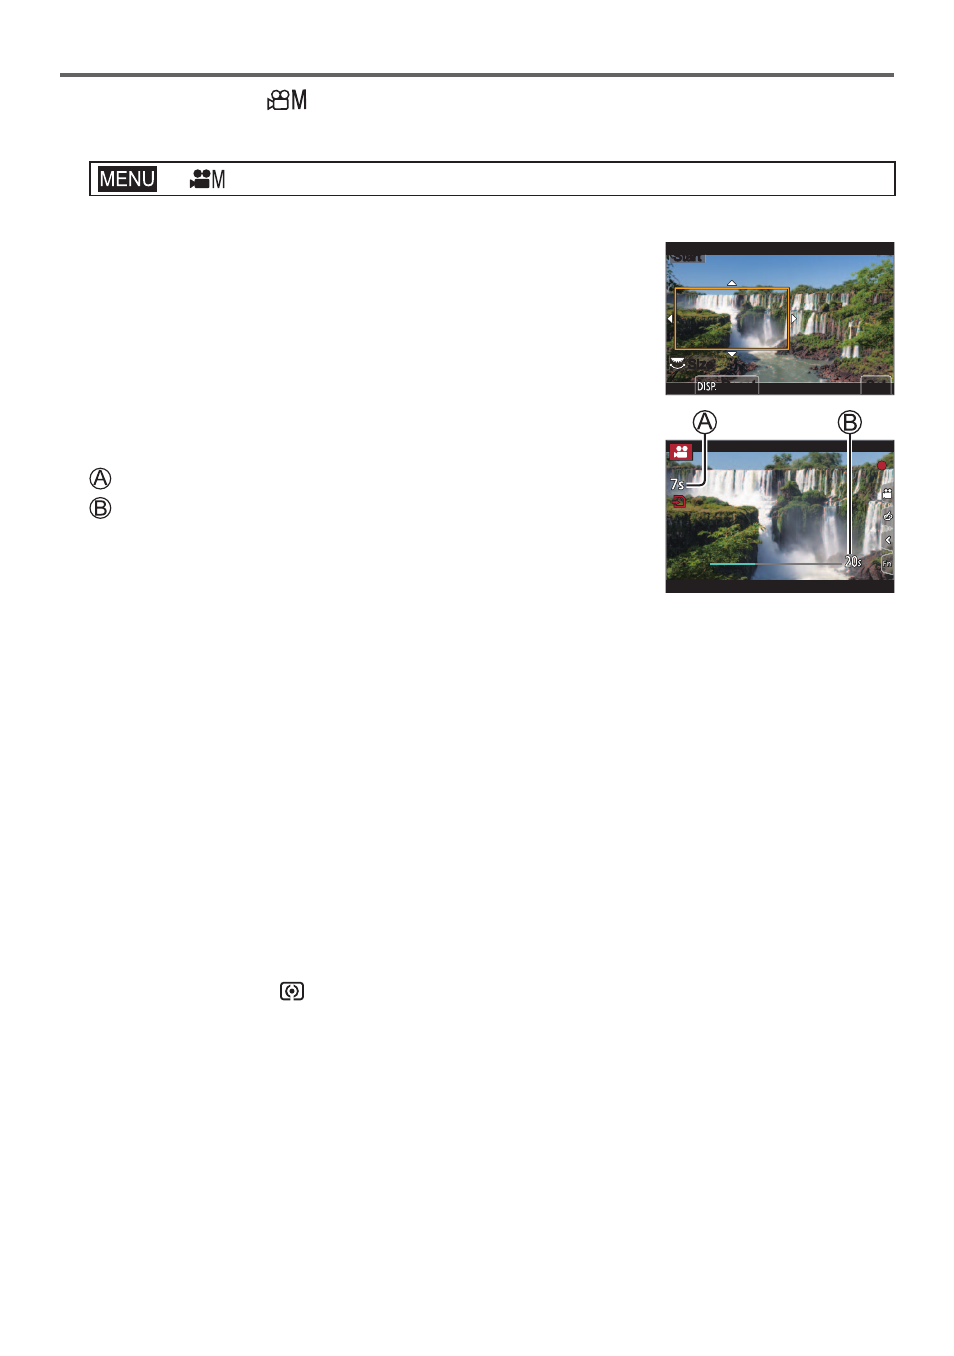
3
Set the crop start frame and press [MENU/SET] to set
• Set the crop end frame as well.
• When making settings for the first time, a crop start frame of size
1920×1080 is displayed.
• Move the frame by touching it or using the cursor button. You can
adjust the frame size by pinching out/pinching in or rotating the
rear or front dial.
Size
Size
Start
Start
Reset
Reset
Set
Set
4
Press the motion picture button (or the shutter button)
to start recording
Elapsed recording time
Set operating time
• Immediately release the motion picture button (or the shutter
button) after pressing it.
• When the set operating time has elapsed, recording
automatically ends. To end recording midway, press the motion
picture button (or the shutter button) again.
●
When you want to zoom in/out, set different angles of view for the cropping start and end frames.
For example, to zoom in, set a larger angle of view for the start frame and a smaller angle of view
for the end frame.
■
Changing the position and size of a crop frame
Press [Fn7] button while the recording screen is displayed, and perform step
3
.
■
To cancel [4K Live Cropping] recording
Set [OFF] in step
2
.
●
[4K Live Cropping] recording cannot be performed when [High Speed Video] is set.
●
Focus is adjusted and fixed in the crop start frame.
●
[Continuous AF] is set to [OFF].
●
[Metering Mode] will be [
] (Multi Metering).
●
You cannot zoom in/out during [4K Live Cropping] recording.