Celestron NexStar Evolution 6 150mm f/10 Schmidt-Cassegrain GoTo Telescope User Manual
Page 22
22
I
ENGLISH
2 Place your finger along the edge of the front cell of the telescope (be careful not to touch the corrector plate), pointing towards
the collimation screws The shadow of your finger should be visible when looking into the eyepiece Rotate your finger around
the tube edge until its shadow is seen closest to the narrowest portion of the rings (i e , the same direction in which the central
shadow is skewed)
3 Locate the collimation screw closest to where your finger is positioned This will be the collimation screw you will need to adjust
first (If your finger is positioned exactly between two of the collimation screws, then you will need to adjust the screw opposite
where your finger is located)
4 Use the hand control buttons to move the de-focused star image to the edge of the field of view in the same direction that the
central obstruction of the star image is skewed
5 While looking through the eyepiece, use an Phillips head screw driver to turn the collimation screw you located in step 2 and
3 Usually a tenth of a turn is enough to notice a change in collimation If the star image moves out of the field of view in the
direction that the central shadow is skewed, than you are turning the collimation screw the wrong way Turn the screw in the
opposite direction, so that the star image is moving towards the center of the field of view
6 If while turning you notice that the screws get very loose, then simply tighten the other two screws by the same amount
Conversely, if the collimation screw gets too tight, then loosen the other two screws by the same amount
7 Once the star image is in the center of the field of view, check to see if the rings are concentric If the central obstruction is still
skewed in the same direction, then continue turning the screw(s) in the same direction If you find that the ring pattern is skewed
in a different direction, than simply repeat steps 2 through 6 as described above for the new direction
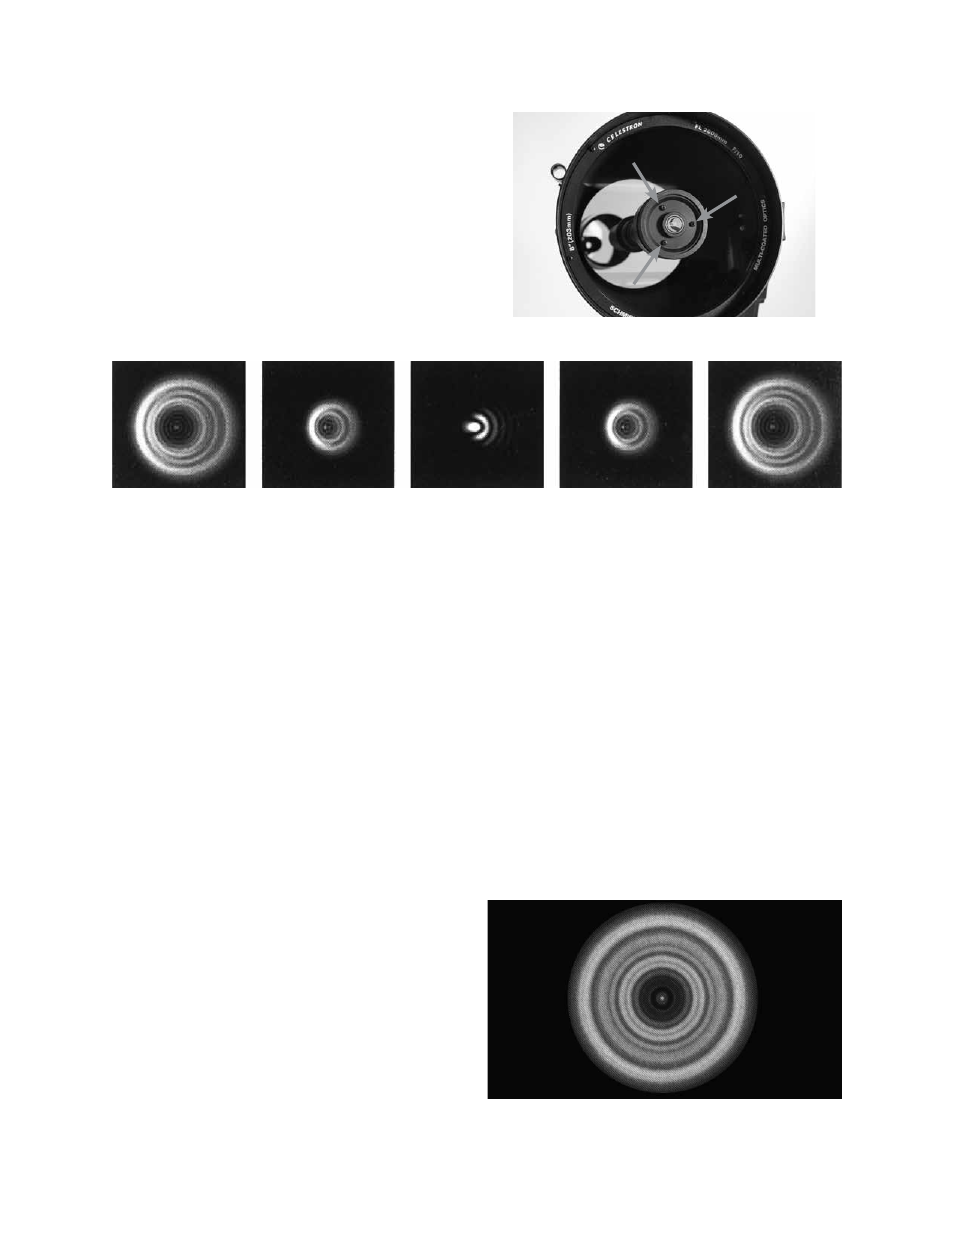
Even though the star pattern appears the same on both sides of focus, they are asymmetric. The dark obstruction is skewed
off to the left side of the diffraction pattern indicating poor collimation.
To accomplish this, you need to adjust the secondary
collimation screw(s) that move the star across the field
toward the direction of the skewed light These screws are
located on the secondary mirror holder
Note:
Make only small 1/6 to 1/8 adjustments to the
collimation screws and re-center the star by moving the
scope before making any improvements or before making
further adjustments.
1 While looking through a medium to high power eyepiece,
de-focus a bright star until a ring pattern with a dark shadow
appears Center the de-focused star and notice in which di-
rection the central shadow is skewed
Secondary Mirror Collimation Adjustment Screws
A collimated telescope should appear symmetrical with the
central obstruction centered in the star’s diffraction pattern.
Perfect collimation will yield a star image very symmetrical
just inside and outside of focus In addition, perfect collimation
delivers the optimal optical performance specifications
that your telescope is built to achieve
If seeing (i e , air steadiness) is turbulent, collimation is difficult
to judge Wait until a better night if it is turbulent or aim to a
steadier part of the sky Stars in a steady part of the sky will
be still, not twinkling