Ceiling installation, Appendices – Optoma EH503 User Manual
Page 97
English
97
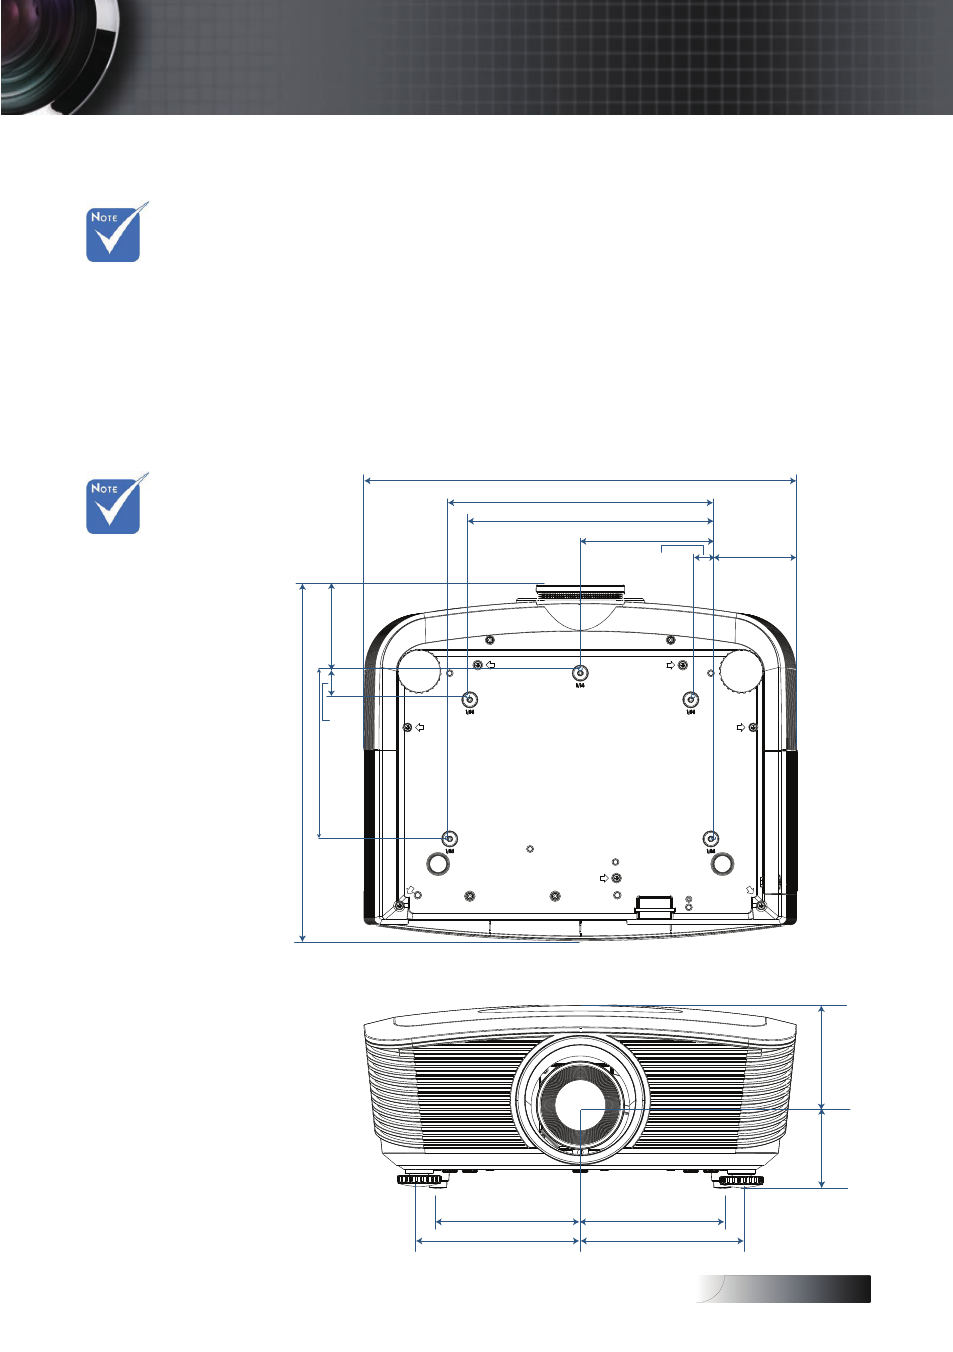
Ceiling Installation
To prevent damage to your projector please use the recommended
mounting package for installation.
To ensure compliance, only use a UL Listed ceiling mount and
screws that meet the following specifications:
4
Screw Type: M4
4
Maximum screw length: 11 mm
4
Minimum screw length: 9 mm
Refer to the following diagram to ceiling mount the projector.
68.50
100.00
160.50
141.50
141.50
88.00
26.50
165.00
354.41
85.49
20.00
130.00
240.00
260.00
430.97
( 1.024" )
( 1.697" )
( 0.945" )
( 0.512" )
( 0.079" )
( 0.337" )
( 0.557" )
( 0.632" )
160.50
( 0.632" )
( 0.557" )
( 0.270" )
( 0.394" )
( 0.650" )
( 1.395" )
( 0.104" )
( 0.346" )
v
Damage to the
projector as a
result of
incorrect
installation
voids the
warranty.
v
Ensure at least
10cm clearance
between the
ceiling and the
underside of
the projector.
v
Avoid locating
the projector
near heat
sources such as
air conditioning
and heaters.
Excess heat
may cause the
projector to
power off.
Appendices