Controls – Ivie iFlex 2400 Series User Manual
Page 5
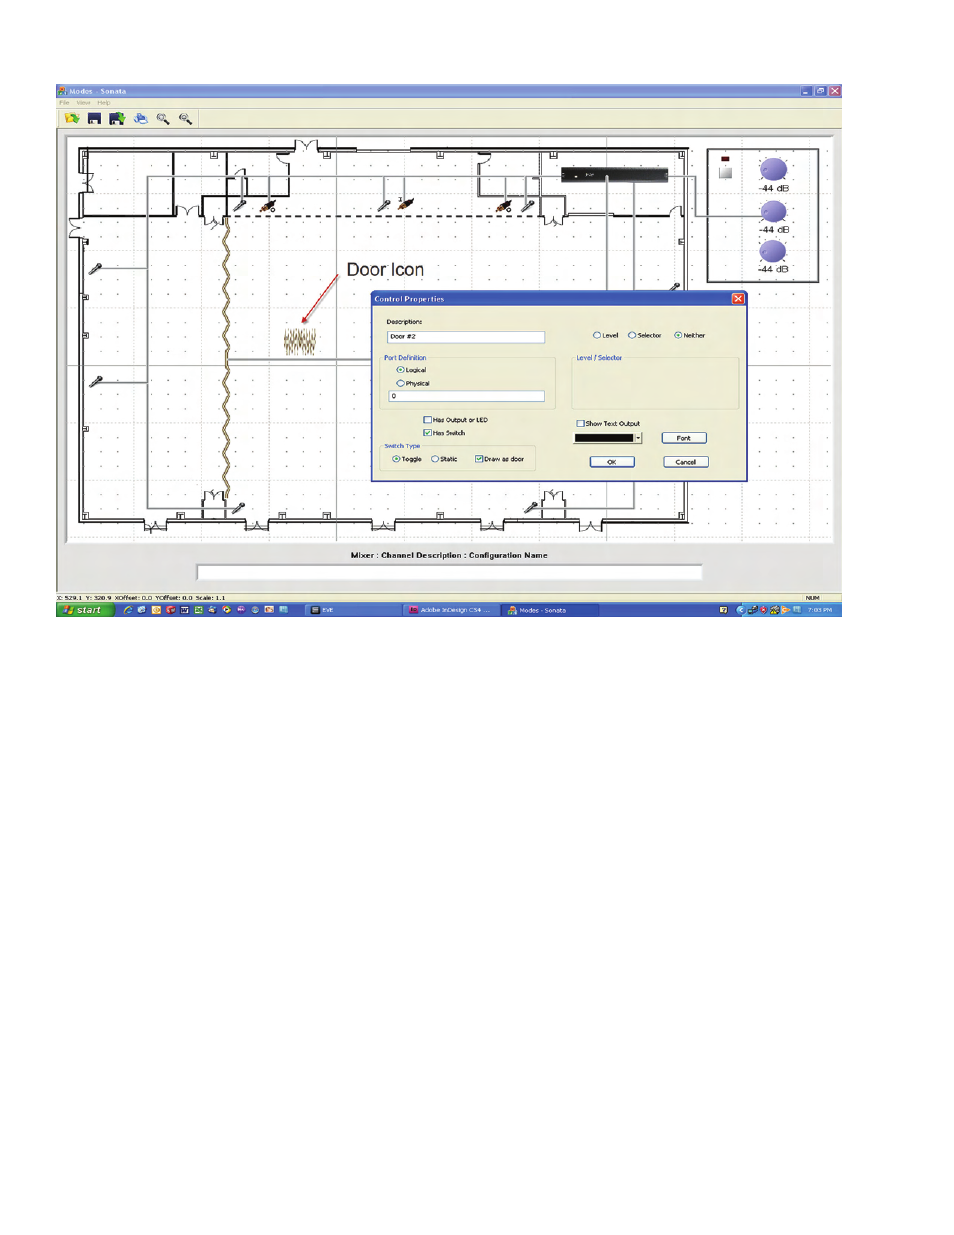
Figure 3
Controls
After placing inputs and line outputs, controls are
placed. In this case, two doors are added to divide
the space into three sections. Notice that doors
must be connected to a mixer also (as in figure 3
above).
Controls are created by right-clicking in the layout
area, and selecting ‘Create Control’. In this case, a
door is defined by:
1. Unselecting the ‘Has Output or LED’
option
2. Checking the ‘Has Switch’ option
3. Checking the ‘Draw as Door’ option
4. Checking the ‘Neither’ option (no
level associated with the door), and
5. Unchecking the ‘Show Text Output’
(again, because there is no level).
Door orientation (vertical or horizontal) is
determined by the aspect ratio of it’s icon. To
make a door vertical, re-size such that it’s vertical
axis is significantly longer than it’s horizontal axis.
Notice that in the upper right-hand corner of figure
3, there is a custom control with an on/off switch,
LED, and three pots. To place this control, right-
click and select ‘Create Template’, then select the
file ‘Control 1’ from the file open dialog box (be
sure to connect the control to the mixer).
The template editor feature within Sonata
TM
makes
designing custom controls very simple, and uses a
similar interface to the layout screen. iFlex
TM
also
makes every custom control a smart control with
the use of the RMPC line of pc boards that attach
to custom controls. For more information on cus-
tom controls, the template editor, and the RMPC
line of products please refer to the Sonata
TM
user
manual.