Computer relocation (h2 h, Computer relocation (h2 hummer only) -1, Computer relocation (h2 hummer only) – Paxton Superchargers Denali User Manual
Page 15
2-1
P/N: 4809639
©2004 Paxton Automotive
All Rights Reserved, Intl. Copr. Secured
12APR04 v3.0(01-03Denali/Esc(4809639v3.0))
Section 2
COMPUTER RELOCATION (H2 Hummer Only)
A.
Remove the plastic cover protecting the
vehicle ECM. Unsnap the ECM from the
bracket securing it to the inner fender.
Temporarily move the ECM to the side to
aid in the bracket relocation.
B.
Remove the two screws securing both the
battery tray bracket and the upper tab of
the ECM bracket. Remove the final screw
securing the botton of the ECM bracket.
Remove the ECM bracket from the vehi-
cle.
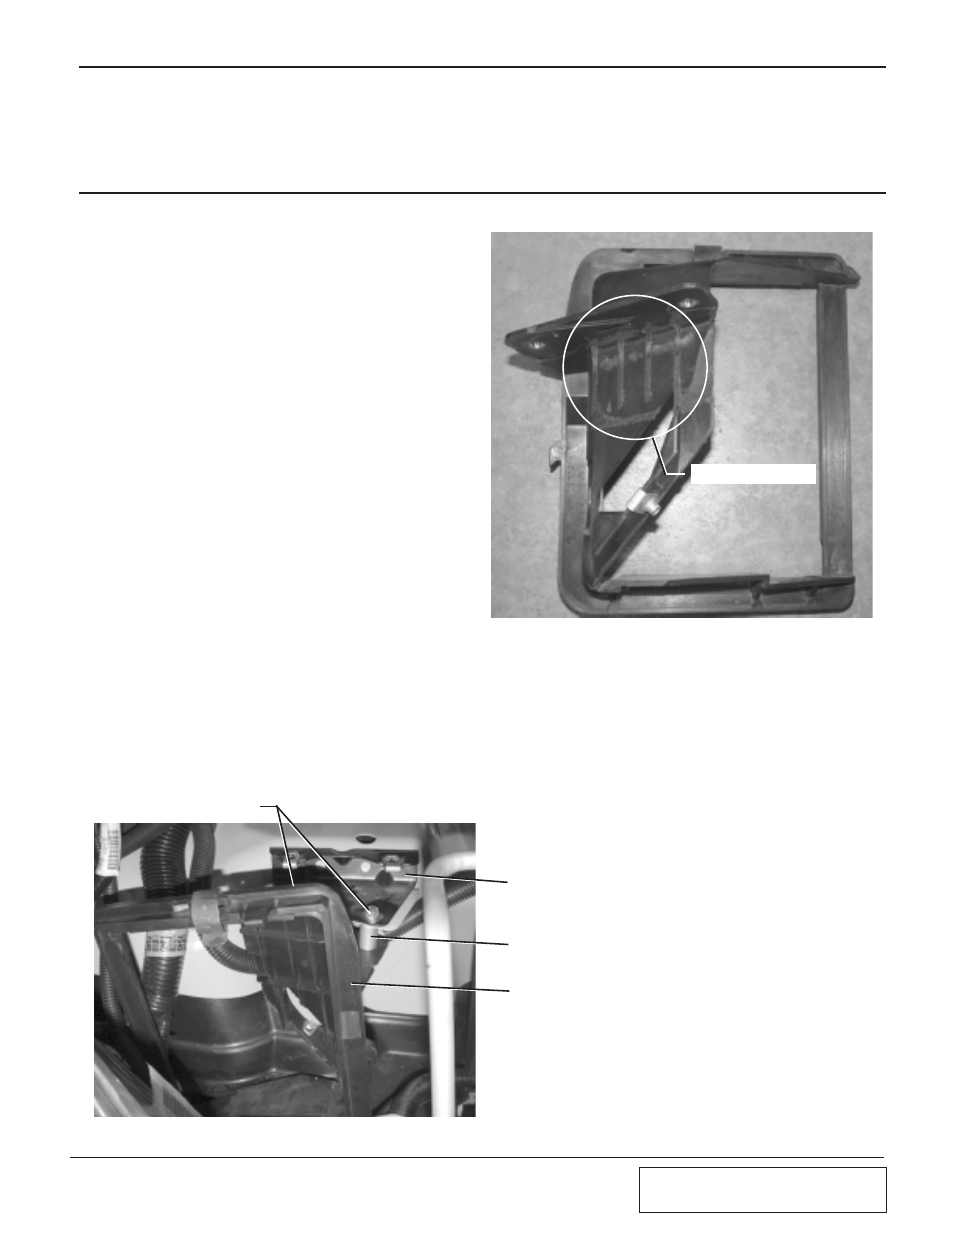
C.
With a grinder, modify the plastic bracket
by removing the strengthening ribs as
shown in (Fig. 2-a).
D.
Using a .25" drill, enlarge the two threaded
holes where the ECM bracket was secured.
(See Fig. 2-b.)
E.
Put the ECM bracket back in the vehicle
placing the mounting tab underneath the
original bracket. Place the battery tray
mounting bracket back into its stock posi-
tion. Using the supplied 6mm x 50mm
screws, fender washers, 6mm nuts and two
.894" spacers, secure the brackets using
the original mounting holes that have been
enlarged. Use the spacers between the
ECM bracket and the inner fender mount
to space the ECM bracket down. (See Fig.
2-b.)
F.
Secure the ECM to the relocated bracket
and re-install the cover.
Fig. 2-a
2.
COMPUTER RELOCATION (H2 Hummer Only)
Fig. 2-b
HOLES TO BE ENLARGED
BATTERY BRACKET IN STOCK LOCATION
SUPPLIED SPACER
BRACKET IN RELOCATED POSITION
RIBS TO BE REMOVED