B h2 hummer heat exchange, H2 hummer heat exchanger installation -2 – Paxton Superchargers Denali User Manual
Page 50
17-2
P/N: 4809639
©2004 Paxton Automotive
All Rights Reserved, Intl. Copr. Secured
12APR04 v3.0(01-03Denali/Esc(4809639v3.0))
17.B
H2 HUMMER HEAT EXCHANGER INSTALLATION
A.
Remove the two screws securing the
ends of the grill. Unsnap the middle
clips and remove the grill from the
vehicle.
B.
Take four supplied cooler brackets and
line them with the supplied adhesive
backed foam. Trim any extra foam.
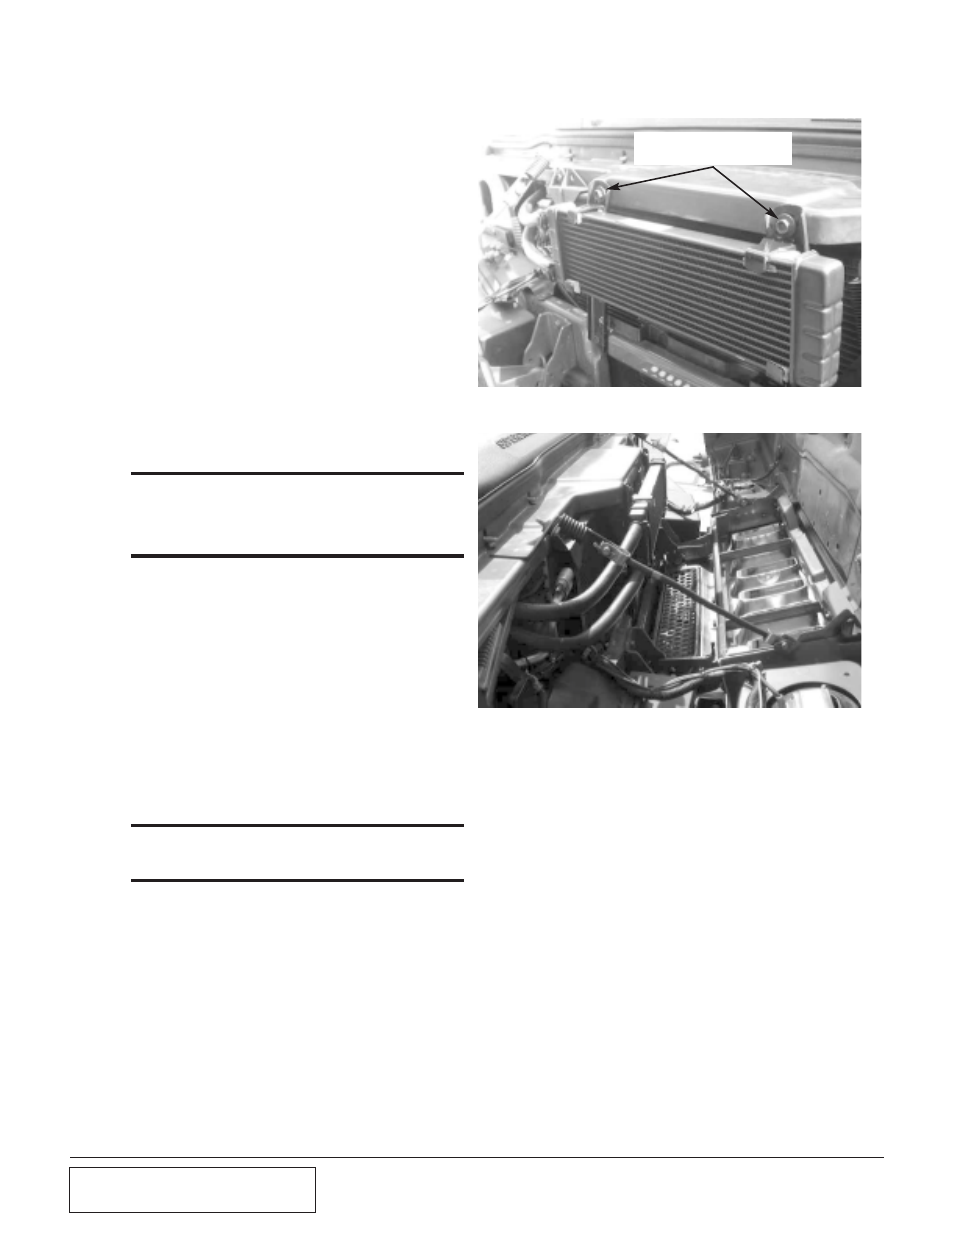
C.
Unscrew the two factory screws secur-
ing the cross supports to the upper
core support. (See Fig. 17.B-f.) Place
the cooler in the brackets with the
barbs facing to the passenger’s side.
D.
Place the brackets on the bottom of
the cooler and mark on the cross sup-
ports where you will need to drill. Make
sure to close the hood with the brack-
ets temporarily installed to verify clear-
ance between the brackets and the
hood supports
***NOTE***
Temporaritly place a piece of sheet metal between the core
support and the A/C condenser when drilling to ensure that
the condenser is not punctured. (See Figs. 17.B-f, and
17.B-g for the following steps.)
E.
Drill two 9/32" holes at the marked
locations on the cross support.
F.
Open the hood and mount the cooler
to the cross support with the supplied
1/4" hardware and brackets. Make sure
that the cooler is sandwiched snuggly
between the upper and lower brackets.
G. Open and close the hood being careful
to make sure the heat exchanger has
clearance with the hood.
H.
Reinstall the hood to its factory loca-
tion.
***NOTE***
The clearance will be tight between the heat exchang-
er and the hood once it is installed.
Fig. 17.B-f
Fig. 17.B-g
REMOVE TWO SCREWS AND
INSTALL COOLER BRACKETS