Fuel management unit (fmu, Fmu installation (denali/escalade only) – Paxton Superchargers Denali User Manual
Page 27
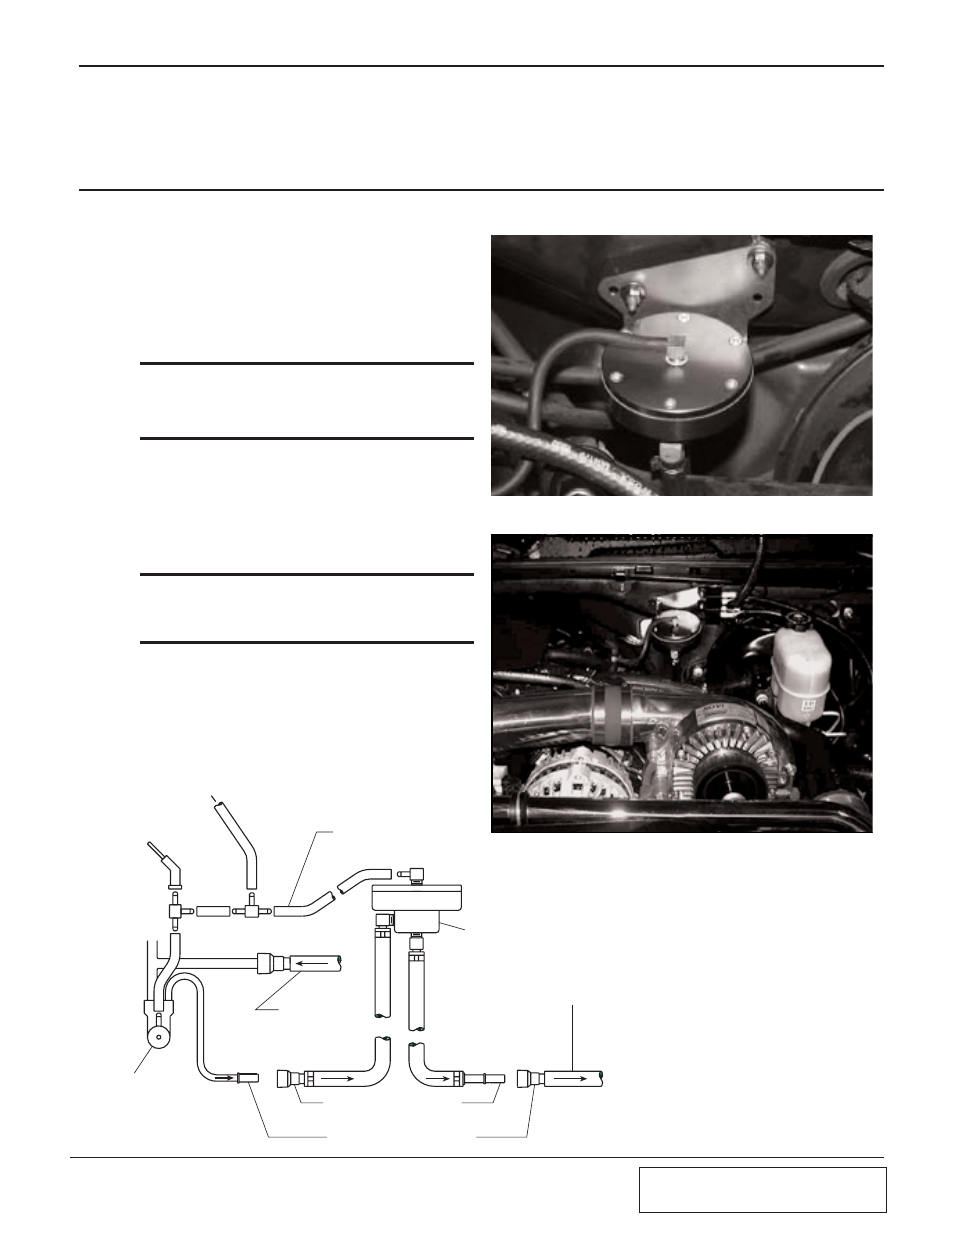
3. ATTACH THE SUPPLIED VACUUM LINE
AND TEE INTO THE FUEL REGULATOR
MANIFOLD VACUUM LINE (LINE TO BYPASS
VALVE WILL BE INSTALLED LATER)
STOCK RETURN LINE
(TO TANK)
STOCK SUPPLY
LINE (FROM
TANK)
TO PAXTON COMPRESSOR BYPASS VALVE
STOCK MANIFOLD
VACUUM LINE (REMOVED FROM
FUEL REGULATOR)
FUEL PRESSURE
REGULATOR
ARROWS INDICATE THE
DIRECTION OF FUEL FLOW
F.M.U.
2. ATTACH EACH OF THE FMU LINES
TO THEIR RESPECTIVE SNAP
CONNECTORS
1. REMOVE THIS FITTING FROM THE
FUEL REGULATOR RETURN LINE
8-1
P/N: 4809639
©2004 Paxton Automotive
All Rights Reserved, Intl. Copr. Secured
12APR04 v3.0(01-03Denali/Esc(4809639v3.0))
Section 8
FMU INSTALLATION (DENALI/ESCALADE ONLY)
8.
FUEL MANAGEMENT UNIT (FMU) INSTALLATION (Denali/Escalade Only)
A.
Mount the supplied FMU as shown in Fig.
8-a using the existing studs on the firewall
as follows:
1.
Remove the nuts securing the factory
ground straps.
2.
Install the FMU over the studs.
*** NOTE ***
Not all vehicles have the studs in the same location.
Drill an additional 1/4" hole in the fmu bracket as
required. (See Fig. 8-a.)
3.
Loosely reinstall the nuts on top of
the FMU bracket.
B.
Disconnect the fuel return line from the
fuel rail and connect the respective lines to
their snap connectors on the end of the
FMU lines. (See Fig. 8-c.)
*** NOTE ***
The fuel tank return line extends from the fuel regula-
tor to the tank. It is smaller than the fuel rail supply
line.
C.
Using the supplied 5/32" vacuum line and
TEE, connect the 90° fitting on top of the
FMU to the manifold vacuum line con-
nected to the fuel regulator. (See Fig. 8-c.)
Fig. 8-a
Fig. 8-b
Fig. 8-c