Rigging, 8 highly curved arrays, Connecting a 4 stack to a highly curved array – Adamson E-Series User Manual
Page 33
Page 33
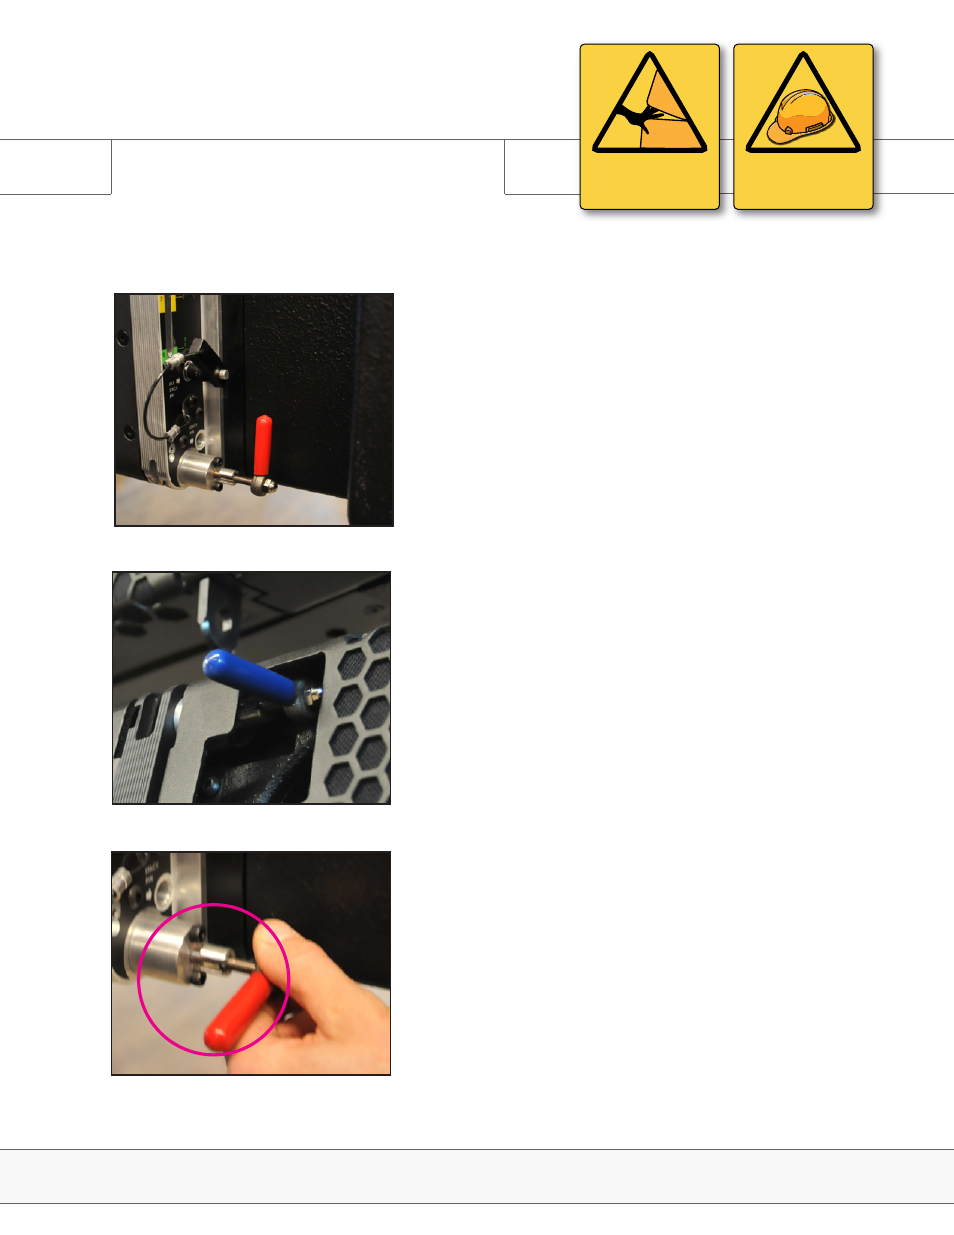
Fig. 1
Fig. 2
Fig. 3
3.8 Highly Curved Arrays
When connecting a 4 stack of cabinets to a steep flown array,
it may not be safe or practical to continue to lower the array to
make the rear attachment (once the fronts are connected). It is
also not recommended to tip the lower dolly forward as this can
be dangerous. The easiest connection method is as follows:
1. Place ALL rear red levers on the 4 stack on the ground to the
“open” position. (Fig. 1)
2. Set the front blue levers on the top cabinet of the 4 stack to the
“Spring” position (Fig. 2)
3. Connect the front of the upper array to the 4 Stack in the same
manner as outlined in section 3.7, #5.
4. Lift the motor slightly so that there is minimal weight on the
dolly of the 4 stack - without actually lifting the dolly from the
ground
5. Ensure the rear red lever on the bottom cabinet of the flown
array is set to “spring” mode. (Fig. 3) Lift the top cabinet in the
stack by hand, so it meets the upper array. The rear red lever
should automatically latch in place. This should be relatively easy
with two people. If the cabinet seems very heavy- there is too
much weight on the cabinet- and the motors must be raised
slightly.
6. Set the next rear red lever to “spring” mode
7. Repeat steps 4-6 until all cabinets are connected at the rear.
Rigging
E-Series | Rigging
PINCH POINT
CAN CAUSE SEVERE
PERSONAL INJURY
WARNING
SAFETY RISK
PAY SPECIAL ATTENTION
NOTE: With enough stage hands, this process can be carried out
with two cabinets at a time- meaning only the red lever connecting
the backs of the 2nd & 3rd cabinet need be disconnected. Please
ensure safe lifting practices are being adhered to to avoid injury.
If straining to lift cabinets - use more stage hands or try lifting the
motors slightly.
Connecting a 4 stack to a highly curved array