Installation (for qualified installers only), Surround panel installation, Piece surround panels – Avalon Firestyles 34 DVL User Manual
Page 19
Installation (for qualified installers only)
19
© Travis Industries
4140813
100-01294
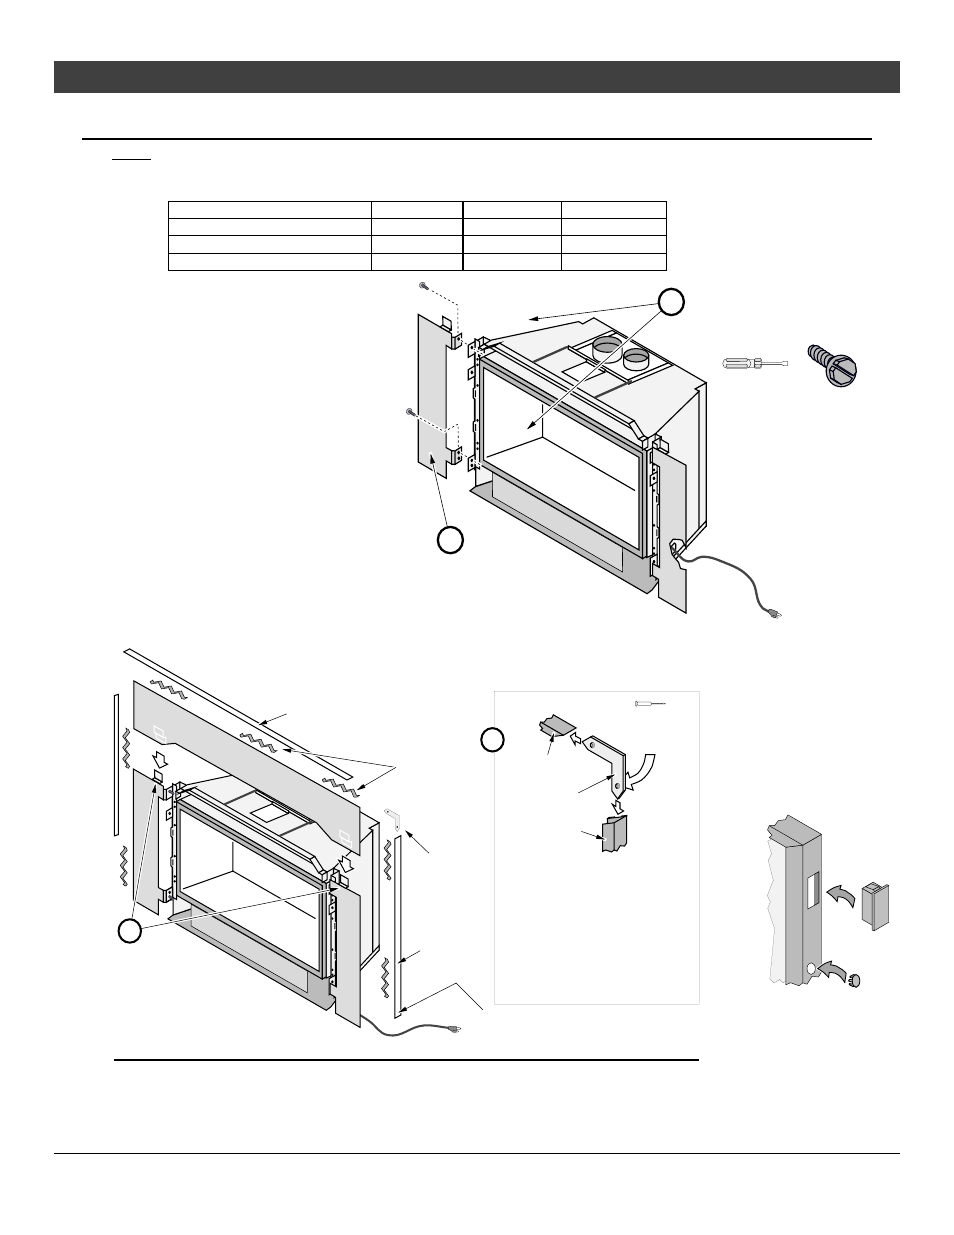
Surround Panel Installation
NOTE: The insert may be installed without surround panels.
3-Piece Surround Panels
PANEL SIZE
WIDTH
HEIGHT
PART #
4” x 6”
40”
29”
96100320
8" x 10"
44-3/16"
33-3/8"
96100321
10” x 13”
48-3/16"
36-3/8"
96100322
1
Follow the directions to the
right to install the side panels.
2
Follow the directions below to
install the top panel.
COVER PLUGS FOR
ON/OFF SWITCH AND
RHEOSTAT
Install the button plug
and switch plug into the
surround panel trim to
conceal the mounting
holes (see the illustration
below).
Line up each side surround
panel and insert two screws from
the inside to secure in place.
5/16" Nutdriver
Pre-thread the holes on the surround
panels with the screws included in the
surround panel kit.
b
a
Run the power cord to
the right of the insert.
Top
Panel
Top Trim
"L" Bracket
Right Side Trim
"L" Bracket
Right Side
Trim
Top Trim
Trim Installation:
Insert one leg of each "L" bracket into the top
and side trim piece. Align the trim to form a
precise corner, then tighten the two set
screws with a small standard screwdriver.
Slide the trim over the panels. Place the
spring clips behind the panels at the locations
shown. This keeps the trim tight against the
panel.
Micro (1/16”)
Standard
Screwdriver
Spring
Clips
Optional Knock-Out
An optional knock-out is provided if the power cord is
routed behind the surround panel.
Install the top panel so
the tabs insert into the
joggle clips on the top
panel
b
a