B.C. Time Recorders Simplex Bravo/Combo/100 User Manual
Page 10
I
NSTALLATION
5
To Change the Ribbon
Note: The ribbon cartridge does not come installed. Use the following to install the cartridge
before using the Simplex 100.
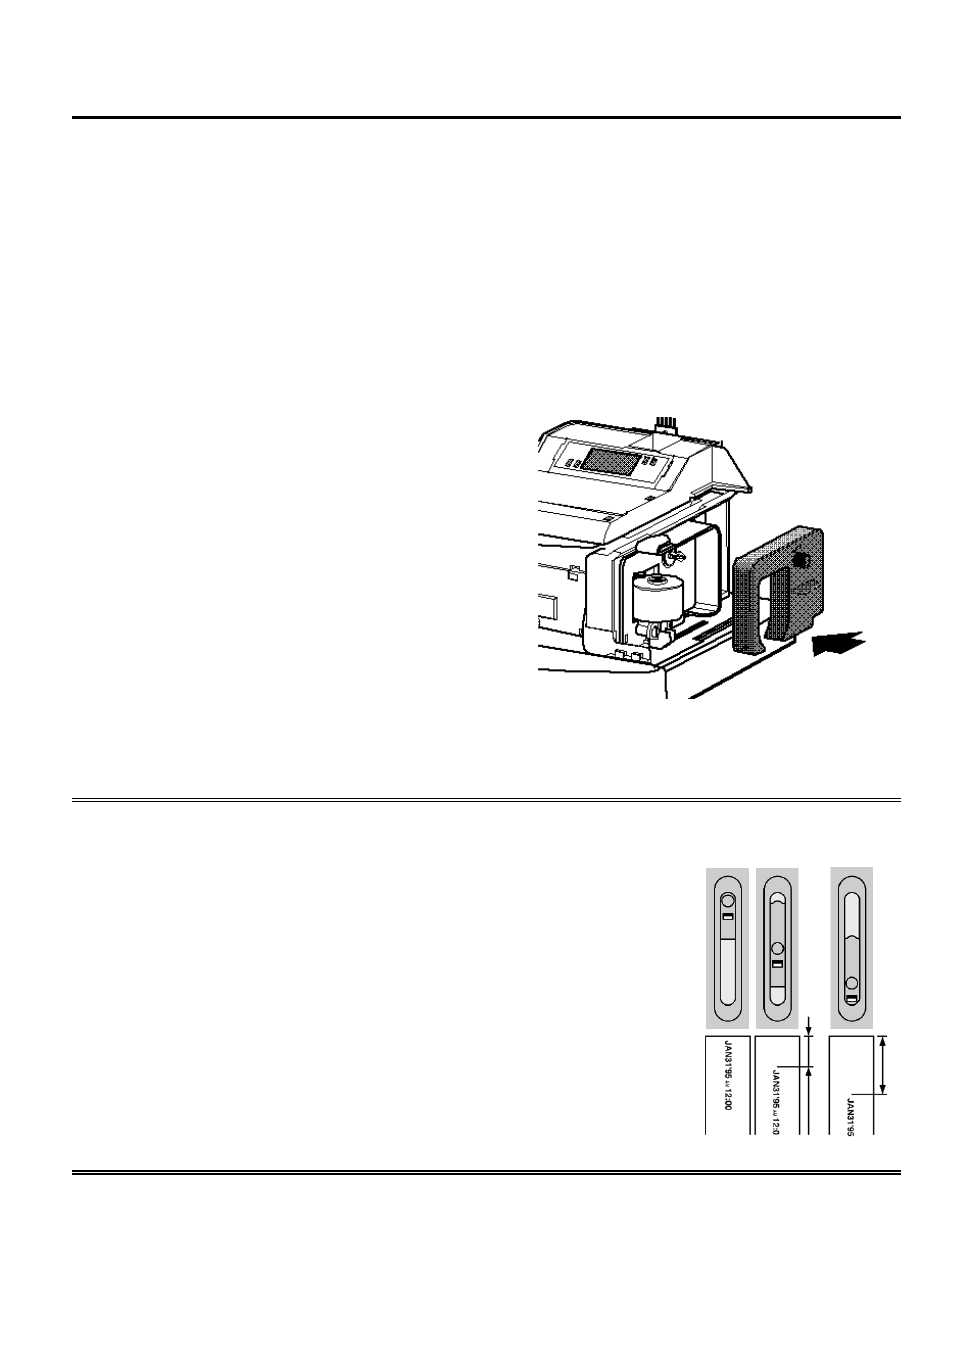
To Remove the Ribbon Cartridge
1. Unlock and remove the cover.
2. Grasp the ribbon cartridge by its tab and pull it straight out the side of the Simplex 100.
To Install the Ribbon Cartridge
1. Unpack a ribbon cartridge.
2. Rotate the knob on the ribbon cartridge
clockwise to remove all ribbon slack.
3. Slide the cartridge’s exposed ribbon under the
print head. Then snap the ribbon cartridge into
place while ensuring that the ribbon is fully
seated.
4. Temporarily apply power to the clock (refer to
the To Connect Power section of this publication) to take a test print on a clean sheet of paper.
• Ensure that the imprint is complete and smudge-free.
To Set the Print Margin
Note: Set the Print Margin before wall mounting the Simplex 100.
1. Using a piece of paper, determine where you want the leading
edge of the imprint placed with respect to the card/document
edge.
2. Set the trigger stop (located under the base of the clock) to the
desired depth.
3. Temporarily apply power to the clock (refer to the To Connect
Power section of this publication) to test the Print Margin.
Installing the Ribbon
Setting the Margin