Baby Lock Destiny (BLDY) Instruction & Reference Guide-Part1 User Manual
Page 103
USING SENSOR FUNCTIONS WITH SEWING STITCH
Se
wi
n
g Ba
sics
101
2
e
Press
to apply the reference position
setting.
*
The setting can also be applied by extended touch in
the adjustment area with the sensor pen.
→ The needle moves to the specified position to start
sewing.
→ The stitch selection screen appears again, and the
stitch width changes to the setting specified with the
sensor pen.
→ The guideline marker stops flashing.
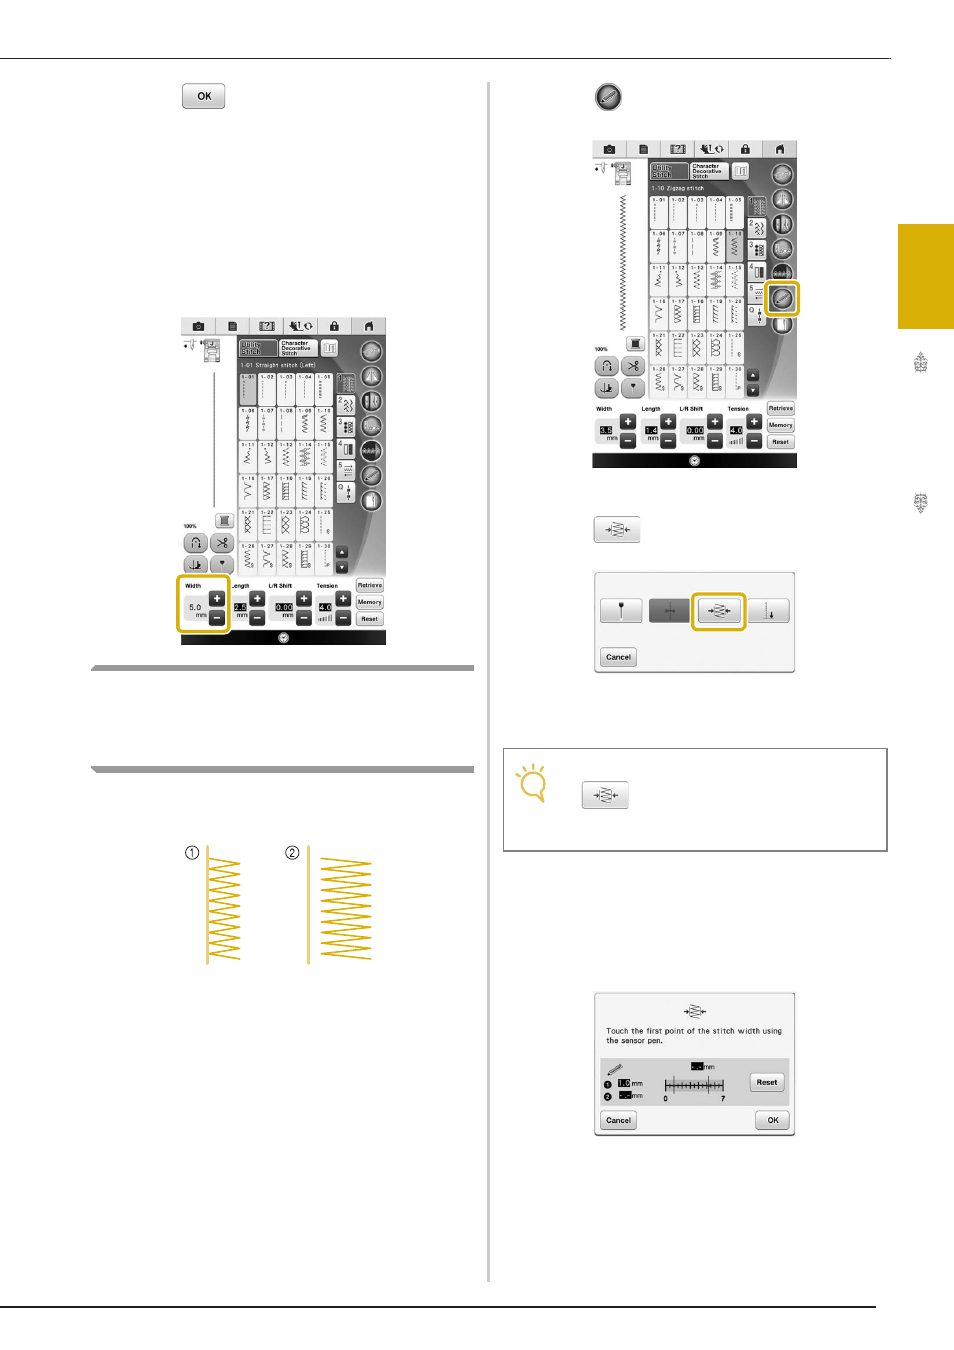
Using the Sensor Pen to Specify
the Stitching Width and Stitch
Position
The zigzag width and “L/R Shift” value can be
specified.
a Original stitching width/position
b Adjusted stitching width/position
a
Select a stitch pattern.
b
Press .
→ The sensor functions screen appears.
c
Press .
→ The stitching width setting screen appears, and the
guideline marker flashes at the present left side of
the stitch width.
d
With the sensor pen, touch the first point
for the stitching width.
→ The distance from the left reference line to the
touched position appears in the stitching width
setting screen.
→ The guideline marker moves to the touched position
and flashes.
Note
• If
is not available, the stitching width
cannot be specified with the selected stitch
pattern. Select a different stitch pattern.