Caution – Baby Lock Destiny (BLDY) Instruction & Reference Guide-Part1 User Manual
Page 151
SEWING THE STITCHES
U
tili
ty
S
tit
ch
es
149
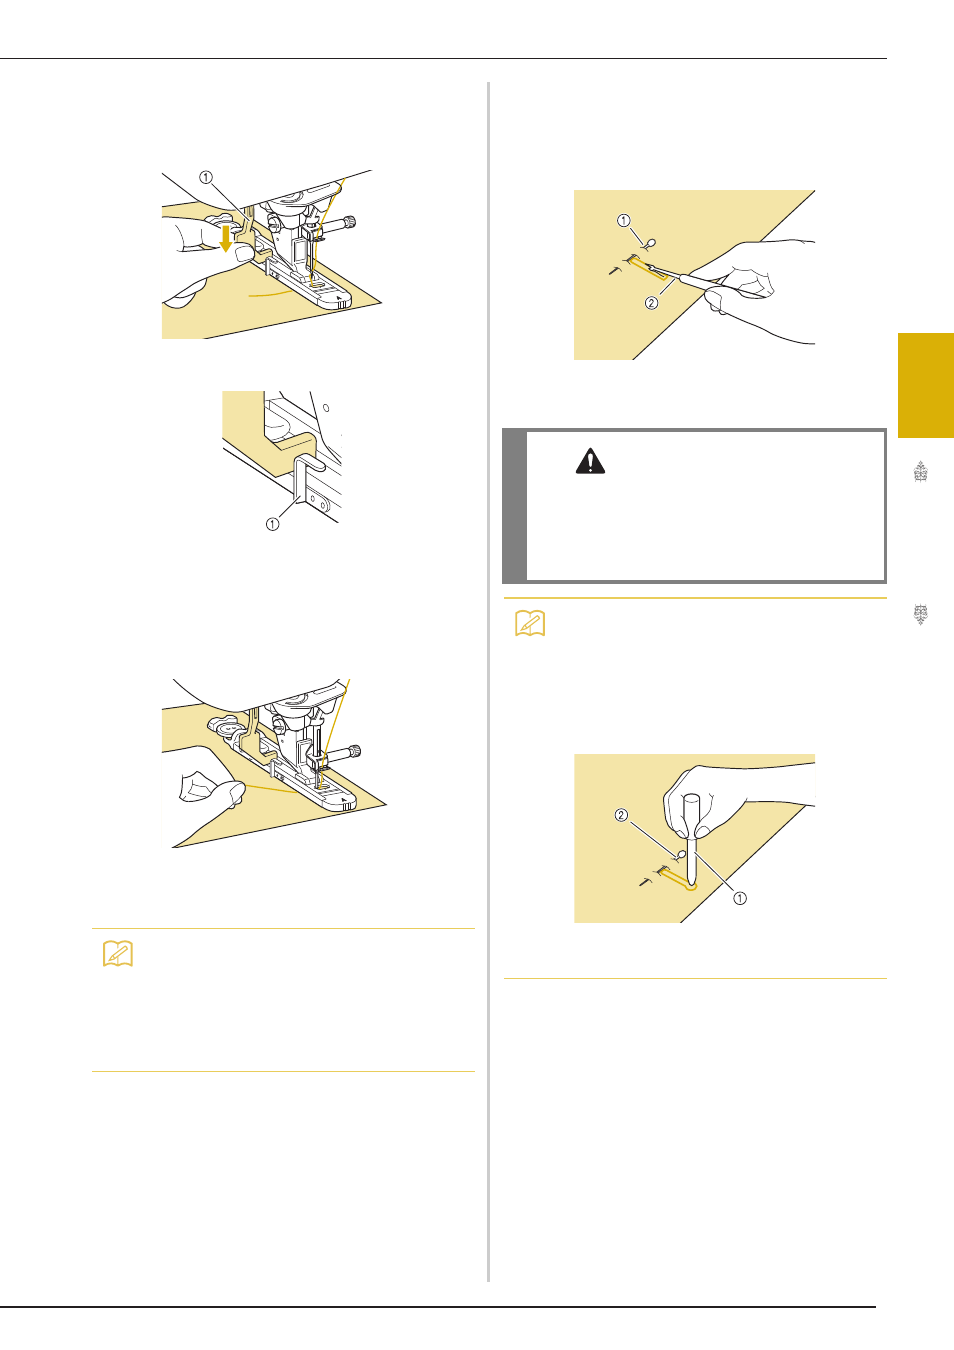
3
e
Lower the buttonhole lever so that it is
positioned behind the metal bracket on the
buttonhole foot.
a Buttonhole lever
a Metal bracket
f
Gently hold the end of the upper thread,
and then start sewing.
*
Feed the fabric carefully by hand while the
buttonhole is sewn.
→ Once sewing is completed, the machine
automatically sews reinforcement stitches, and then
stops.
g
Insert a pin along the inside of one of the
bar tacks, and then insert the seam ripper
into the center of the buttonhole and cut
towards the pin.
a Basting pin
b Seam ripper
Memo
• If automatic thread cutting is turned on
before you start sewing, both threads are
automatically cut after the reinforcement
stitches are sewn. If the fabric does not feed
(for example, because it is too thick),
increase the stitch length setting.
CAUTION
• When using the seam ripper to open the
buttonhole, do not put your hand or finger in
the path of the ripper. The ripper may slip and
cause injury. Do not use the seam ripper in any
other way than how it is intended.
Memo
• For keyhole buttonholes, use the eyelet
punch to make a hole in the rounded end of
the buttonhole. Then insert a pin along the
inside of one of the bar tacks, insert a seam
ripper into the hole made with the eyelet
punch, and cut towards the pin.
a Eyelet punch
b Basting pin