Selecting utility stitches, Utility stitch lcd screen – Baby Lock Destiny (BLDY) Instruction & Reference Guide-Part1 User Manual
Page 110
SELECTING UTILITY STITCHES
108
■ Utility Stitch LCD Screen
Press a key with your finger to select the stitch pattern, to select a machine function, or to select an
operation indicated on the key.
*
All key functions of the LCD are explained in the “Key Functions” table on the following page.
SELECTING UTILITY STITCHES
No.
Display
Key Name
Explanation
Page
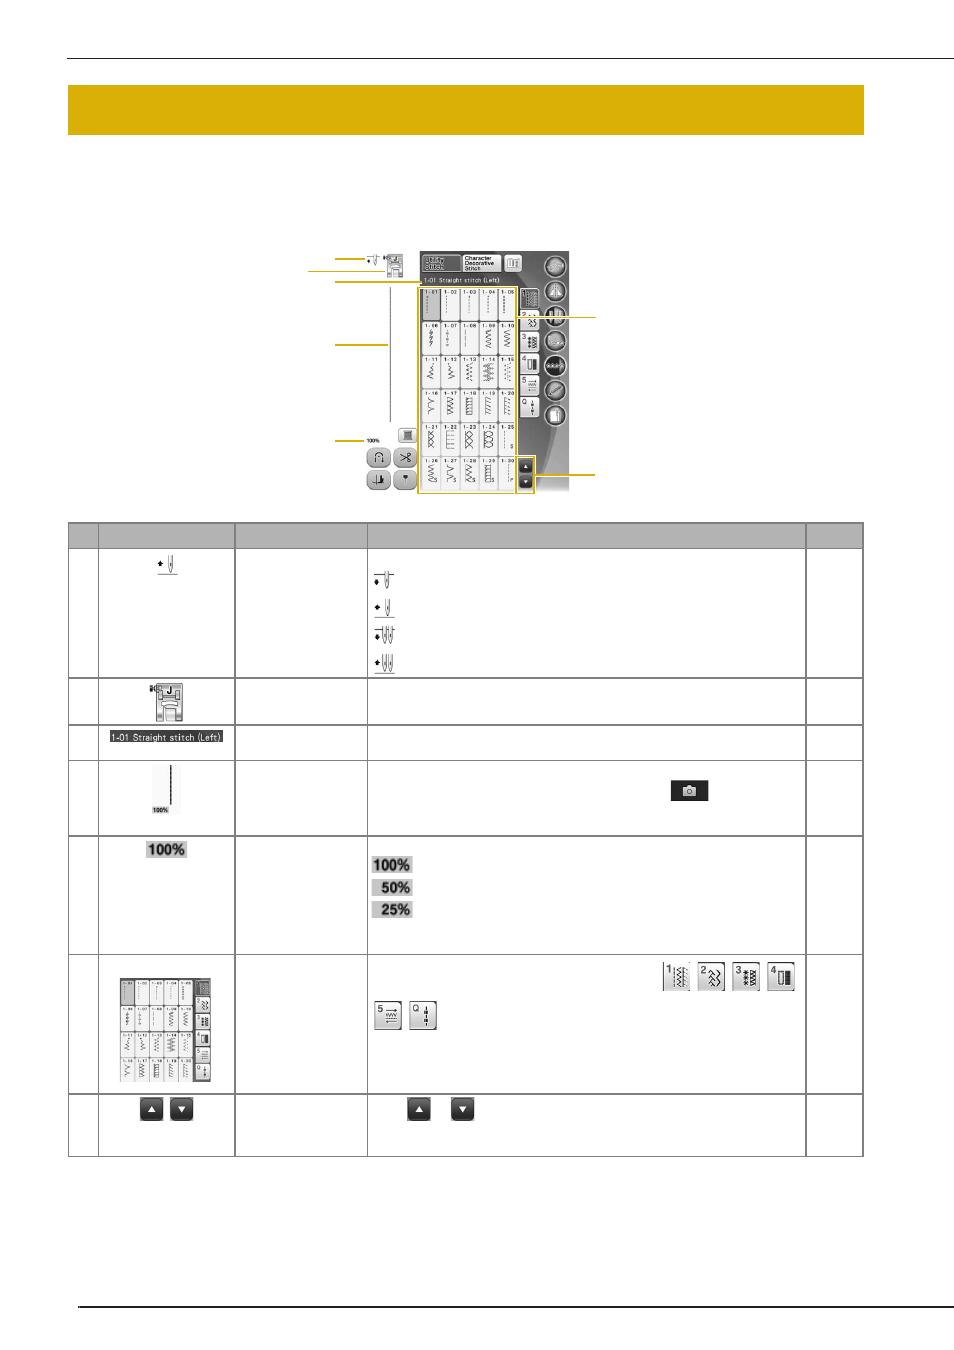
a
Needle position
setting display
Shows single or twin needle mode setting, and the needle stop position.
Single needle/down position
Single needle/up position
Twin needle/down position
Twin needle/up position
63, 93
b
Presser foot display
Shows the presser foot code. Attach the presser foot indicated in this
display before sewing.
68
c
Selected stitch
display
Shows the name and code number of the selected stitch.
111
d
Stitch preview
Shows a preview of the selected stitch. When shown at 100%, the stitch
appears in the screen at nearly its actual size. Press
to display the
stitch preview and the camera view together to check how the stitch will be
sewn on the actual fabric.
96, 111
e
Pattern display size
Shows the approximate size of the pattern selected.
: Nearly the same size as the sewn pattern
: 1/2 the size of the sewn pattern
: 1/4 the size of the sewn pattern
* The actual size of the sewn pattern may differ depending on the type of
fabric and thread that is used.
111
f
Stitch selection
screen
Press the key for the pattern you want to sew. Use
to change to different stitch groups.
111
g
Page key
Press
or
, to move the pages of stitch selection screen, one page
at a time. You can scroll up and down the pages faster by touching the
screen.
110
a
b
c
d
f
e
g