Caution – Baby Lock Destiny (BLDY) Instruction & Reference Guide-Part1 User Manual
Page 163
SEWING THE STITCHES
U
tili
ty
S
tit
ch
es
161
3
b
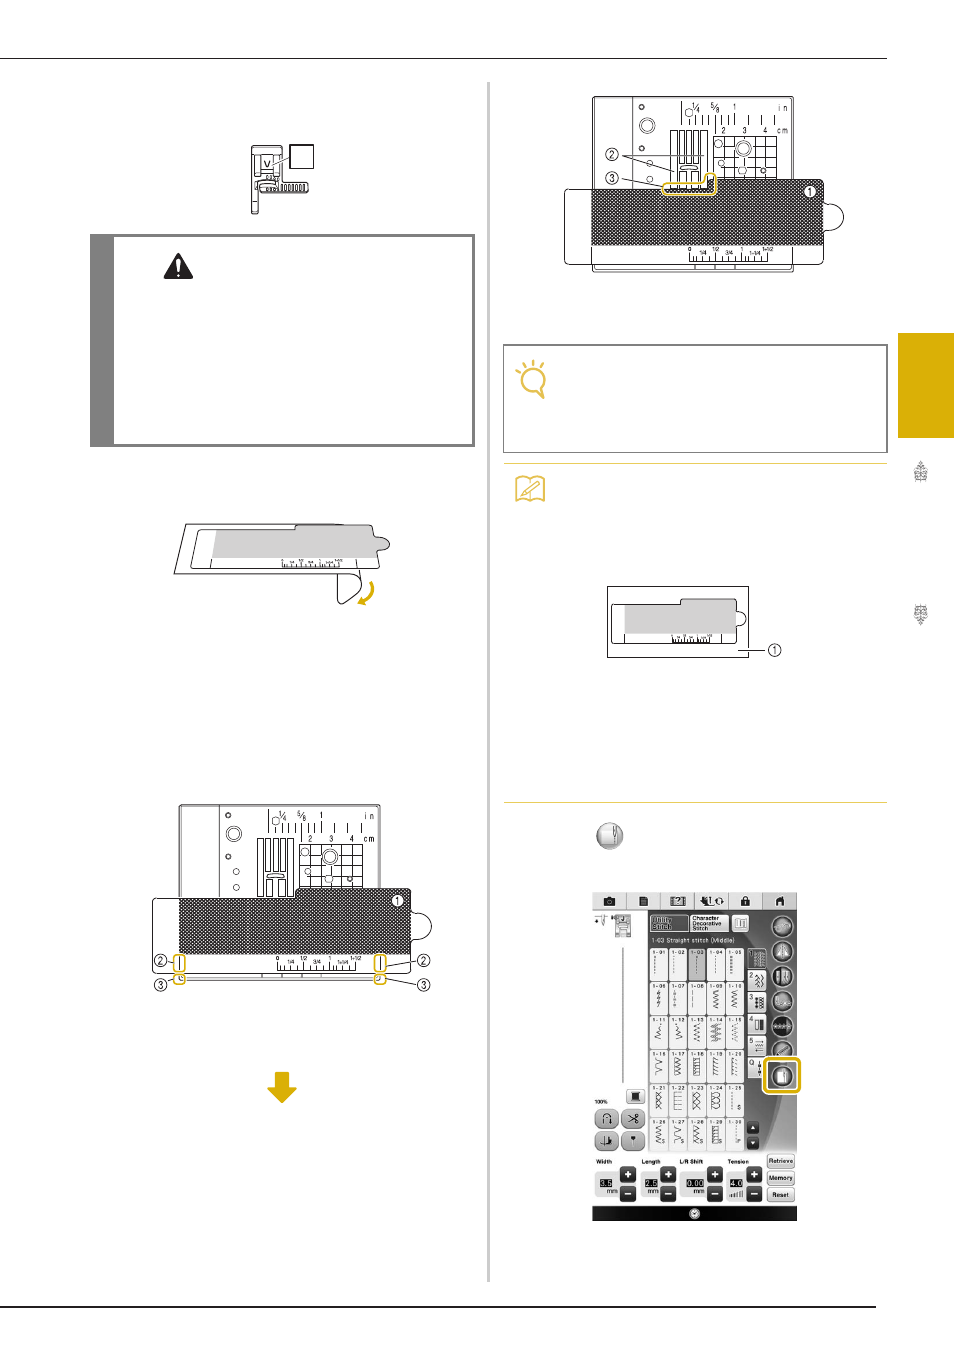
Attach the vertical stitch alignment foot
“V”.
c
Peel off the transparent sheet of the edge
sewing sheet.
d
Place the edge sewing sheet on top of the
needle plate cover.
Align the guides on the edge sewing sheet with the
sides of the needle plate cover, and then adjust the
position of the edge sewing sheet so that its cutout
aligns with the edges of the opening for the feed dogs.
Position the edge sewing sheet so that there is no gap
between it and the edges of the opening for the feed
dogs.
a Edge sewing sheet
b Guides on edge sewing sheet
c Sides of needle plate cover
a Edge sewing sheet
b Feed dogs
c Between the feed dogs and the edge sewing sheet
e
Press .
CAUTION
• When edge sewing with the built-in camera,
be sure to use the vertical stitch alignment foot
“V”. In order to maintain a fixed distance from
the edge of the fabric, the needle will slightly
move to either side, even when sewing with a
straight stitch. If a different presser foot is
used, it may be hit by the needle, causing the
needle to break or resulting in injuries.
V
Note
• If the metal needle plate is visible between
the feed dogs and the edge sewing sheet,
the fabric may be incorrectly detected by
the built-in camera.
Memo
• Before using the edge sewing sheet, peel
off the transparent sheet. After use, affix the
edge sewing sheet to the transparent sheet
to prevent it from collecting dust.
a Transparent sheet
• Be sure to install a fully wound bobbin
before starting to use the edge sewing
feature and built-in camera. If you need to
change the bobbin while edge sewing,
remove the edge sewing sheet carefully and
place it again after changing the bobbin.