BECKHOFF CX9000 User Manual
Page 51
Appendix
Embedded PC
49
2. Prepare Image-Server (once)
Provide the image server on the host PC, the components are:
•
Two batchfiles "CxImgSrv_HMI.bat" and "CxImgSrv_LF.bat"
Note that the CX9000 is shipped with different hardware environment (e.g. more or less flash memory).
•
Folder "\Tools" contains the image server itself: CxImageSrv.exe
•
Folder "\Images" contains the HMI and LF subfolders with the required file "Boot.bin"
If you receive a new NK.BIN file, just rename it to "Boot.bin" and provide it in the correct subfolder
3. Prepare CX9000
Prepare the "Boot-Strap Mode" on CX9000. There are two ways to set the CX9000 into "Boot-Strap Mode":
•
set a DIP-switch on CX9000
•
start a program, to set the CX9000 into"Boot-Strap Mode".
Prepare the CX9000 to start in "boot-strap" mode.
1. Power down the CX9000
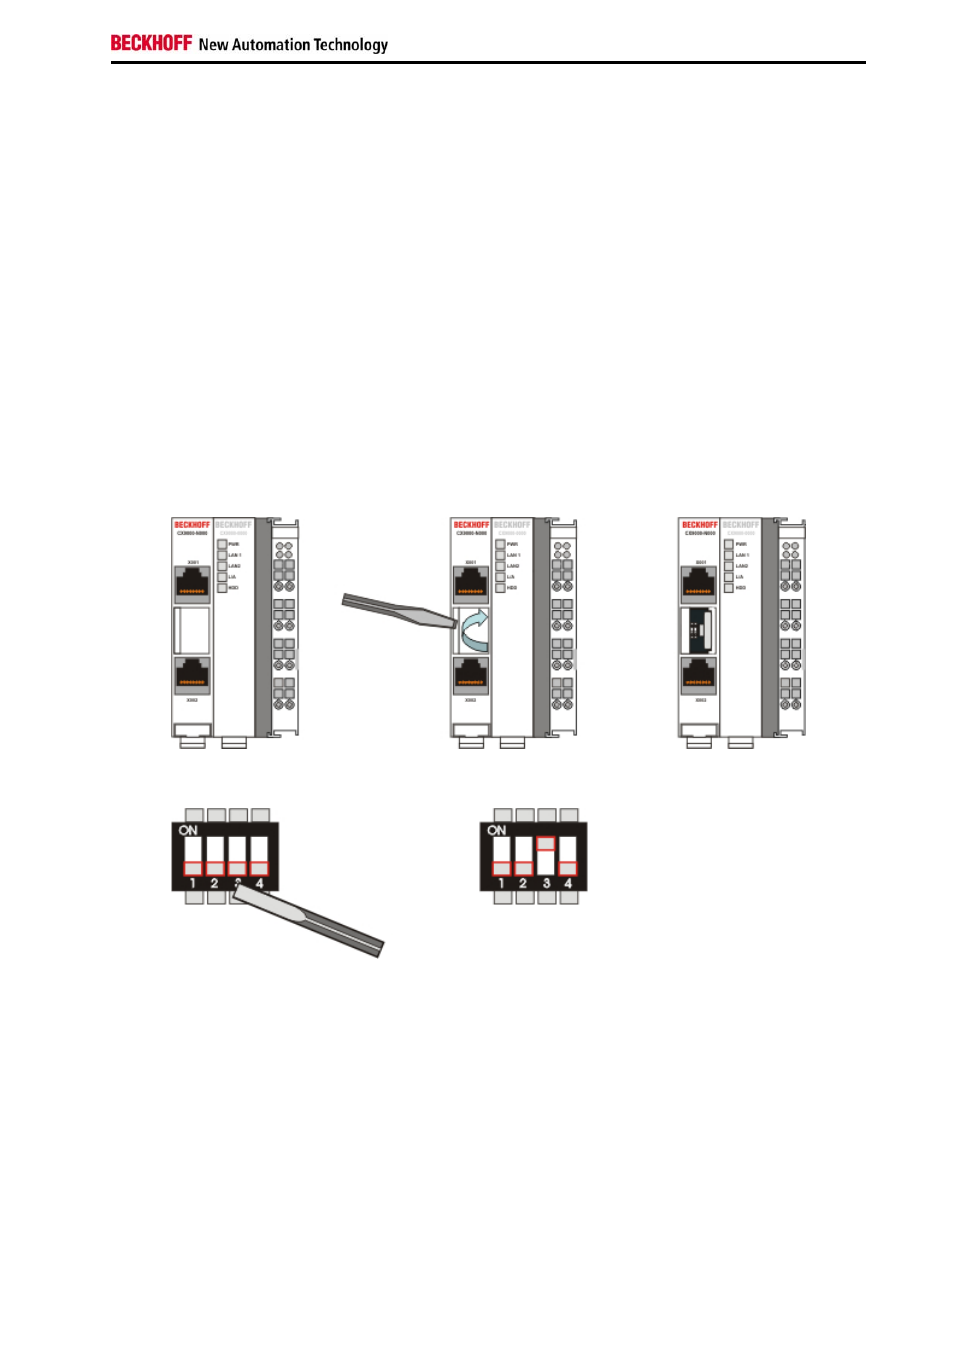
2. Open the battery compartment (located between two ethernet ports)
It can be opened with the aid of a screwdriver (proceed carefully in order to avoid damage).
3. Find the dip switches 1,2,3,4 and set switch 3 from OFF to ON
Alternative the administrator can start a tool on the CX-Systems to set the CX9000 into "Boot-Strap Mode". First the
program must be downloaded from the BECKHOFF FTP-Server. If the CX9000 has no USB the tool can be
transferred via ftp onto the system. Use CERHOST-Tools to control the CX9000 remote via Ethernet. Activate the
FTP server on the CX, if not it is disabled. The necessary configuration is shown below: