6 wall mount sample pot – Bluelab Dosetronic Peridoser Kit User Manual
Page 14
10
Version P1.3 : 151012
Bluelab Dosetr
onic P
eridoser Kit
Bluelab Corporation Limited
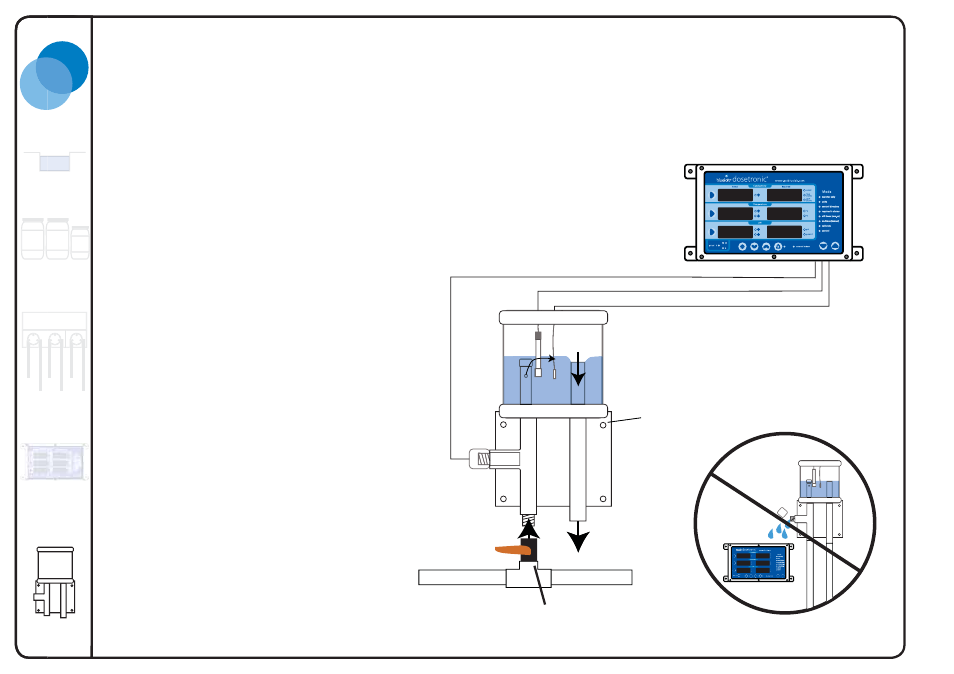
Steps
1. Fix sample pot in position
Select a position on the wall that is near
the nutrient tank pump and where
all
probe cables from the Dosetronic can
reach.
2. Fit Inlet Piping
Fit a “T” junction to pipes feeding the crop
and connect supplied fl ushing ball valve.
3. Fit Outlet Piping
Connect piping to the outlet of the sample
pot and fi x into a position where it can fl ow
back into the nutrient tank.
4. Flush out plastic (swarf) and residue
Open sample pot inlet valve, allow sample
pot to fi ll and then close the valve and
allow it to drain as much as possible.
5. Adjust inlet valve
Remove lid of sample pot. Adjust fl ushing
ball valve until the water inside the sample
pot can fl ow through the outlet pipe back
to the tank.
2.6 Wall Mount Sample Pot
Conductivity
pH
Temperature
P
ipes f
eeding cr
op
To
cr
op nutrient tank
Corner
mounting screws
Flushing Ball Valve
If the Dosetronic is being installed
into a system that is already
operating, it is an option that you
could use a submersible aquarium
pump to pump water from the
nutrient tank to the sample pot.
2