3 main menu, 1 display – Bolide SVR9000D User Manual
Page 18
User Manual
17
5.3 Main Menu
5.3.1 Display
5.3.1.1 Live mode
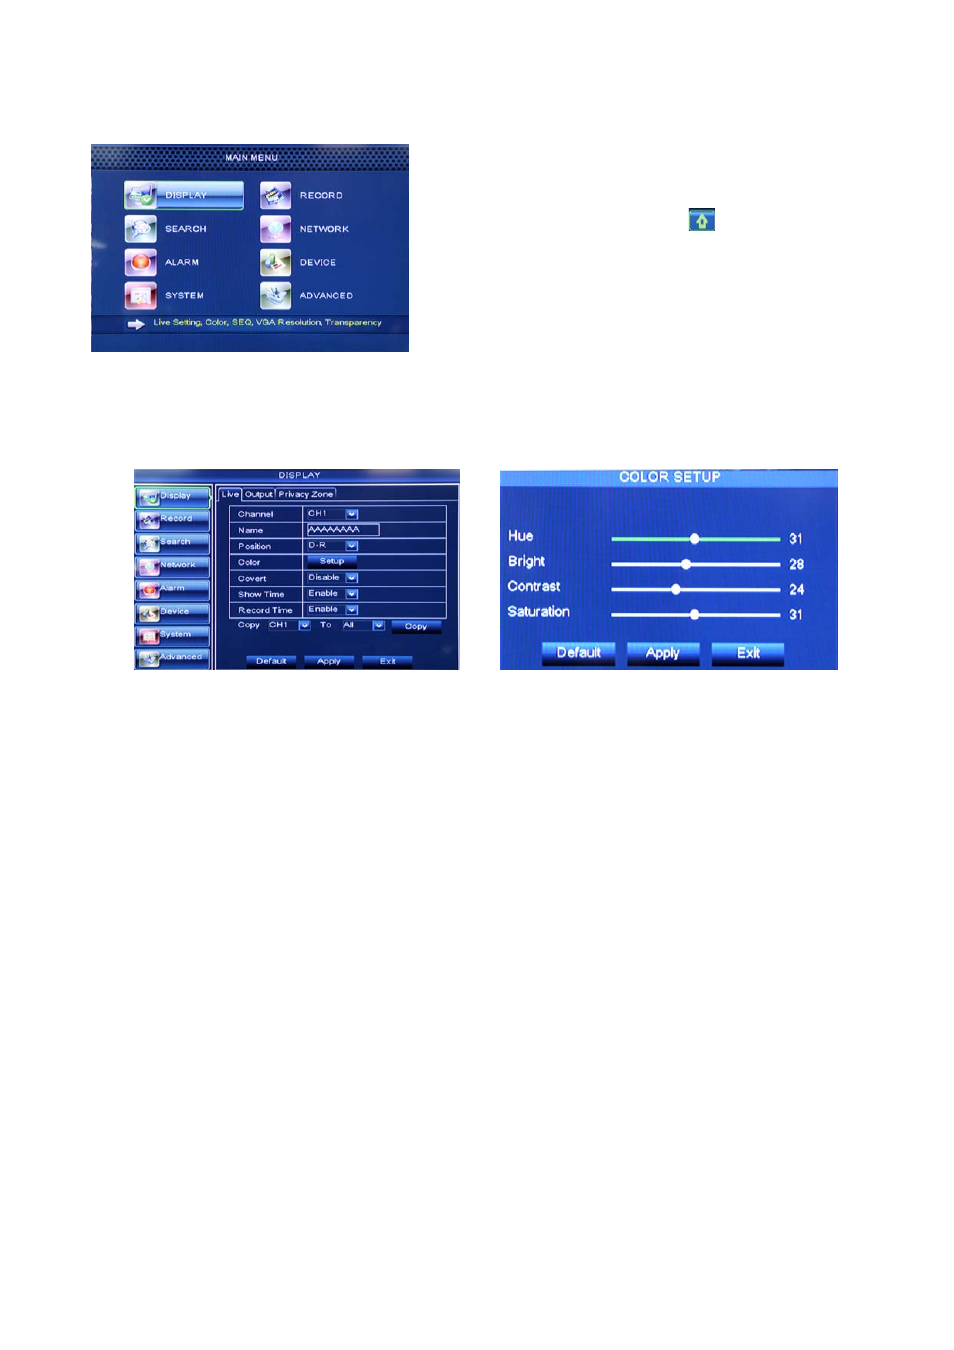
Go to <Main menu Display Live> option and enter into the <Display> setting interface shown as Picture 5-3.
Channel: allow you setup the channel you desired.
Name: allow you setup the channel name, and system support up to eight characters or four Chinese
characters.
Position: allow you setup the display position of each channel.
Color: Click [Setup] option to enter into the [Color setup] interface shown as Picture 5-4.
Covert: allow you enable [Live] surveillance screen
Show time: allow you enable system time appear in the <Live> screen.
Record time: When set to “Enable”, you are allowed to record system time into the record history.
Copy: allow you copy all data of one channel to any other one
Above picture 5-4 is the Color Menu where you can adjust image brightness, saturation, contrast and hue
parameters of each channel.
Explanation:
1、The modifications will be available after clicking [APPLY] button on the bottom of the sub-menu windows
and being prompted to save and then clicking [ok] button.
2、If you want to cancel the modification, click [Exit] button to exit the menu.
3、When clicking [DEFAULT] button, all system default values will be reset to default value.
4、System default value indicates the value pre-set at the factory.
On <Live> mode, click [Menu] button on the front panel or
Remote controller to enter into Main menu interface shown as
Picture 5-2. And also you can click [
] icon to enter the main
menu screen. In Main Menu mode, you can control device
management settings, such as Display, Record, Network,
Search, Device, System and Advanced setting etc.
Picture 5-2
Picture 5-3
Picture 5-4