4 network – Bolide SVR9000D User Manual
Page 24
User Manual
23
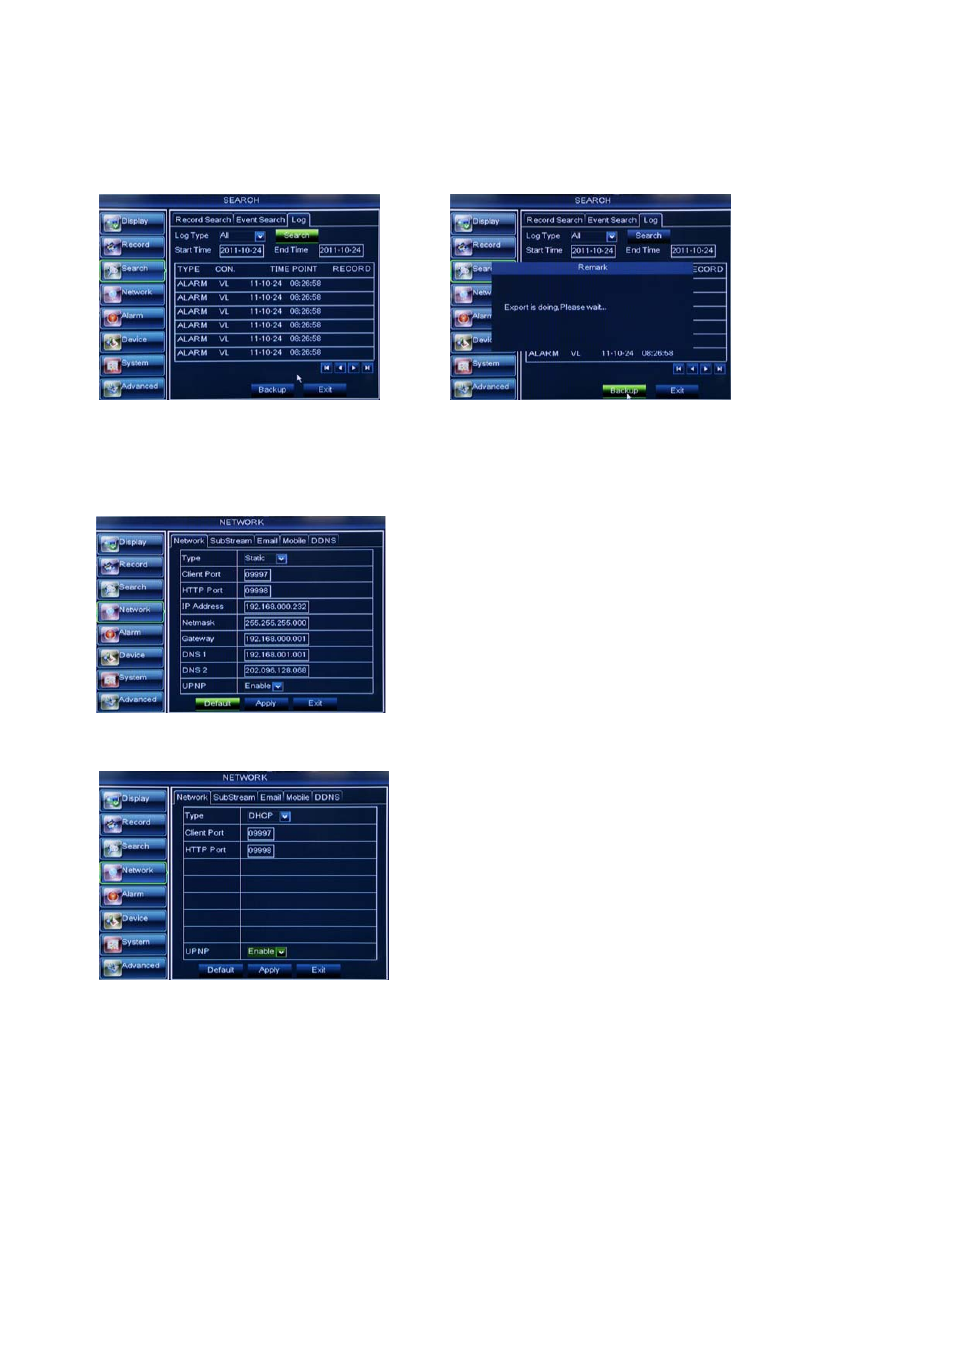
5.3.3.5 Log Search
Go to [Main menu Search Log] option to enter into the Log search interface shown as Picture 5-25.
Herein allow you preview the log information you have searched. And click [Backup] to export all the
log information which is listed. For other button functions please refer to previous section 5.3.3.3-Event Search
5.3.4 Network
5.3.4.1 Network set
Click [Main menu Network Network] to enter into the below interface shown as Picture 5-27.
DNS: DNS server is generally provided by local ISP. Herein please enter the IP address of your DNS
5. Visit a remote DVR
http: // public net IP: web port (such as: 8080)
http: //intranet IP: web port (such as: 8080 - only use for Intranet)
6. Input the IP address of your domain name server
Friendly Reminder:
1.
All the parameters you set are available only when you click [Apply] and after system are
restarted.
2.
User need to change MAC address when there are multiple DVRs at the same local area
network. Details please refer to section 5.6.2.5 -System Information.
When selecting DHCP from the Type, A router will
automatically allocate IP address for your DVR. After restarting
each time, the IP address captured by your DVR may be
different. So, port forwarding is required when you visit a
remote DVR.
1. Select DHCP and click [Save] button;
2. Exit and restart DVR;
3. Input media port and web port
4. Set IP address captured by DVR and web port to a router
After selecting network mode - such as DHCP, PPPOE or
static allocation- and setting up web ports,you can visit DVR
remotely through a network or internet.
UPnP (Universal Plug and Play) function: If router
supports UPnP function and set <UPnP> to “On”, system will
automatically forward port to router.
Picture 5-25
Picture 5-26
Picture 5-27
Picture 5-28