2 record set – Bolide SVR9000D User Manual
Page 20
User Manual
19
5.3.2 Record set
5.3.2.1 Record parameters
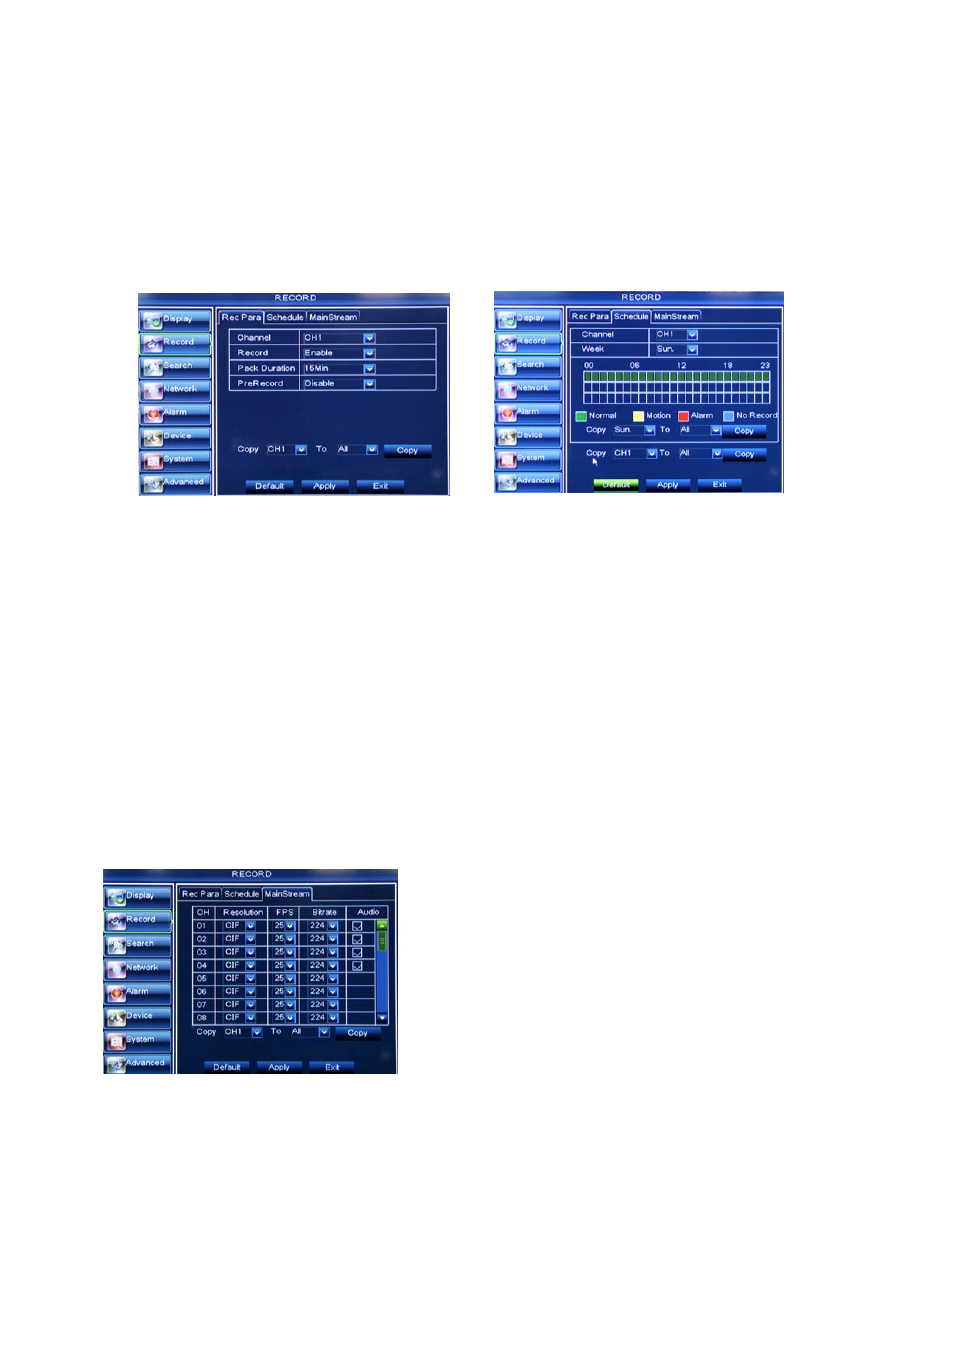
Go to [Main menu Record Record Para] to enter into the interface shown as Picture 5-11.
Channel: allow you setup the channel you desired.
Record: allows you set up record status (Enable/Disable) of each channel
Pack Duration: indicates maximum continuous record time (15, 30, 45 and 60 min).
Pre-record: Motion detection and I/O triggered record support Pre-record function.
5.3.2.2 Schedule
Click [Main Menu Record Schedule] to enter into the interface shown as Picture 5-12.
[Channel] option allows you select one channel you desired.
To setup weekly schedules, tick-select the box of the record status you want (Alarm, General, or No
Record) and then click on each box in the schedule time line that you want this method to apply to. You can
use the [Copy – To] pull-down menus and Copy button to copy settings from one day to another day or all
days.
After you complete the schedule you activate it by clicking the [Apply] button.
You can also click on the Default button to use the system defaults.
Explanation: Under the <record> menu and <search> menu, original color stands for no record, “Red” stands
for alarm record, “yellow” stands for Motion record and “Green” stands for normal record.
5.3.2.3 Main Stream
Go to [Main menu Record Main Stream] to enter into the interface shown as Picture 5-13.
Resolution: support D1, HD1 and CIF.(16CH not
supported D1)
Frame rate: PAL: 1-25 f/s ; NTSC: 1-30 f/s.
Bit rate: user could select the relative value by
pull-down menu.
Audio: When tick-selecting the option, system will
record video stream with audio simultaneously
Picture 5-11
Picture 5-12
Picture 5-13