2 install the pcmcia card – Measurement Computing PCM-DAS16x/16 User Manual
Page 7
2.2 INSTALL THE PCMCIA CARD
Your PCM card is completely plug and play. There are no switches or jumpers to set
prior to installation in your computer. Simply follow the steps shown below to install
your PCM - hardware.
1.
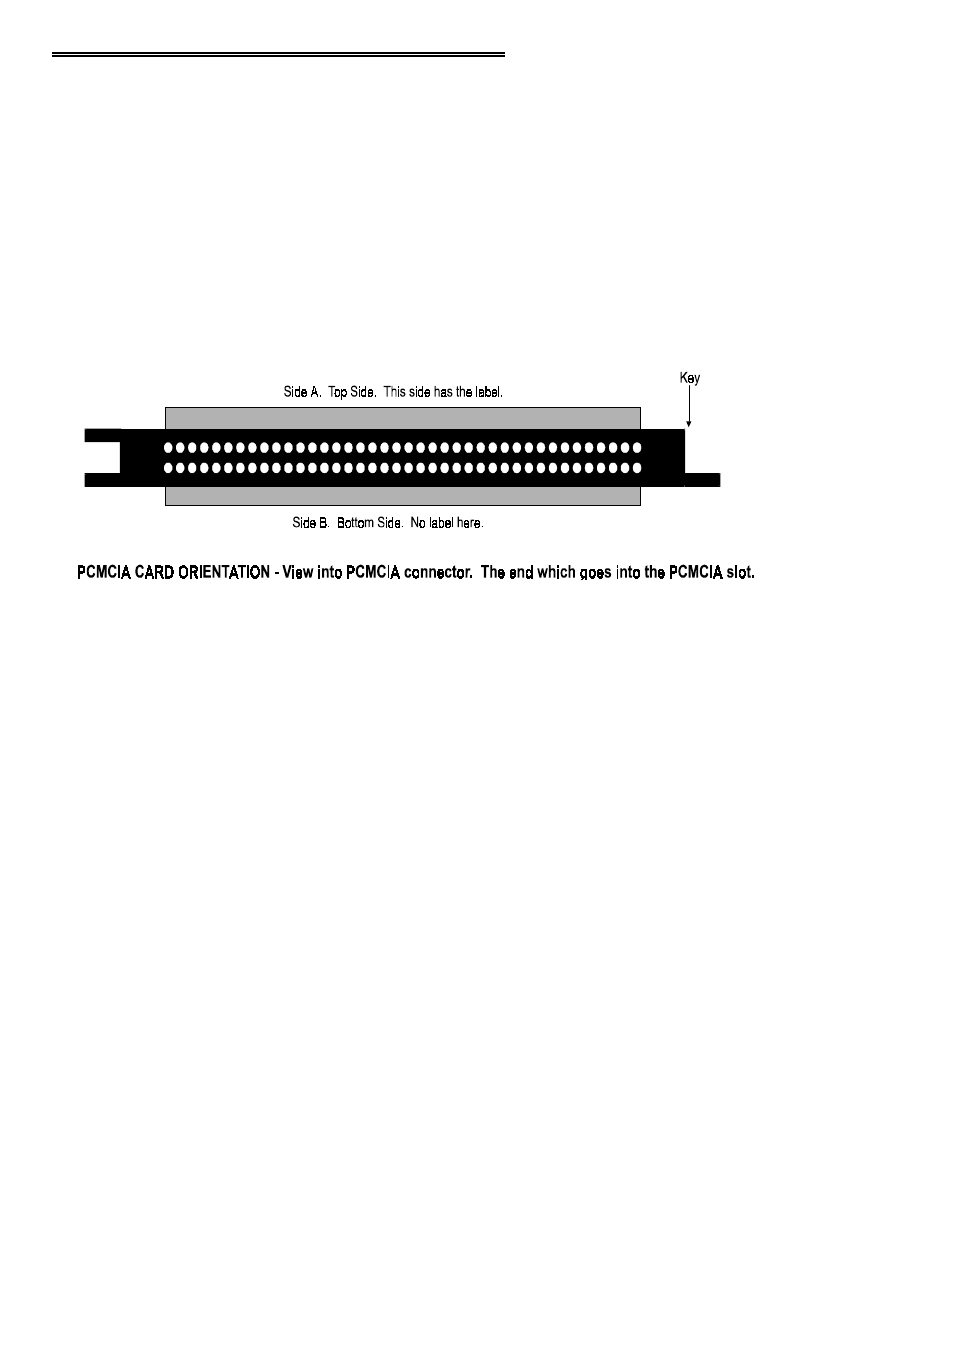
Insert the card into a free PC Card/PCMCIA type II or III slot. You do not
have to turn the computer off. The system is designed for power on installa-
tion. Shown here is a PCM card case looking into the connector which is
inserted into the PCMCIA slot of your computer. The KEY helps to insure
that the PCM board is inserted in the correct orientation.
2.
If the appropriate drivers are already loaded on the PC, the card should be
detected, recognized, and configured by Windows and you should hear an
insertion beep. If the card is not detected by Windows, go to step 3. To ver-
ify the card has been recognized, go to Control Panel\System\Device Man-
ager and the card should now appear under "DAS Component." If your card
appears in the list you can now proceed to the "RUN InstaCal" section of this
manual.
3.
If the drivers are not already loaded on the PC, you will be prompted for a
driver. If you are not prompted for a driver after inserting the card, go to
step 4. The appropriate driver is located on disk 1 of the installation disk set.
Insert this disk. Windows should detect the driver file automatically, install
it and then the card should be detected by Windows and you should hear an
insertion beep. To verify the card has been recognized, go to Control
Panel\System\Device Manager and the card should now appear under "DAS
Component." If your card appears in the list you can now proceed to the
"RUN InstaCal" section of this manual.
4.
If the card is not detected by Windows and you are not prompted for a driver
after inserting the card, check that your computer's 32-bit PCMCIA drivers
are enabled. If they are not, enable them and then restart your computer and
try the above procedure again.
3