Ravenheat CSI 85 User Manual
Page 17
5.3
UNPACKING.
5.3.1 Open the top of the carton (fig. 9).
5.3.2 Rest the carton on the floor ( keeping
the flaps open).
5.3.3
Turn the carton over, with the boiler
inside and then pull the carton.
5.3.4
Rest the boiler on the floor and remove
the polystyrene guards (fig. 13).
17
5.4
POSITIONING OF THE BOILER.
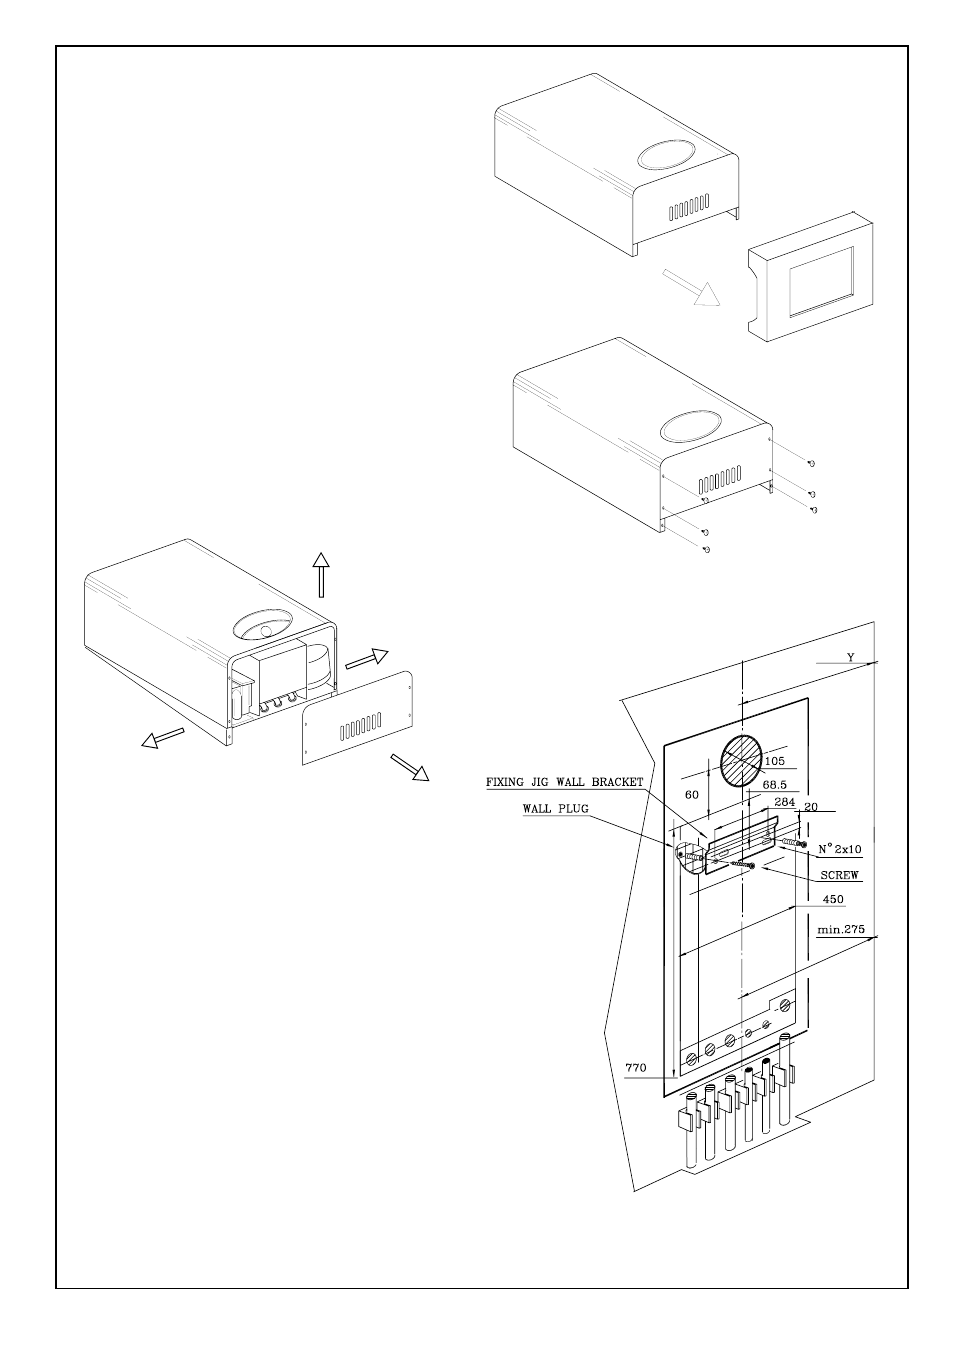
5.4.1 Remove the 2 screws that secure the
upper bottom part of the casing.
5.4.2 Unscrew the 4 screws that fasten the
lower grating on the casing and remove
it from the sides of the casing (Fig. 14).
5.4.3
Carefully slide the casing forward to lift
off (fig. 15).
Fig. 13
Fig. 14
Fig. 15
5.5
INSTALLING THE APPLIANCE FOR REAR
FLUE OUTLET
Use the adhesive tape to attach the template
to the wall, making sure that the centre line is
vertical.
- Mark the two holes to fix the hanging bracket
onto the wall as well as the centre
of the flue duct.
- Detach the template from the wall.
- Use a 10 mm. dia drill to make the 2 holes.
Insert the plastic expansion plugs.
- Cut or core drill a 105 mm. dia hole for
inserting the flue duct.
- Locate the wall hanging bracket and fix with
the two coach bolts.
Fit the elbow header, positioning it
towards the required direction (Fig 16).
IMPORTANT: Make sure that the elbow’s dia.
60 mm duct is inserted into the fan, the rubber
seal and orifice plate have been correctly
fitted.
Fig. 16