Multi flash mode, Bounce flash – SIGMA ELECTRONIC FLASH EF-610 DG SUPER PA-PTTL (ペンタックス用) User Manual
Page 20
19
1. Set the mode of camera.
2. Set the P-TTL mode on the EF-610 DG SUPER PA-PTTL.
3. Press the + button or – button of the EF-610 DG SUPER
PA-PTTL until the LCD panel indicates the /
.
4. Check the focus. Make sure that the flash ready lamp on the
EF-610 DG SUPER PA-PTTL is lit and the camera’s built-in flash
is charged before releasing the shutter.
◆
This procedure will provide a flash output ratio of 1 : 2 (camera’s built-in flash : EF-610 DG
SUPER).
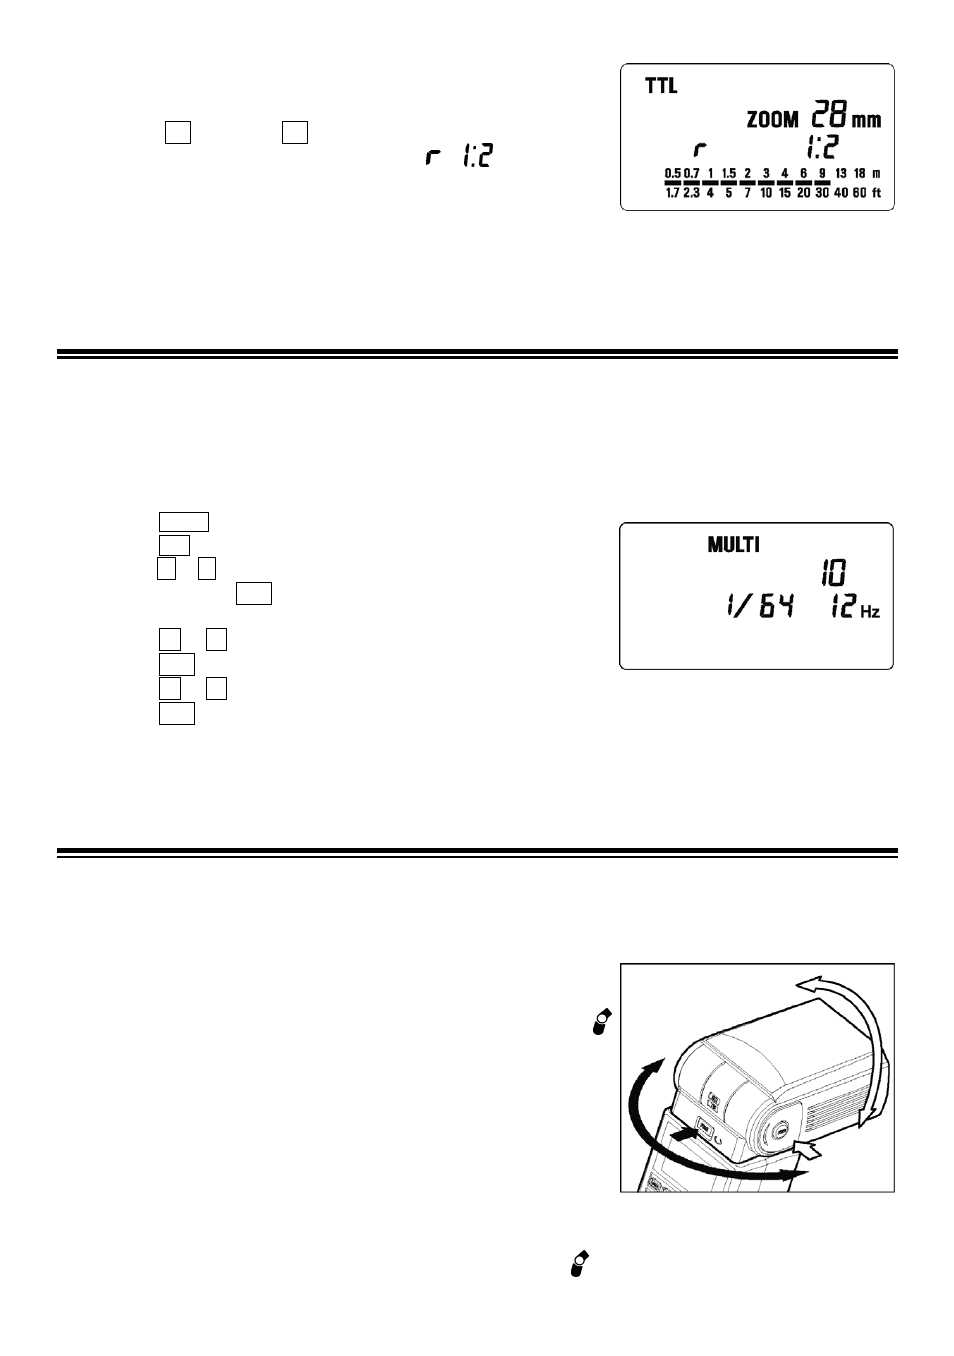
MULTI FLASH MODE
While the shutter is open, the flash will fire repeatedly. By doing so a series of images of the subject
will be exposed in one frame. A dark background with a bright subject shows more effectively in this
mode. It is possible to set the firing frequency between 1Hz and 100Hz. Up to 90 flashes can be fired
continuously. The maximum number of flashes varies, depending on the flash guide number and firing
frequency settings. (Please refer to table 3 on the last page)
1.Set the camera’s exposure mode to M mode, and set the F number
2.Press the
MODE
button until the Multi-flash mode appears
3.Press the
SEL
button until the flash firing frequency starts to blink.
4.Press the + or – button to set the desired flash frequency value.
5.After pressing the SEL button again, the flash power level will
blink.
6.Press the + or – button to set the desired power level.
7.Press the SEL button again, the number of flashes will blink.
8.Press the + or – button to set the desired number of flashes.
9.Press the SEL button again, the display will stop blinking.
10.When the ready light of the flash is illuminated, the unit is ready to use.
Note: Please set the shutter speed longer than; Number of Flashes you want ÷ Firing Frequency
BOUNCE FLASH
When you take a photo with flash in a room, sometimes a strong shadow will appear behind the
subject, if you point the flash head upwards or sideways to reflect the light off the ceiling, wall etc. the
subject will be illuminated softly. Press the lock button and adjust the flash head to set the bounce
angle.
UP: 0°, 60°, 75°, 90°
DOWN: 0°,7°
RIGHT: 0°, 60°, 75°, 90°
LEFT: 0°, 60°, 75°,90°, 120°, 150°, 180°
When the bounce flash mode is activated, a bounce indicator
will appear on the LCD panel.
The picture will receive the color from the reflecting surface. Please
choose a white surface for bouncing.
Depending on the reflecting surface, the subject distance and other
factors, the effective distance range for the TTL AUTO may change.
Please check for correct exposure confirmation ( TTL mark on the
LCD panel) after releasing the shutter.
CLOSE-UP EXPOSURES
For bounce flash can be tilted 7° downward for close-ups. The Flash will be effective only for the
subjects 0.5 meter to 2 meters. When the flash head is tilted 7° will blink.