Wireless flash, Only for p-ttl compatible cameras), Using the signal of built-in flash as a trigger – SIGMA ELECTRONIC FLASH EF-610 DG SUPER PA-PTTL (ペンタックス用) User Manual
Page 21
20
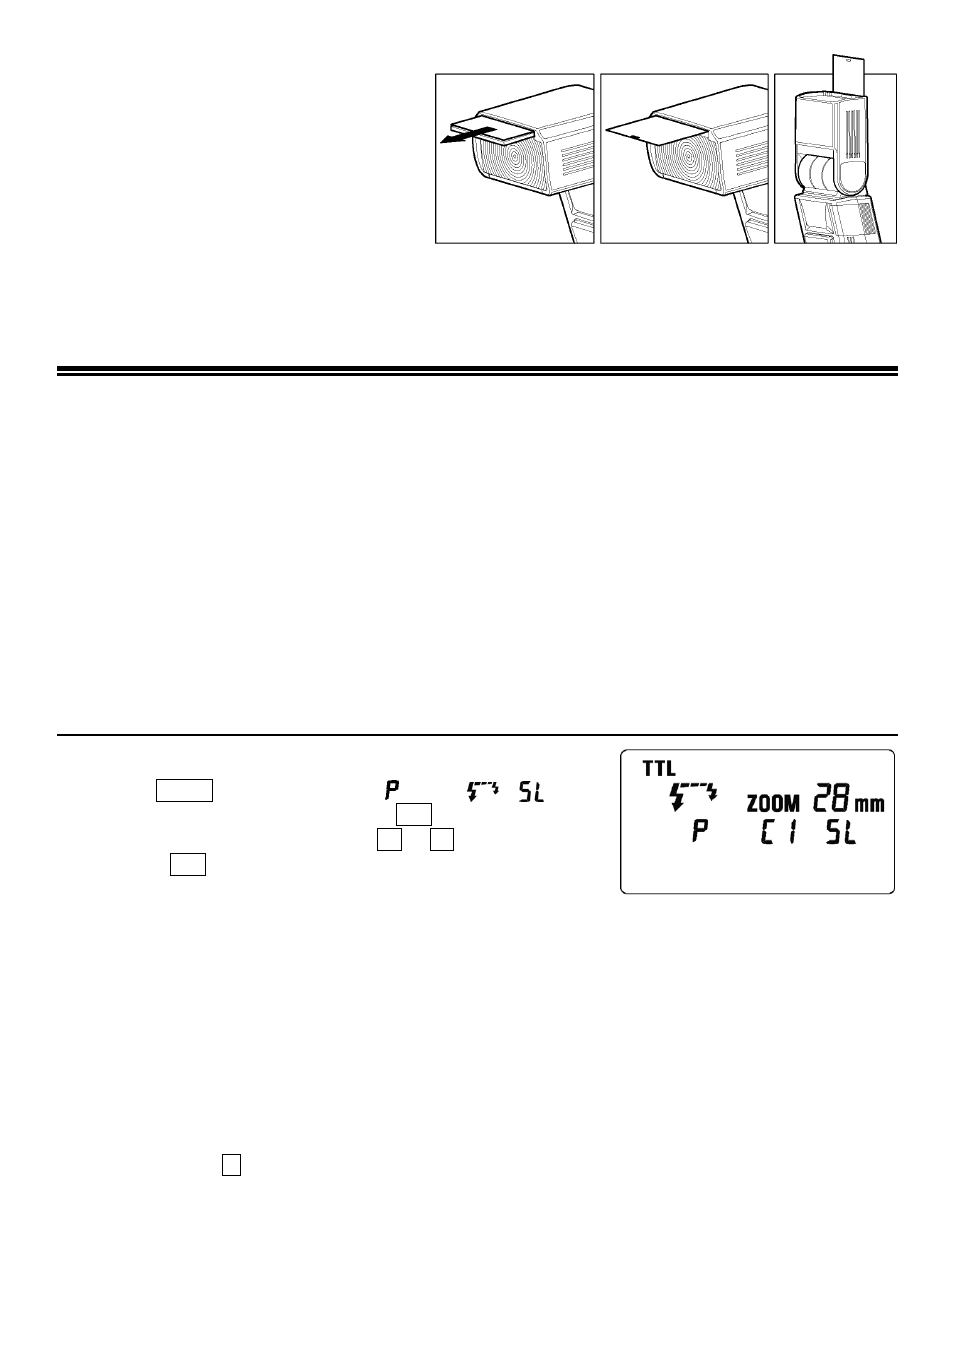
CATCH LIGHT PANEL
This flash is equipped with a built-in catch
light panel, which can create a catch light in
the eyes of the subject when the bounce
flash mode is activated. Slide out the wide
panel and catch light panel, and then put
wide panel back in its place. (Be careful to
slide the panels out smoothly.)
◆
To create a catch light effectively, tilt the flash head upward 90 degrees and take pictures at a close
distance.
WIRELESS FLASH
(Only for P-TTL compatible cameras)
When you use the “Wireless Flash” mode, you can take pictures with a more three-dimensional effect
by shadow, or you can make natural image by shadow depending on the flash position, without any
extension cord connecting the camera body and the flash. In the case of the EF-610 DG SUPER
PA-PTTL, communication between the camera body and the flash will be done by the means of the
light of the flash. In the “Wireless Flash” mode, the camera will calculate the correct exposure
automatically.
◆
It would be helpful to use a mini-stand when the flash unit is separated from the camera. The
mini-stand has a threaded hole to attach the flash unit to a tripod.
◆
Make sure not to position the flash your picture area.
◆
Place the flash approximately between 0.5m-5m (1.5-5.6ft) range, and camera approximately
1m-5m (3-16ft) range from the subject.
◆
In case of other people using Wireless Flash mode near you, your flash may be influenced by the
other person’s flash and your flash may fire. In this circumstance, please set your flash to a different
channel; from that of the other person’s flash. Please refer to above settings.
USING THE SIGNAL OF BUILT-IN FLASH AS A TRIGGER.
(Except *ist Ds/Ds2/DL/DL2, K100D, K100D Super, K110D)
1. Press the MODE button to Select the ⁄ TTL ⁄
⁄
mark.
2. Channel information will blink when the SEL button is pressed.
3. Set the channel number by pressing + or – button.
4. Press the SEL button several times until the display stops
blinking.
5. Attach the flash to the camera, turn the power switch of your camera on and press the shutter button
halfway, flashgun’s channel information will be transferred to the camera.
6. Remove your flash from the camera and place it at the desired position.
7. Pop-up the built-in flash of your camera, and confirm that it is fully charged.
◆
In wireless flash mode, AF Auxiliary Light will blink to indicate that the flash is fully charged.
8. Adjust the focus of your camera for taking picture.
◆
It is possible to use Exposure Compensation. For more details please refer to Exposure
Compensation section.
◆
By custom function setting of the camera, it is possible to cancel built-in flash as a main flash.
Please refer to instruction manual of the camera for details.
◆
It is possible to use High Speed Sycnchro photography. Please set flash mode of camera as High
Speed Synchro (W HS), as explained above and refer to instruction manual of the camera for
details.
◆
It is also possible to useamount of discharge adjustment (1 ⁄ 1 ~1 ⁄ 64). P-TTL flash can be
performed by maximizing the setting value.