English, 12 on screen menu – Sim2 Teatro 80 User Manual
Page 14
13
ENGLISH
TEATRO 80 - M80
W: Total hours of projector use
L: Hours projector lamp on
F: Software firmware version
X: Operating status:
0 – OFF
1 – ON
2 – Lamp preheating
3 – Lamp switching back on
4 – Lamp cooling
Y: Specific status:
0 – None
1 – Blank
2 – Freeze
3 – Test Pattern
12 ON SCREEN MENU
INPUTS
The input selection menu is opened by pressing 0 on the
remote control or with the source key on the keypad. To
select an input, scroll through the list with the ▲ and ▼ keys
until the required input is highlighted, then press ▶.
Input selection menu display terminates if you press the ESC
key or when the On-Screen Menu display timeout interval
(set in the Setup Menu) has elapsed or after the signal has
been recognised.
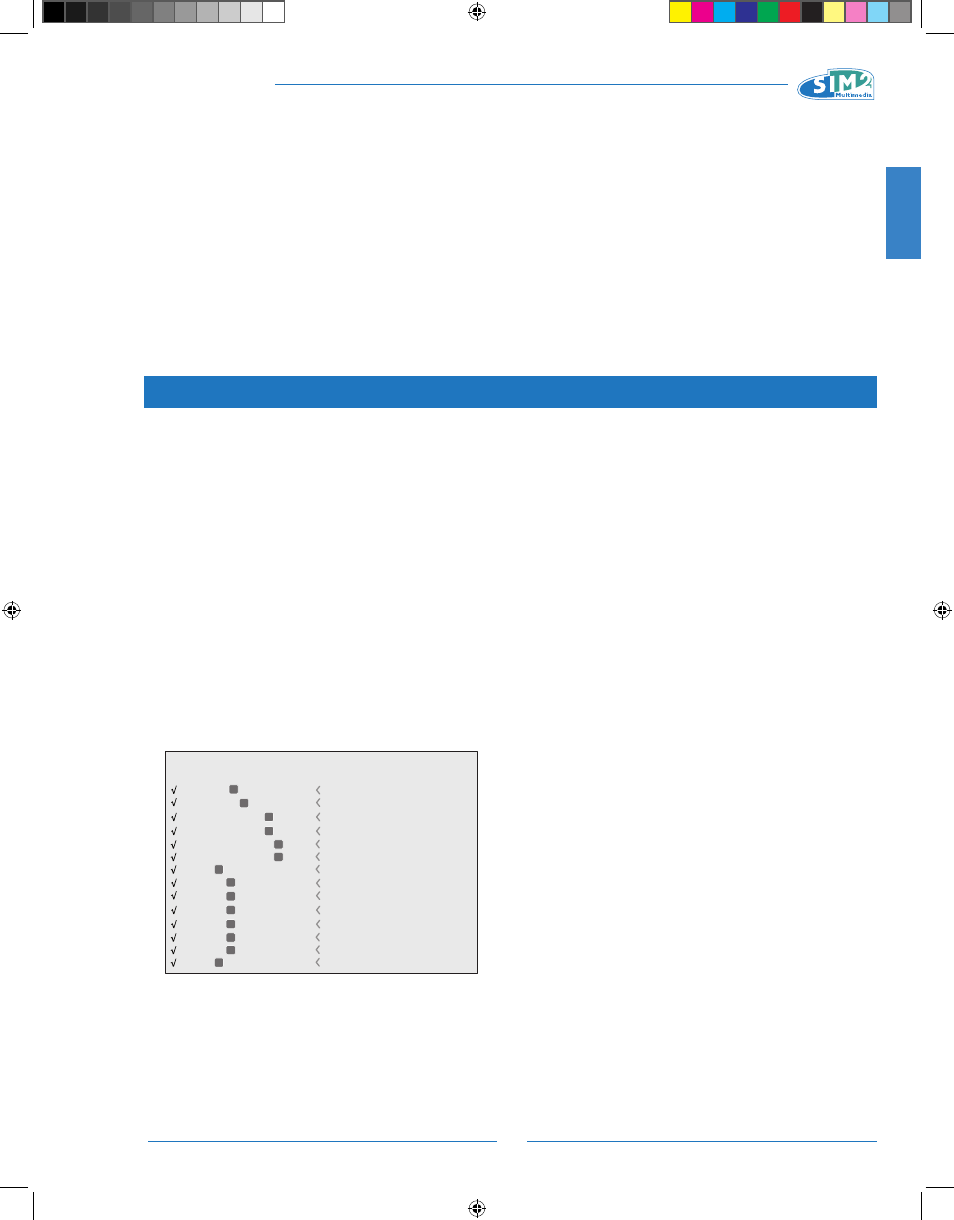
Some inputs can receive RGB and YPrPB signals.
The input and type of signal (RGB or YPrPb) are set in the
pull down menu that is displayed to the right of the symbol
< when you press the key ◀ (Fig. 17).
2 S-VIDEO
5 GRAPHICS RGB
3 COMPONENT
1 VIDEO
1
2
3
5
S-VIDEO
GRAPHICS
COMPONENT
VIDEO
4 COMPONENT
4
COMPONENT
6 GRAPHICS RGB
6
GRAPHICS
7 DVI
7
DVI
Source List / Edit Source Name
9 HDMI
12 HDMI
10 HDMI
8 HDMI
8
9
10
12
HDMI
HDMI
HDMI
HDMI
11 HDMI
11
HDMI
13 HDMI
13
HDMI
14 SDI
14
SDI
After selecting the signal that arrives from the source (using
the ▲ and ▼ keys), press MENU+/MENU- to confirm and exit
the pull-down menu; to the right of the < symbol, you will
see the setting you have just entered.
All system functions can be operated from the keypad or
remote control, with the aid of a complete, user-friendly on
screen menu.
During the short time that it takes to find the signal, a box
will appear showing the signal requested. Additional infor-
mation regarding the signal such as the video standard (for
video signals) or definition (for graphic signals), the aspect
and the current user memory can be displayed by pressing
the number key on the remote control corresponding to the
selected source.
In the SETUP menu you can select whether or not to display
this information; for further information see SOURCE INFORMA-
TION in the MENU section.
MAIN MENU
Press the MENU key on the keypad or the MENU+ or MENU-
key on the remote control to access the main menu of the
On Screen Display.
The main menu is divided into four windows, PICTURE, IM-
AGE, SETUP and MENU, in which the various adjustments are
grouped according to the frequency of use. Use the ▲ and
▼ keys to select the line corresponding to the adjustment
you wish to make (Fig. 18).
The various menus offer only adjustments corresponding to
the type of input signal displayed (e.g. certain typical adjust-
ments for video signals, not necessary for graphic signals, do
not appear on the menus for the latter, and vice versa).
Some adjustments (E.G. BRIGHTNESS and CONTRAST) are as-
sociated with a numerical value that can be modified within
the set limits using the ◀ and ▶ keys.
For others (e.g. MODE) you can choose between two op-
tions offered on the same line and selectable using the ◀
and ▶ keys.
Other settings can be selected from submenus, which ap-
pear as an superimposed window in which you make selec-
tions by pressing the ▲ and ▼ keys (Fig. 19a/b).
Fig.17
TEATRO 80 MB - EN.indd 13
25/10/10 18.02