7 installation – Sim2 Teatro 80 User Manual
Page 7
6
TEATRO 80 - M80
Place the projector on a stable surface or use the optional
ceiling bracket.
WARNING: When using the ceiling mount bracket, the sa-
fety instructions provided with the bracket must be strictly
observed. If you use a bracket other than the one provided
by SIM2 Multimedia, make sure the projector is located at
least 65 mm from the ceiling and that the bracket does not
block the air intake and outlet slots.
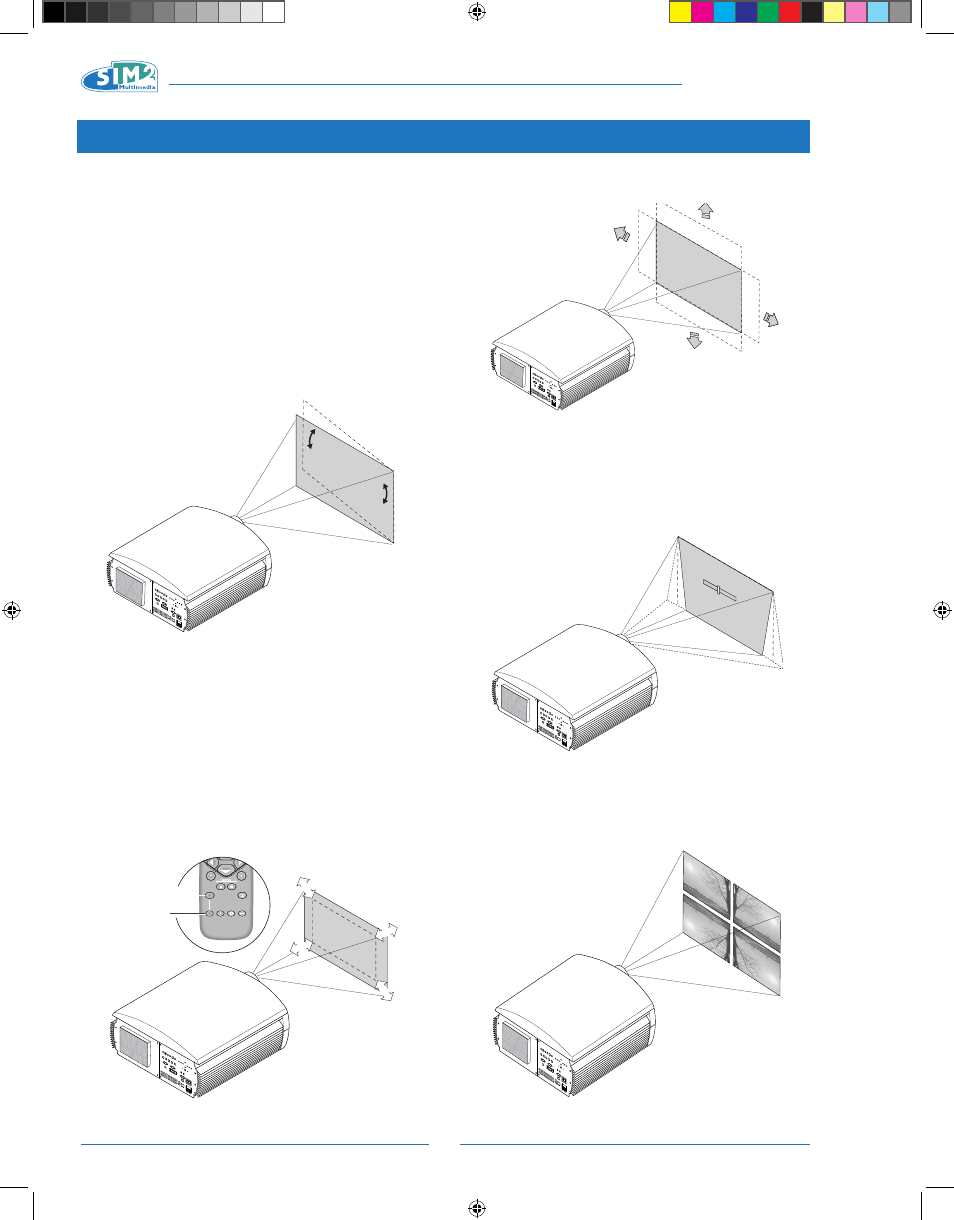
If the image slopes left or right, adjust the two feet on the
bottom to obtain a level position, lining up the base of the
projected image with the base of the projection screen
(Fig. 2).
Fig.2
Placed the projector at the desired distance from the screen:
the size of the projected image depends upon the distance
between the lens and the screen and the zoom setting.
Use the motorized zoom (Fig. 3) widen or to narrow the
projected image.
Use the motorized focus (Fig. 3) to obtain the best definition
of the projected image. If the focus is correct, from up close
to the screen you should be able to distinguish each single
pixel that makes up the projected image (Fig. 3).
Fig.3
The image can be centred using the motorized lens control.
Movements can be either vertical or horizontal (Fig.3a).
Fig. 3a
If this movement is not enough, you will need to tilt the pro-
jector and correct the keystone distortion using the keystone
adjustment in the installation manual (Fig.4).
TRAP
EZIO
20%
Using the Orientation item in the Setup menu, you can
either turn the projected image upside down or create a
mirror image of it (Fig.5), so as to adapt it to the configura-
tions of frontal, frontal on ceiling, rear, or rear on ceiling
installation.
Fig. 5
Fig. 4
7 INSTALLATION
ZOOM
ZOOM
ZOOM
ZOOM
F1
FOCUS
AUTO
ASPECT
VCR
HELP
ZOOM
F2
ZOOM
FOCUS
FOCUS
FOCUS
FOCUS
TEATRO 80 MB - EN.indd 6
25/10/10 18.02