Setting timeline audio settings – Grass Valley Aurora Edit v.7.0 User Manual
Page 151

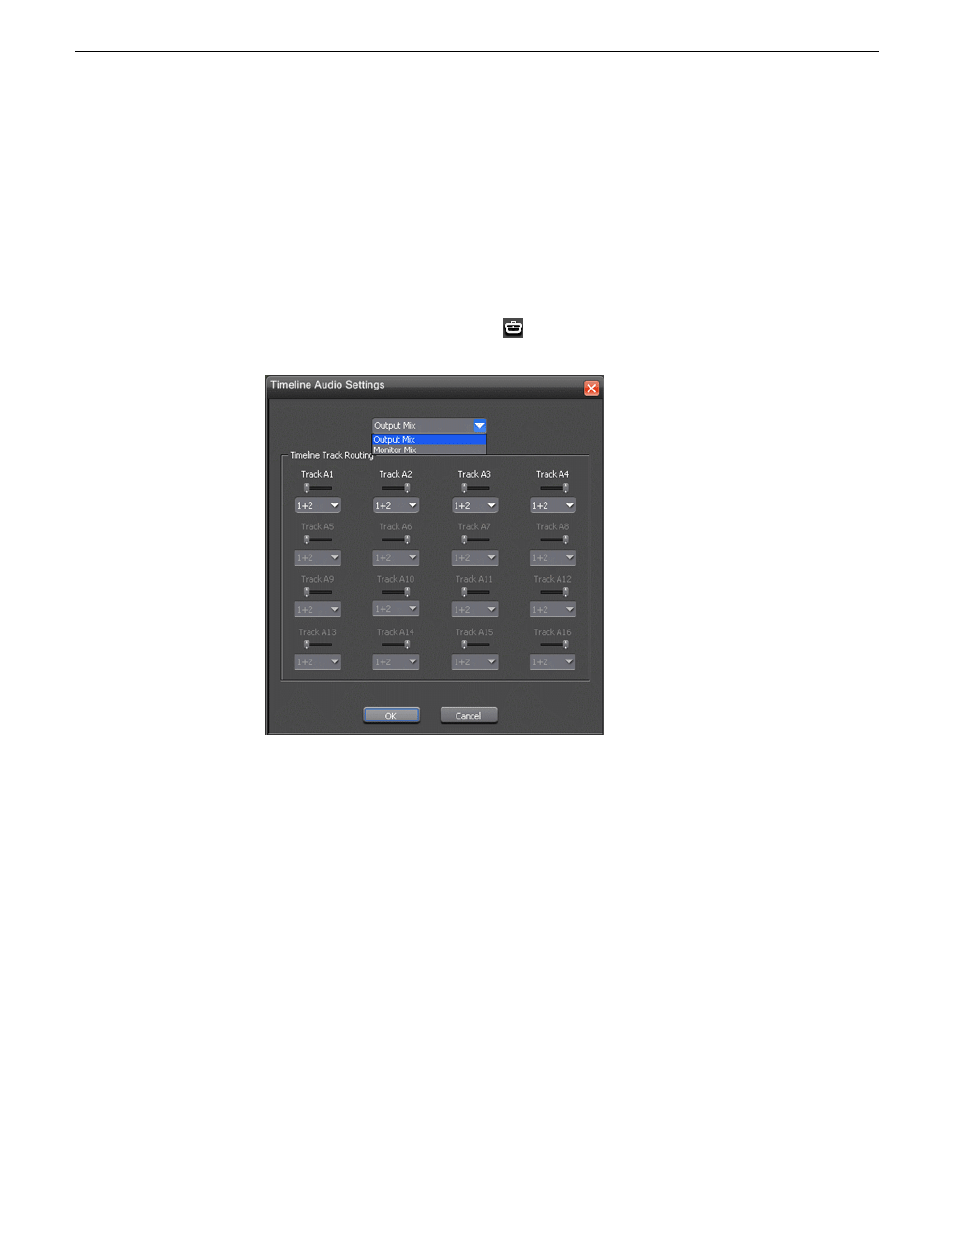
Setting Timeline audio settings
You determine the pan control and channel routing for each track of the timeline using
the Timeline audio settings.
Setting the pan control adjusts the sound location for your sequence. You can select
where the audio tracks of your sequence output by specifying the number of output
channels and routing those channels.
1. In the Audio Mixer Tool, click the
Settings
button to bring up the Timeline
Audio Settings controls.
2. Select
Monitor Mix
or
Output Mix
from the pulldown.
Monitor Mix
controls the panning and channel output for the speakers in the edit
bay, and does not affect sends to the server, play to tape, or live playout through
the Playback Channel.
Output Mix
controls the panning and channel output for the actual output of your
sequence for playout.
3. Set the pan control by dragging the pan slider for an audio channel to the right or
left position; press
Alt + click
on a pan slider to set the pan direction to center.
By default, odd-numbered channels pan to the left and even-numbers channels
pan to the right. Changing the pan direction affects the entire track in a sequence.
4. Route audio channels by selecting the channels you want to output:
1+2
,
3+4
, etc.
or
All.
For a two-channel system, audio channels route by default as follows:
08 April 2010
Aurora Edit User Guide
151
Audio