Ion Science Hydrosteel 7000 User Manual
Page 26
Hydrosteel 7000 MANUAL
Ion Science Ltd
Page 26 of 43
Unrivalled Detection. www.ionscience.com
Commissioning
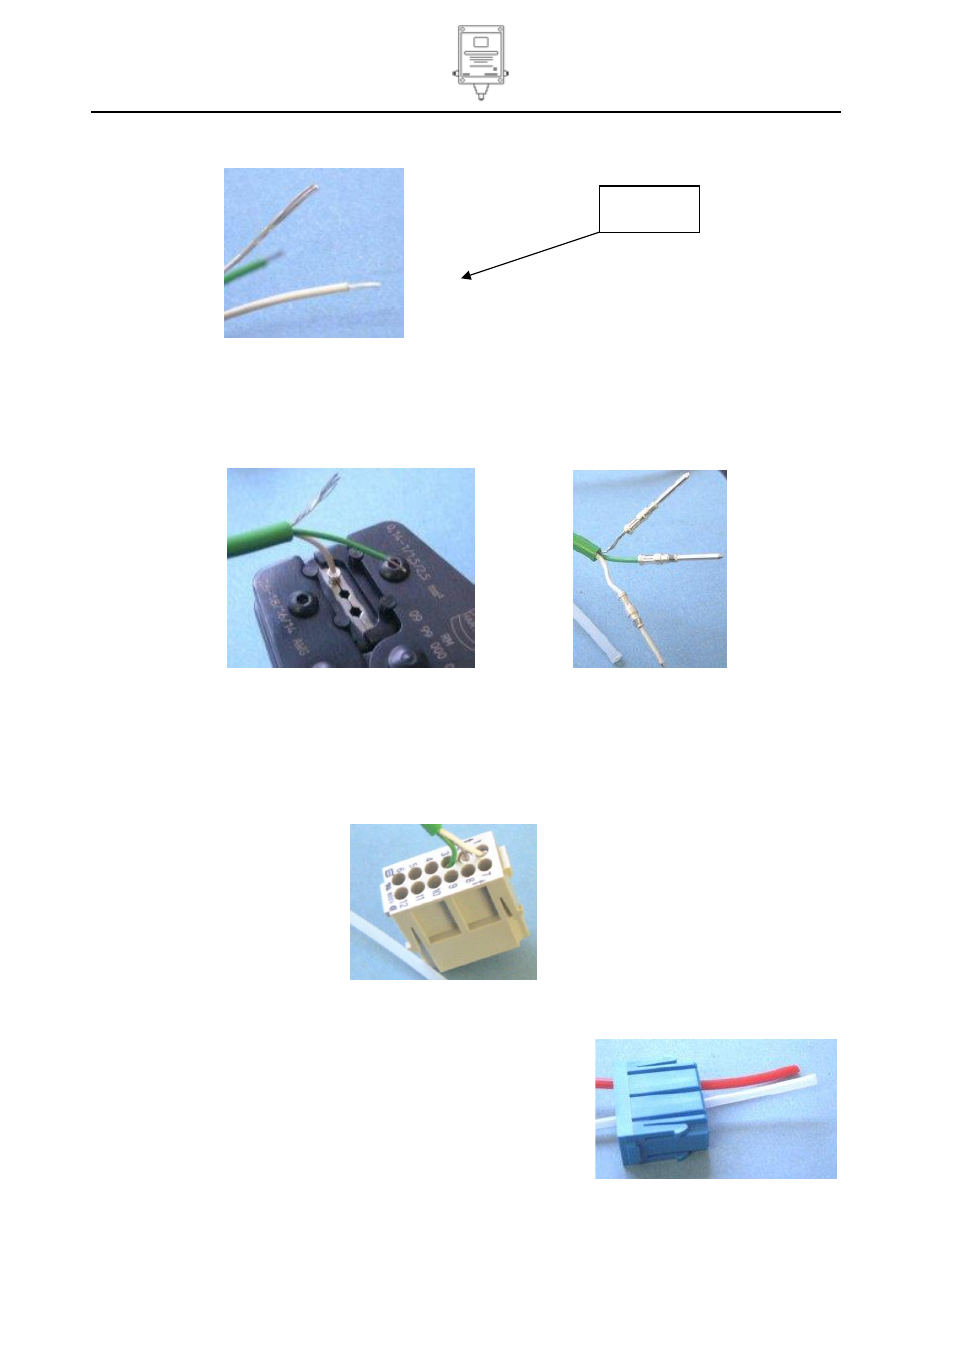
12. Strip 8mm length off white and green wires.
13. Crimp all three wires using crimp contact pins Pt No. 1/JCPB-01. Push the exposed conductor ends into
contact pins. Please Note the screen is tight into crimp socket so don’t twist the conductors together and
tease gently into avoid bending the conductors. If necessary cut 1 or 2 conductor strands out of the
bundle to enable it to fit. Use the end location of “Harting service tool” (Harting part number 09 99 000
0021) to crimp.
14. Feed the nylon tubes and the thermocouple cable through the male reducer and Han connector housing.
15. Fit crimps into Han DD module (1/JSIB-01) from the rear. The rear of the module is the flat fully
numbered sided. The crimps should be fitted as follows according to the numbering on the Han DD
module. Pin 1 = white, pin 2 = scre
en, pin 3 = green. Use “insert tool” (Harting part number 0999 000
0171) (or with care a small flat blade screw driver) to push crimp sockets until they are securely located.
(Note: to remove the crimps from the sockets if they are incorrectly placed or require maintenance the
“Harting extraction tool” is required.
16. Check the adapter and M20 cable gland parts are tightly fitted to the Han connector housing.
17. Feed nylon tubes through the pneumatic module (1/JNIB-01).
Flux through position 1 and background through position 2.
Since both tubes are natural in colour marking using black tape
for background and red tape for flux has been fitted to the un-
terminated end. This may have been lost when the conduit was
cut to length. If so trace through the liens by blowing or sucking.
Strip 8mm of
insulation