Iopower, Using windows hyperterminal), Flash upgrade operation guide – Linkskey LKV-IOP08 User Manual
Page 10: Flash upgrade procedure, Setting the windows hyperterminal
ioPower User Guide Flash Upgrade Operation Guide
Rev. 1.41 Copyright© All rights reserved. Feb 2005
7
ioPower
Flash Upgrade Operation Guide
(USING WINDOWS HYPERTERMINAL)
Important Note: Beside using Windows HyperTerminal for ioPower flash upgrade, you can also use the Tools/Upgrade option
on the ioPower Management Software Menu. Please refer to the Quick Installation section on this User Guide.
The ioPower allows its user to upgrade firmware contents
whenever is needed to enhance its functionality and/or
performance. With the firmware upgrade feature, your
investment on the unit is further ensured and its life-time value
just maximized. You don’t have to buy a newer unit just to
have better features, instead you can have them all added to
your current unit with an easy flash upgrade! The correct Flash
upgrade procedure is described below. Please follow the
instructions to complete your firmware upgrade.
Flash Upgrade Procedure
Before you can perform a flash upgrade, you should have (1) a
powered-on PC with an available RS-232 port (DB9) (2) the ioPower
Unit to be upgraded, and (3) a RS-232 cable (DB9 to-DB9) connected
already to RS-232 ports on both your PC and the ioPower Unit.
AND also…..
Pease be sure to have (4) the latest flash upgrade file (
*.x
) ready on
your local computer. You can copy them from the diskette/CD-ROM
provided by the technical support or download it from available
support website.
Check the connection between the ioPower
Unit and PC
Make sure you have powered on the PC and also the
ioPower Unit before you perform the flash upgrade procedure.
Step 1. Connect your PC and the ioPower Unit using a RS-232
cable.
Setting the Windows HyperTerminal
Once you have successfully established a serial connection,
the settings will be stored on your PC and a shortcut with the
connection’s name generated under your HyperTerminal
program menu. Next time, you can establish the connection
again simply by clicking the connection shortcut without going
over the procedure in this section again. If that is the case, just
click the connection shortcut and go right to the last section,
Flash Upgrade File Transfer.
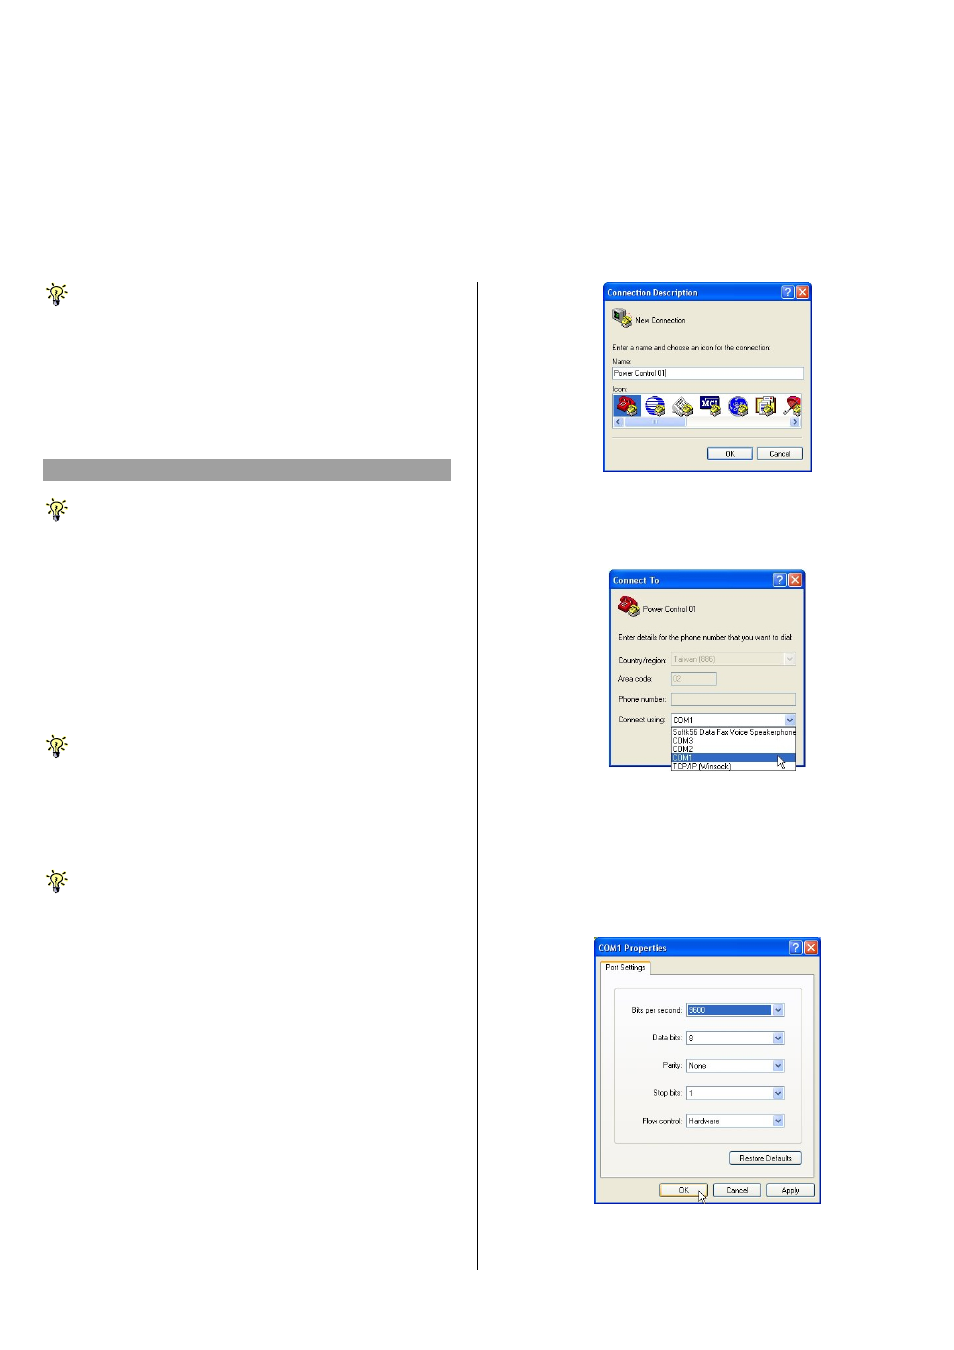
Step 2. On your PC (which should already be connected to
your ioPower Unit with a DB9-to-DB9 RS-232 cable),
activate the Windows HyperTerminal
(Start/Programs/Accessories/Communications/Hyper
Terminal). Designate your HyperTerminal connection
with a specific name, e.g. Power Control 01.
Click
OK.
Step 3. Select COM 1 or COM 2 (depending on r actual COM
port configuration). In this case, we select COM 1.
Click
OK.
Step 4. Configure your port setting with the following
parameters:
Bits per seconds:
9600
Data
bits: 8
Parity: None
Stop
bits: 1
Flow
Control: Hardware
Click
Apply then click OK. Then HyperTerminal
windows appears…..