Setting the current date and time, Setting the date and time, E-45 – Casio QV-3000EX/Ir User Manual
Page 45
SETTING THE CURRENT DATE AND TIME
E-45
SETTING THE CURRENT DATE AND TIME
Use the following procedures to set the current date and
time, and to select the date format.
When you record an image, the time and date the image was
shot is registered in accordance with data from the camera’s
built-in clock. You can even use the TIME STAMP function to
“stamp” the date and time inside the image.
IMPORTANT!
• The time and date settings are cleared if the camera is
left for about 24 hours without battery and AC power
being supplied. If this happens, restore power and
make new time and date settings before using the
camera again.
• A flashing time display indicates that the time and date
(clock) settings have been cleared. Use the procedure
on this page to make the correct time and date set-
tings.
• If you do not set the camera’s built-in clock to the cur-
rent date and time, all images are recorded with the
default date and time, which probably is not your cor-
rect current date and time. Be sure to correctly set the
clock before you use the camera.
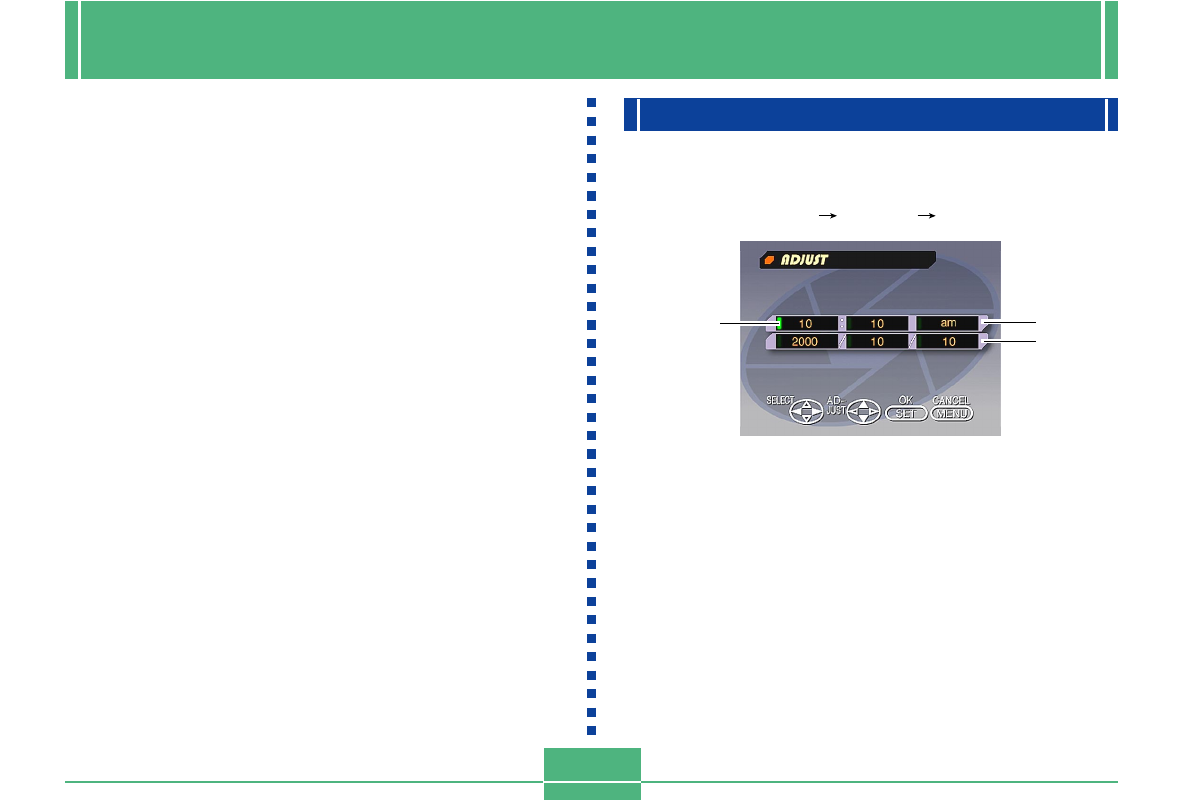
Setting the Date and Time
1.
Press MENU.
2.
Select “Set Up”
“Date”
“Adjust”.
3.
Set the current date and time.
• Press [
왔
] and [
왖
] to change the value or setting at the
location of the green marker.
• On the menus, the currently selected item is indicated
by the color green. Either the menu item is highlighted
in green, or a green marker appears to the left of the
menu item to indicate that it is selected.
• Use [
왘
] and [
왗
] to move the green marker to the set-
ting you want to change.
Time
Date
Marker