Step 6: shooting images in auto mode, Look through the viewfinder and hold the camera – Sony ILCA-99M2 User Manual
Page 35
C:\4688165121\4688165121ILCA99M2AP2\01GB-ILCA99M2AP2\020PRE.indd
2016/09/01 10:27
ILCA-99M2
4-688-165-12(1)
GB
35
Preparations for shooting
Hint
• If you want to set the date and time later, you can cancel the date and time
setting procedure by pressing the MENU button. In this case, the setting
screen for the date and time will reappear the next time you turn on the
camera.
• To reset the date and time setting, use MENU (page 80).
Note
• If the date and time setting procedure is cancelled halfway through, the
setting screen for the date and time will reappear every time you turn on the
camera.
• This camera does not have a function for inserting the date into images.
You can insert the date into images and then save and print them using
PlayMemories Home (for Windows only).
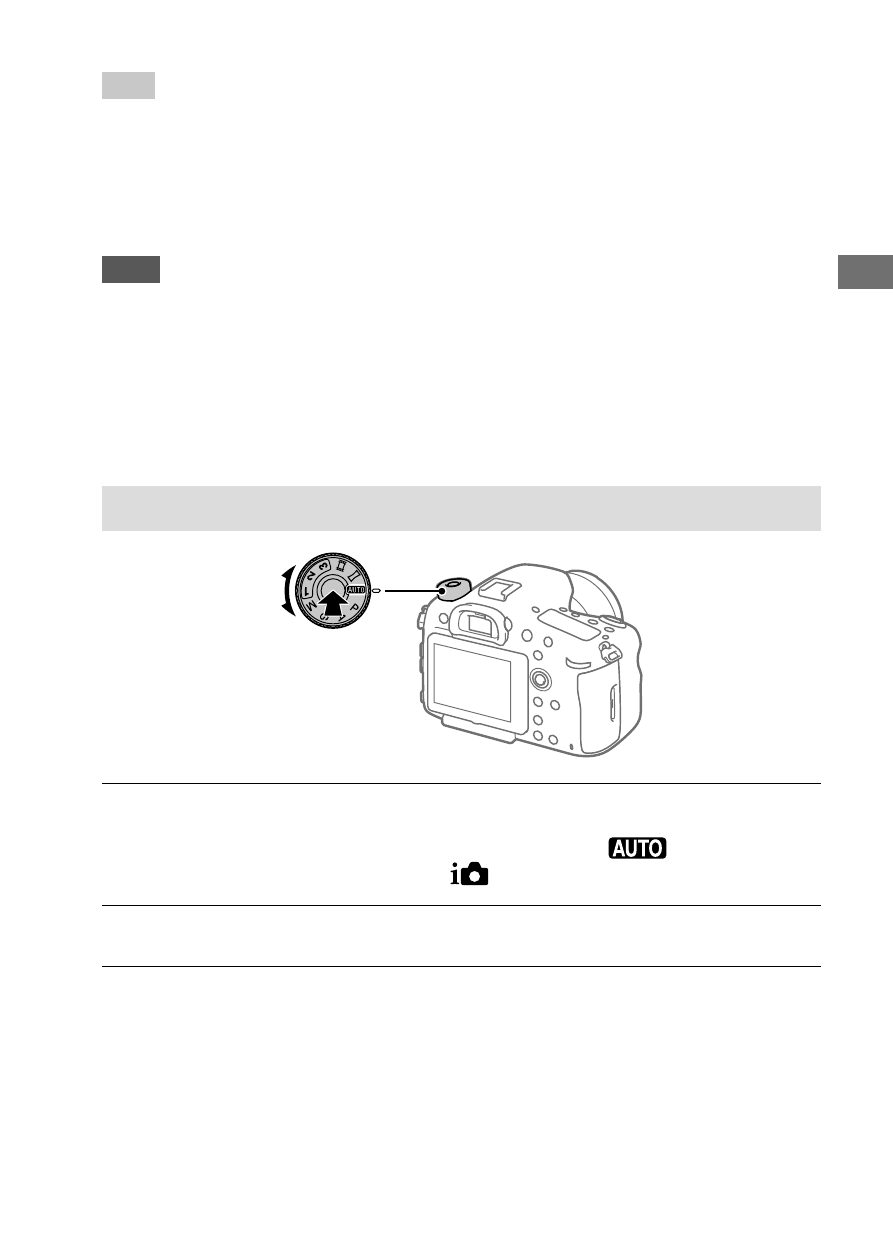
Step 6: Shooting images in auto mode
1
Press and hold the lock release button in the center of the
mode dial, then turn the mode dial to set to
.
The shooting mode will be set to
(Intelligent Auto).
2
Look through the viewfinder and hold the camera.
3
Set the size of the subject by rotating the zoom ring of the lens
when a zoom lens is attached.