Getting ready, Inserting the bobbin, Winding the bobbin – Silvercrest SNM 33 B1 User Manual
Page 78
78
GB / IE
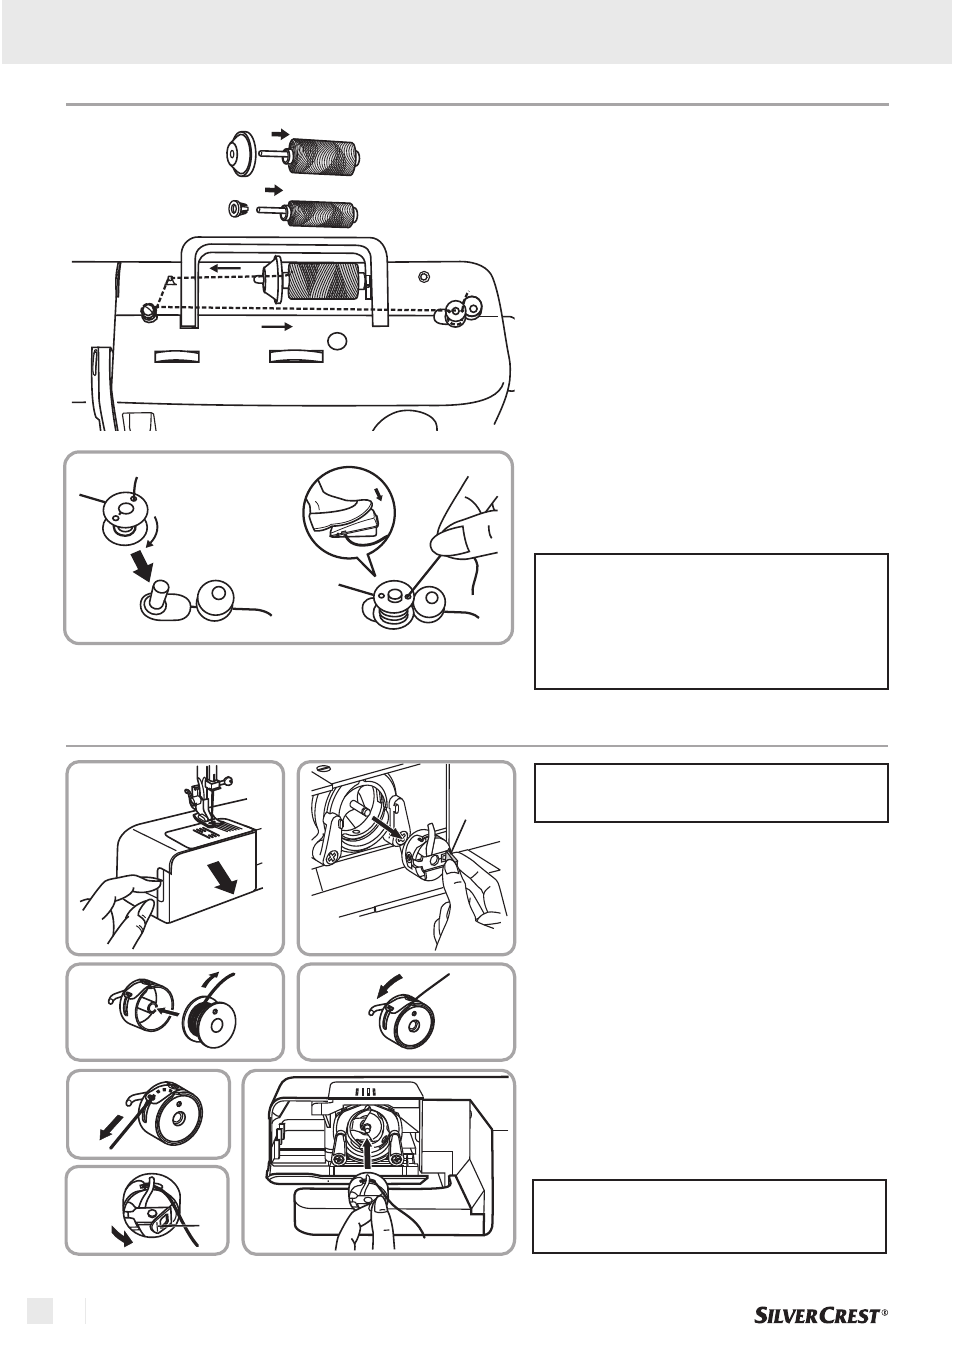
Getting ready
Place the spool (m) on the spool pin and
hold it in place with the spool pin cap (r).
- Small spool pin cap for thin threads
- Big spool pin cap for thick threads
Lead the thread from the spool into the
thread guide, and up to the
.
Pull the thread from the inside through a
hole of the empty spool (g). Place the spool
on the spool holder and push to the right
into the filling position.
Hold the end of the thread. Press the pedal.
Release the pedal after a few turns.
Release the thread and cut as close as
possible to the spool. Press the pedal again.
Once the spool is full, it rotates slowly.
Release the pedal. Replace the spool into
sewing position and remove it.
If the bobbin winder spindle is in winding
position, the sewing process is
automatically interrupted. To sew push
the bobbin winder spindle to the left
(sewing position).
bobbin
Note:
Inserting the bobbin
Attention:
Note :
Turn power switch to off ("O").
When inserting or removing the bobbin, the
needle must be fully raised.
1. Open the hinged cover.
2. Pull the bobbin case tab (A) and remove
the bobbin case.
3. Hold the bobbin case with one hand.
4. Insert the bobbin (3) so that the thread
runs in a clockwise direction (arrow). (4)
5. Put the thread under the tension spring.
6. Hold the bobbin case by the hinged latch.
7. Insert it into the shuttle.
The method to bringing up the lower
thread is explained on page 80.
Winding the bobbin
1
5
6
7
A
2
3
4
A