Sewing basics buttonhole foot – Silvercrest SNM 33 B1 User Manual
Page 85
GB / IE
85
Sewing basics
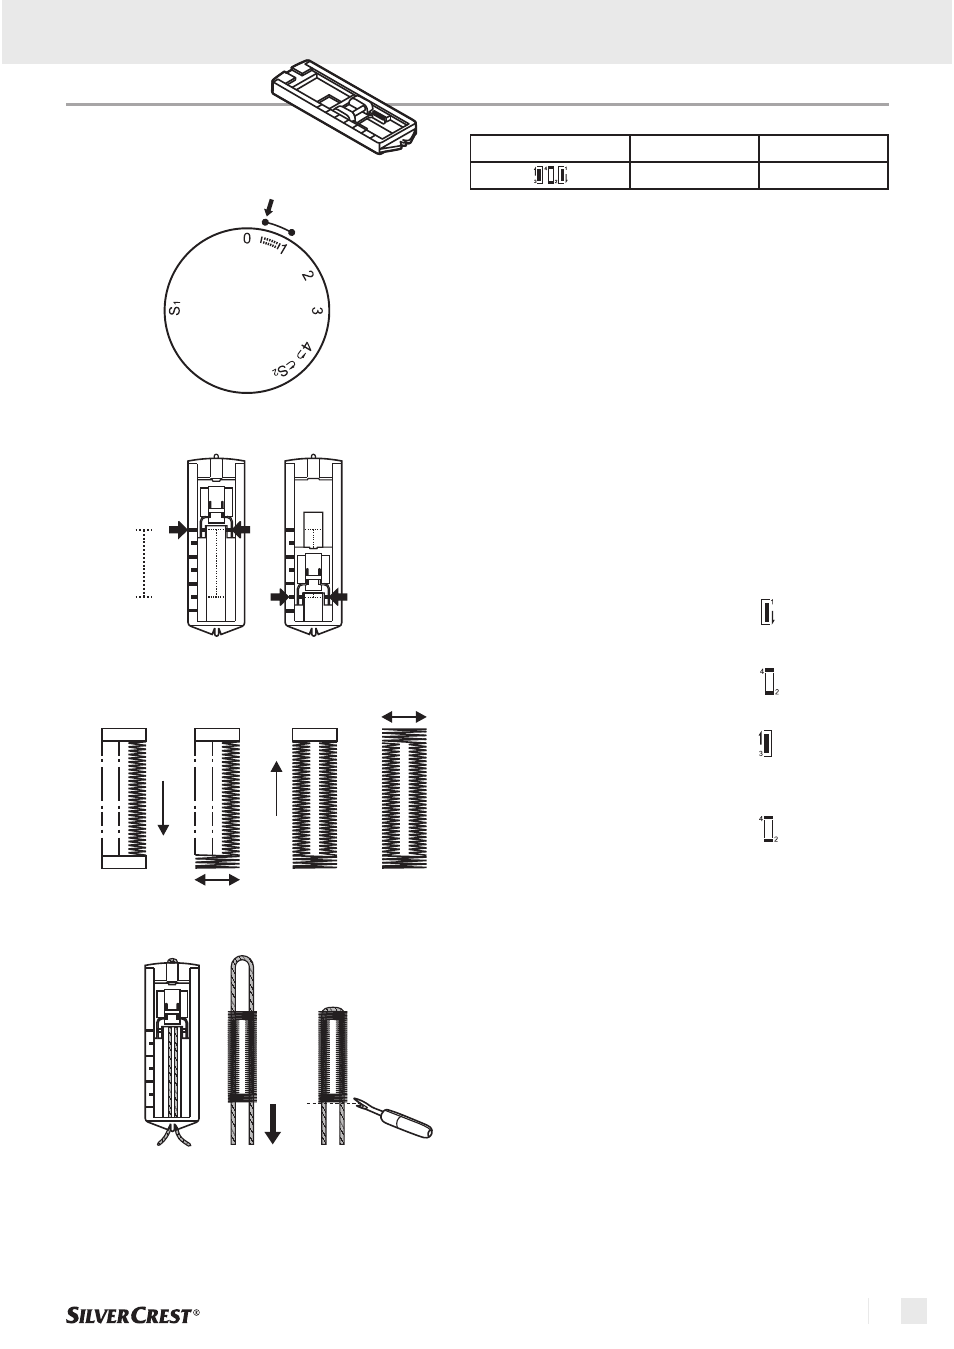
Buttonhole foot
Preparation:
Note:
To prepare the fabric:
Tips:
Remove the zigzag foot and attach the buttonhole
foot. Adjust the stitch length dial between "0.3" - "1".
The density of the stitch depends on thickness of
the fabric.
Always test sew a buttonhole.
Measure the diameter of the button and add 0.3cm
(1/8") for the bartacks. If you have a very thick
button, add more to the diameter measurement.
Mark the position and length of the buttonhole on
the fabric. Raise the needle to its highest position.
Position the fabric so that the needle is on the mark
that is furthest from you.
Pull the buttonhole foot towards you as far as it will
go.
Lower the foot.
A. Turn the pattern selector dial to "
". Sew at
moderate speed until you reach the end mark.
Raise the needle to its highest position.
B. Turn the pattern selector dial to "
" and sew 5-
6 bartack stitches. Raise the needle to its highest
position.
C. Turn the pattern selector dial to "
" and sew
the left side of the buttonhole to the mark at the
end which is further from you. Raise the needle
to its highest position.
D. Turn the pattern selector dial to "
" and sew
bar tack stitches. Raise the needle to its highest
position.
Bringing up the foot. Remove the fabric from under
the foot. Draw the upper thread through the
backside of the fabric and knot upper and lower
threads. Cut the center of the buttonhole with the
stitch ripper, being careful not to cut the stitches on
either side.
- Slightly reduce upper thread tension to produce
better results.
- Use backing material for fine and stretchy fabrics.
- It is advisable to use a gimp cord for stretch or
knit fabrics. The zigzag should sew over the gimp.
(E)
Stitch
Stitch width
Stitch length
5
0.3~1
Stitch length
A
B
C
D
E
0.3