MEDC DB3B User Manual
Page 5
© MEDC 2014
07/14
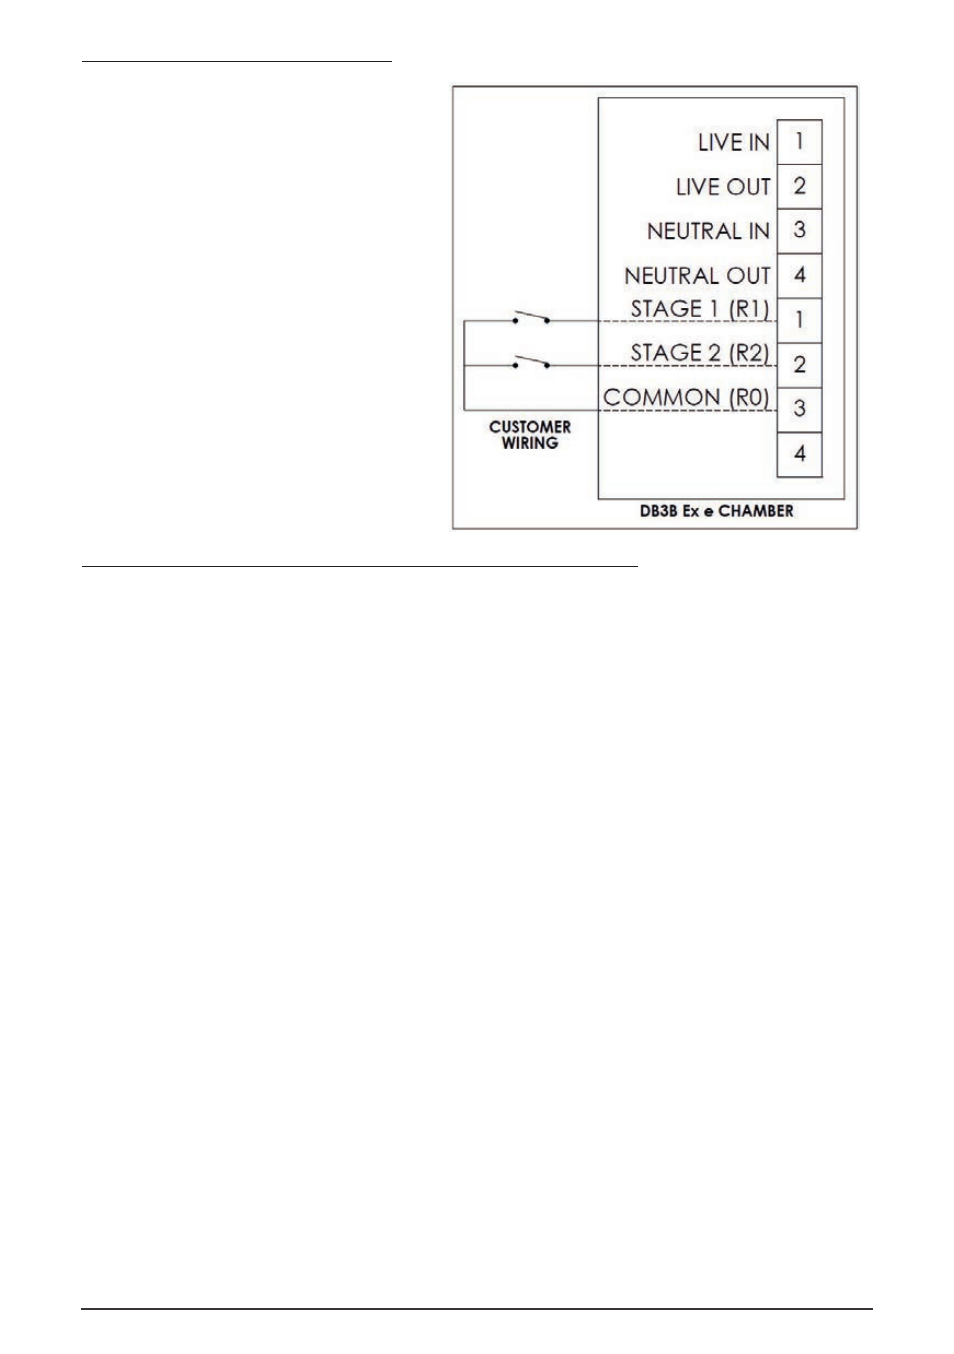
Ex de – AC input wiring details (Types 3 & 4)
•
Type 3: Connect the live and neutral
supply wires to the terminals as detailed in
the wiring diagram. When power is
applied to the unit, the stage 1 tone will be
produced as selected on the 5- way DIP
switch inside the Ex d chamber.
•
Type 4: Connect the live and Neutral
supply wires to the terminals as detailed in
the wiring diagram. When power is
initially applied to the unit, no tone will be
produced. Connect wires and remote
switches to terminals R0, R1 and R2 as
shown. When the switch connected to R1
is closed, the stage 1 tone will be
produced as selected by the 5-way DIP
switch on the electronics assembly. When
the switch connected to R2 is closed, the
pre-selected tone for stage 2 is produced.
See tone table 2 for details of pre-selected
tones.
Note: Closing both switches will produce no tone.
Ex d & Ex de – DC input, 3 stage without monitoring wiring details (Types 5 & 6)
This type can be configured in a number of different ways depending on requirements. Independent tone selection
for all 3 stages is via the 3 off 5-way DIP switches fitted to the electronics assembly:
•
2-wire system (Single stage): Connect the positive and negative supply wires to the terminals as detailed in
the wiring diagram.
•
2-wire system (Dual stage, reverse polarity): Connect the positive and negative supply wires to the
terminals as detailed in the wiring diagram. The second stage is produced by reversing the polarity of the
supply to the unit.
•
3-wire system (Dual stage, common +ve): Connect 3 supply wires to the terminals as detailed in the wiring
diagram (1 common +ve wire and 2 -ve wires). Stage 1 is produced when power is applied across the
common +ve and stage 1 -ve terminals. Stage 2 is produced when power is applied across the common
+ve and stage 2 -ve terminals.
•
3-wire system (Dual stage, common -ve): Connect 3 supply wires to the terminals as detailed in the wiring
diagram (2 +ve wires and 1 common -ve wire). Stage 1 is produced when power is applied across the
stage 1 +ve and common -ve terminals. Stage 2 is produced when power is applied across the stage 2 +ve
and stage common -ve terminals.
•
4-wire system (Triple stage, Common -ve): Connect 4 supply wires to the terminals as detailed in the
wiring diagram (3 +ve wires and 1 common -ve wire). Stage 1 is produced when power is applied across
the stage 1 +ve and common -ve terminals. Stage 2 is produced when power is applied across the stage 2
+ve and common -ve terminals. Stage 3 is produced when power is applied across the stage 3 +ve and
common -ve terminals.
All versions are supplied with terminals to allow loop-in loop-out connection of the supply wires.
Note: If an EOL resistor is specified on a DC unit, it will be fitted as standard across terminals 5 & 6 in the Ex d
chamber (see below). Re-position EOL as required for other configurations.
When positioning the EOL, ensure there is a minimum of 14mm free space between the resistor body and terminal
block and ensure the resistor is not in contact with the pcb or housing.