Chapter 5 initial connecting and settings, Connect the phone – PLANET VIP-251T User Manual
Page 21
5
Chapter 5
Initial Connecting and Settings
Connect the phone
Step 1
: Connect the IP Phone to the corporate IP telephony network. Before you connect the phone
to the network, please check if your network can work normally.
You can do this in one of two ways, depending on how your workspace is set up.
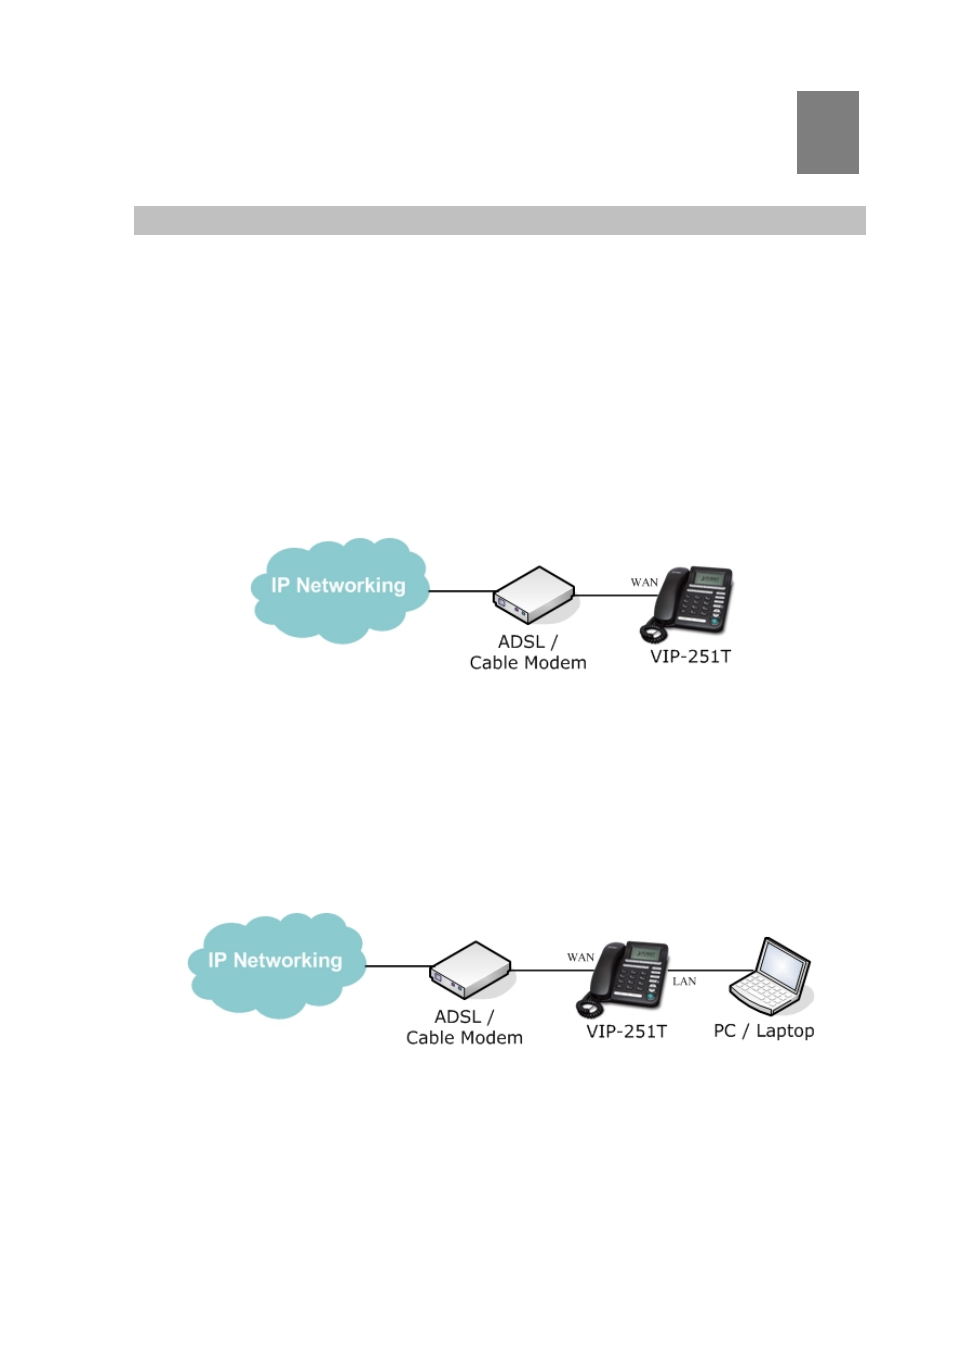
-
Direct network connection
: By this method, you need at least one available Ethernet port in
your workspace. Use the Ethernet cable in the package to connect WAN port on the back of
your phone to the Ethernet port in your workspace. Since this VoIP Phone has router
functionality, whether you have a broadband router or not, you can make direct network connect.
The following figure is for your reference.
-
Shared network connection
: Use this method if you have a single Ethernet port in your
workspace with your desktop computer already connected to it. First, disconnect the Ethernet
cable from the computer and attach it to the WAN port on the back of your phone. Next, use the
Ethernet cable in the package to connect LAN port on the back of your phone to your desktop
computer. Your IP Phone now shares a network connection with your computer. The following
figure is for your reference.
Step 2
: Connect the handset to the handset port by the handset cable in the package.
Step 3
: Connect the power supply plug to the DC port on the back of the phone. Use the power
cable to connect the power supply to a standard power outlet in your workspace.
Step 4
: Then the phone’s LCD screen displays “Hello...booting....loading system....”, when ready
screen typically displays the date, time, connection status and SIP name.
21