Midi transmit settings – Yamaha PSR-S770 User Manual
Page 121
PSR-S970/S770 Reference Manual
121
10
Connections
CHORD SYS/EX.
The “Tx” setting turns MIDI transmission of MIDI chord exclusive data (chord detect. root and type) on or
off. The “Rx” setting turns MIDI reception and recognition of MIDI chord exclusive data generated by
external equipment on or off.
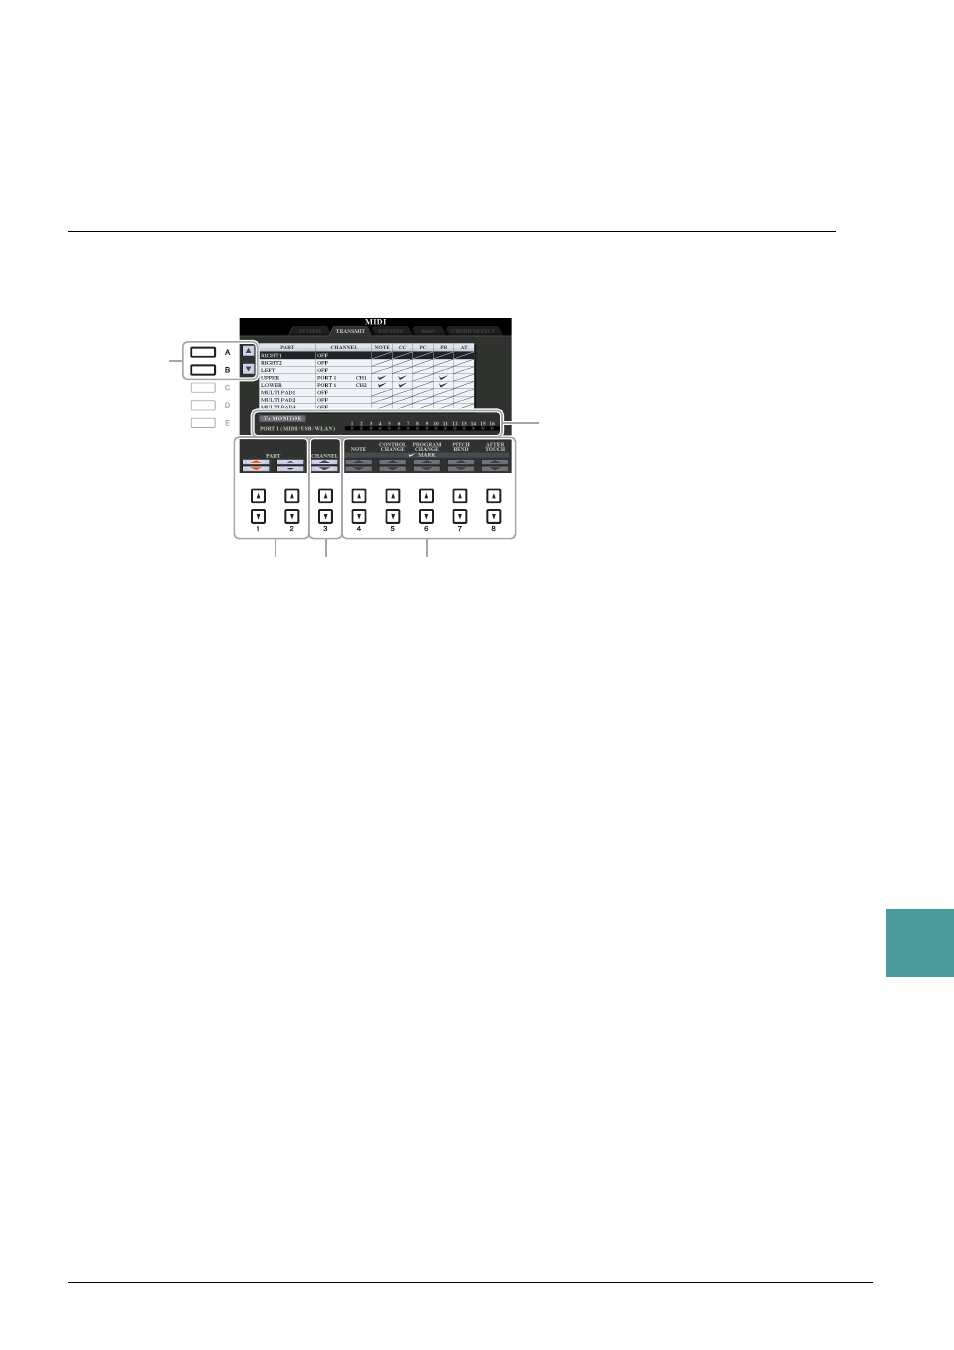
MIDI Transmit Settings
The explanations here apply to the TRANSMIT page in step 4 on
. This determines which parts will
be sent as MIDI data and over which MIDI channel the data will be sent.
1
Use the [A]/[B] buttons or [1
]/[2 ] buttons to select the part for changing
transmit settings.
The Parts listed on this display are the same as those shown in the MIXING CONSOLE display and
CHANNEL ON/OFF display with the exception of the two parts below.
UPPER:
A keyboard part played on the right side of the keyboard from the Split Point for the Voices
(RIGHT 1 and/or 2).
LOWER:
A keyboard part played on the left side of the keyboard from the Split Point for the Voices. This
is not affected by the on/off status of the [ACMP] button.
2
Use the [3
] buttons to select a channel via which the selected part will be
transmitted.
NOTE
If the same transmit channel is assigned to several different parts, the transmitted MIDI messages are merged to a single channel—resulting in unex-
pected sounds and possible glitches in the connected MIDI device.
NOTE
Protected Songs cannot be transmitted even if the proper Song channels 1–16 are set to be transmitted.
3
Use the [4
]–[8 ] button to determine the types of data to be sent.
For information on the MIDI messages which can be set here, see “Note Events” on
.
1
1
2
3
The dots corresponding to each channel (1–16)
flash briefly whenever any data is transmitted on
the channel(s).
NOTE
If “WLAN” is shown, this instrument can handle
MIDI messages received via the USB wireless LAN
adaptor connected to the [USB TO DEVICE] termi-
nal. When “WLAN” is not shown although the USB
wireless LAN adaptor is connected, turn the instru-
ment off then on again.