Deq-ii edit menu, Terms used, Using copy and paste – Oxmoor DEQ-1 User Manual
Page 14: Step one, Step two, Step three
Page 12
DEQ-II EDIT MENU
This chapter details the many advanced editing features
of the DEQ-II.
TERMS USED
EQUALIZATION CURVE (or simply, CURVE):
A
term describing the collection of filter settings
(bandpass, high-pass and low-pass) that completely
define how the equalizer will process audio.
SOFTKEY/MESSAGE AREA:
The portion of the
LCD display dedicated to displaying the Softkey
labels and messages.
ACTIVE FILTER BAND:
The filter which may
currently be adjusted.
BAND CURSOR:
A solid “bar” that overlaps the
slider “slot” of the Active Filter Band; denotes the
Active Filter Band.
NORMAL-VIDEO:
Dark characters on a light
background.
REVERSE-VIDEO:
Light characters on a dark
background.
PRESET:
A group of settings that completely
configure the equalizer.
TITLE:
A 16-character (or fewer) description for the
name of a Preset.
EDIT MENU SCREEN and
EDIT MENU SOFTKEY EXPLANATIONS
Described in this section are the features and functions
of the EDIT menu Softkeys. Step-by-step examples aid
the user in gaining rapid proficiency in using these
functions.
USING COPY AND PASTE
Frequently it is desirable to make small enhancements to
an equalization for comparison purposes without
changing the stored curve. You might, for example,
have an equalization curve with which you are basically
happy but want to experiment, without destroying the
curve you like. One way to accomplish this is by
selecting a different Preset and manually adjusting the
faders until they are set exactly as in the curve you like.
A much better way, however, is by utilizing the COPY
(and PASTE) commands of the EDIT menu. Those
familiar with computers may recognize these commands
as being very similar to the editing functions provided
by most word processor programs. COPY and PASTE
may be used together to copy the curve settings from
one Preset to any other Preset, or even to a Preset in a
different DEQ. The following procedure describes the
steps involved in copying and pasting Presets.
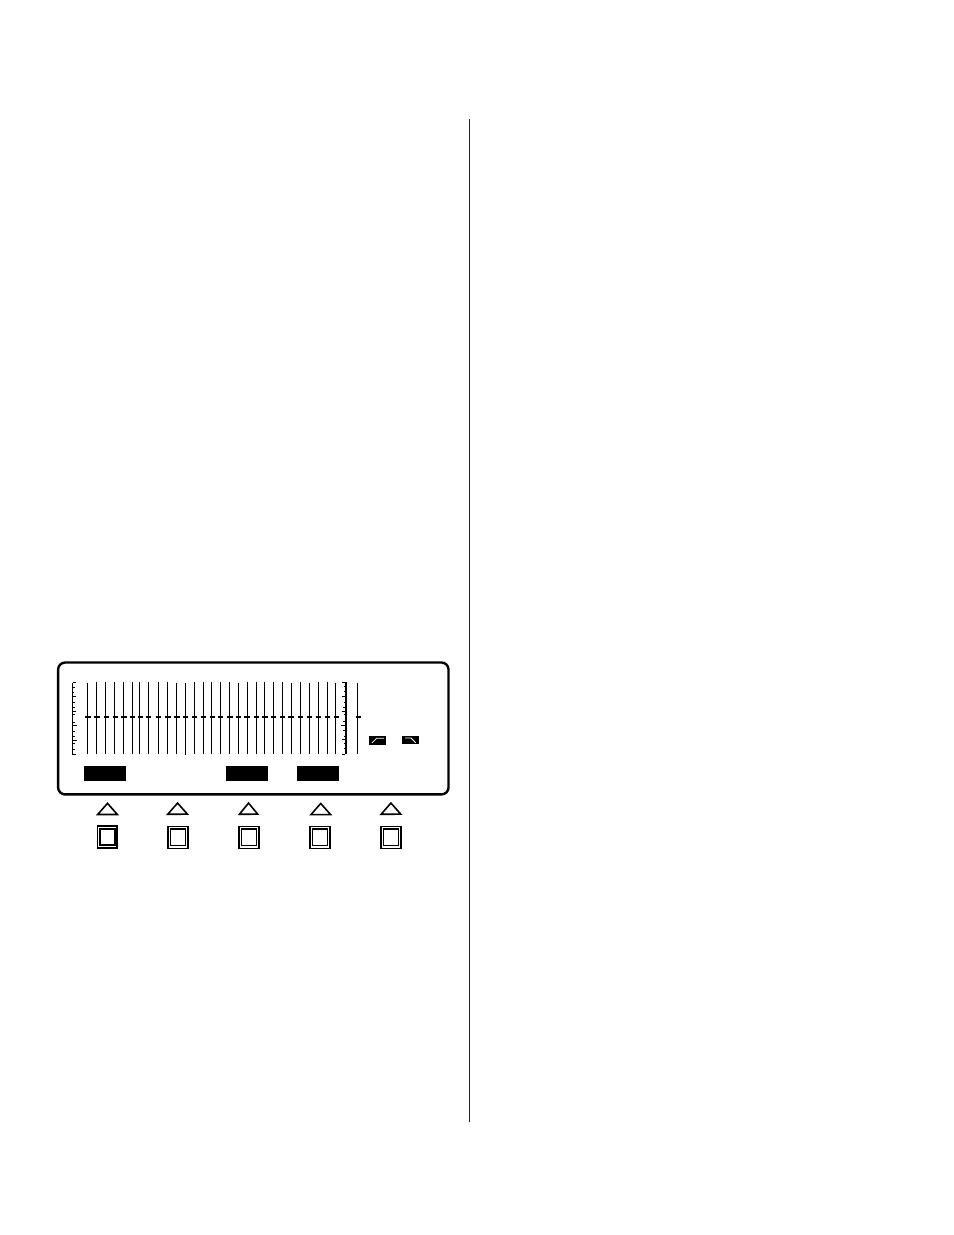
Step One:
Access the EDIT menu by pressing the EDIT
menu key. The Softkey/Message Area should now be
labeled COPY, PASTE, CLEAR, TITLE, and ENTER (see
Figure 3.0). Note that if the active Preset is locked you
will not have access to the CLEAR function (CLEAR will
be in normal-video). Note also that the Band Cursor and
band status information have been blanked from the
display to indicate that the faders may not be adjusted.
Faders may only be adjusted while in the EQ Menu.
Step Two:
Press the Softkey labeled COPY. The COPY
Softkey will flash briefly and then the PASTE Softkey will
be placed in reverse-video (unless the active Preset is
locked: see page 9, Using Lock/Unlock). The flashing COPY
Softkey denotes that the curve has been correctly copied
into the copy buffer, and the reverse-video PASTE Softkey
indicates that the copied curve may now be pasted. If
the Preset is locked then the PASTE Softkey will remain
in normal-video until you change to a preset which is
not locked. You will need to select an unlocked Preset
(or unlock the current Preset) before the PASTE Softkey
is placed in reverse-video and the curve may be pasted.
If you cannot remember how to change Presets, see the
Quick Reference portion of this manual.
Step Three:
Once you have selected the Preset to which
you wish to copy the curve, press the Softkey labeled
PASTE. The Softkey/Message Area should now display
the query “Overwrite Preset?” and the Softkey labels
CANCEL and PASTE (see Figure 3.1). If you decide you
do not want to paste the copied curve over this Preset
simply hit CANCEL and you will be returned to the EDIT
menu without having pasted the curve. The curve you
"copied" will still be held in the copy buffer until you
copy another curve or power down the equalizer. To
complete the paste operation press the PASTE Softkey.
The PASTE Softkey will flash briefly to
DEQ
PRE
OUT
OUT
PASTE
CLEAR
TITLE
COPY
ENTER
1
1
Figure 3.0: EDIT MENU SCREEN