Deq-i internal controls (continued) – Oxmoor DEQ-1 User Manual
Page 25
Page 23
DEQ-I INTERNAL CONTROLS (CONTINUED)
;
;
;
;
;
;
;
;
;;
;
;
;
;
;
;
;
;
;;
;
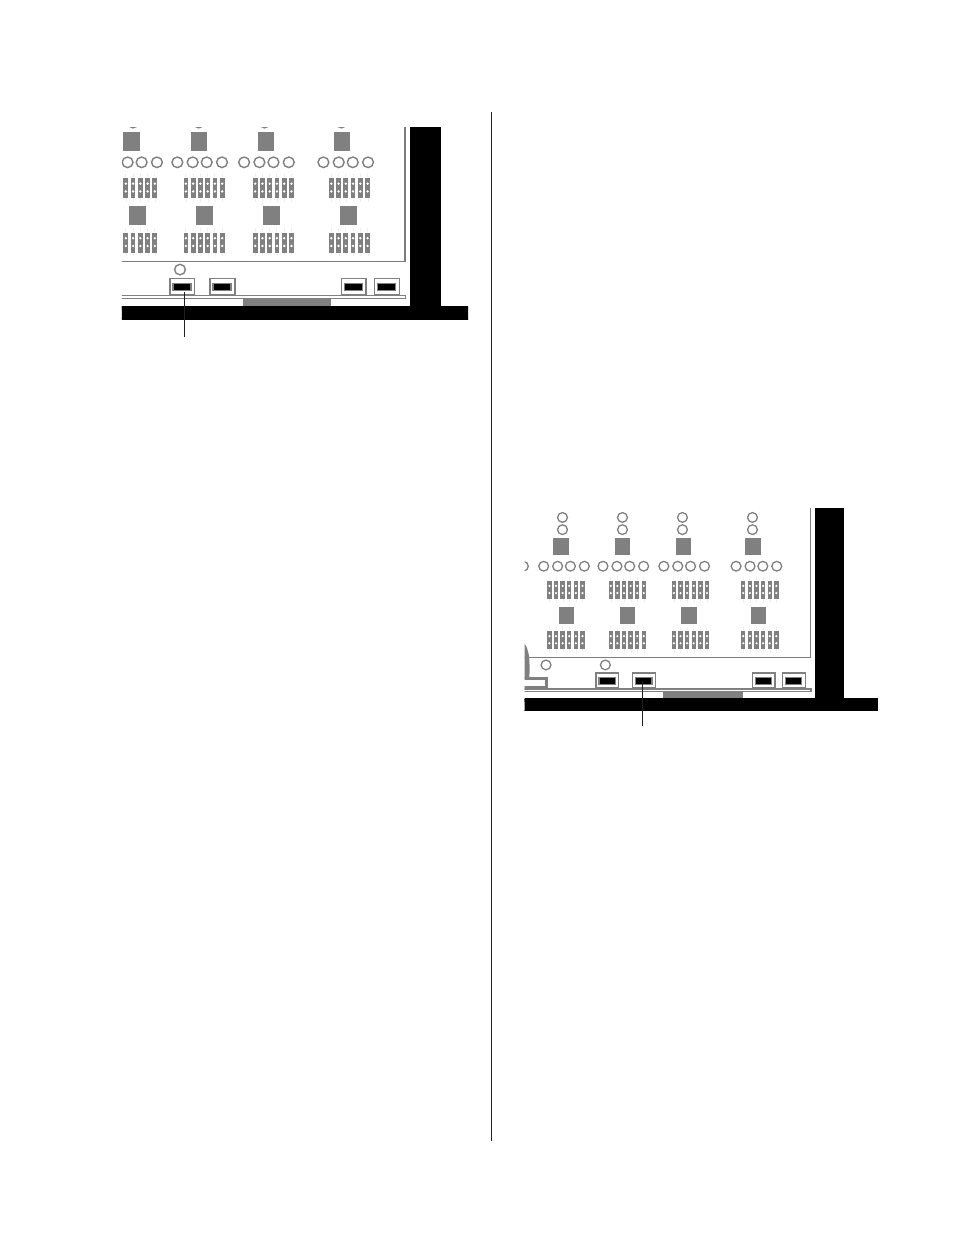
Figure 7.2: DEQ-I Select Button
SELECT
ADJUSTING THE ACTIVE FILTER BAND
1. Push and hold the ADJUST internal control button
(see Figure 7.3). Notice that the 7-segment display is
now showing a two-digit number instead of the single-
digit number it was showing. This two-digit number is
the setting of the Active Filter Band. Appendix E shows
how to interpret the setting (in dB) based on the number
in the 7-segment display.
2. While still holding down the ADJUST internal
control, push either the UP or the DOWN control and
notice that the new setting is displayed. If you are
processing audio you may also hear the change in the
audio.
3. After you are finished adjusting the frequency band,
release the ADJUST control. Notice that the 7-segment
display again displays the Active Preset number.
;
;;
;
;
;
;
;
;
;
;
;
;;
;
;
;
;
;
;
;
;
;
;
;;
;
;
;
Figure 7.3: DEQ-I Adjust Button
ADJUST
SELECTING FREQUENCY BANDS
Selection of frequency bands is accomplished as
follows:
1. Push and hold the SELECT internal control (see
Figure 7.2). Notice that the 7-segment display is
now showing a two-digit number instead of the
single-digit number it was showing. This two-digit
number is the Active Filter Band number, which
denotes the filter band you are currently working
with. Appendix E provides a listing of the Active
Filter Band numbers and their corresponding 7-
segment display codes. You will need to refer to
this listing as you use the internal controls.
2. While still holding the SELECT internal control,
push either the UP or the DOWN control and
notice that the two-digit number changes to the
next higher or lower number. This new number
denotes the new Active Filter Band (refer to
Appendix E for which frequency band the new
number corresponds to). Notice that you are not
adjusting the filters, you are merely selecting a new
filter for adjustment.
3. When you have selected the desired frequency
band, release the SELECT control. Notice that the
7-segment display again displays a one-digit
number, which is the Active Preset number.