Deq-ii quick start tutorial (continued), Adjusting the sliders, Changing the active filter band – Oxmoor DEQ-1 User Manual
Page 9: Adjusting high-pass & low-pass filters
Page 7
DEQ-II QUICK START TUTORIAL (CONTINUED)
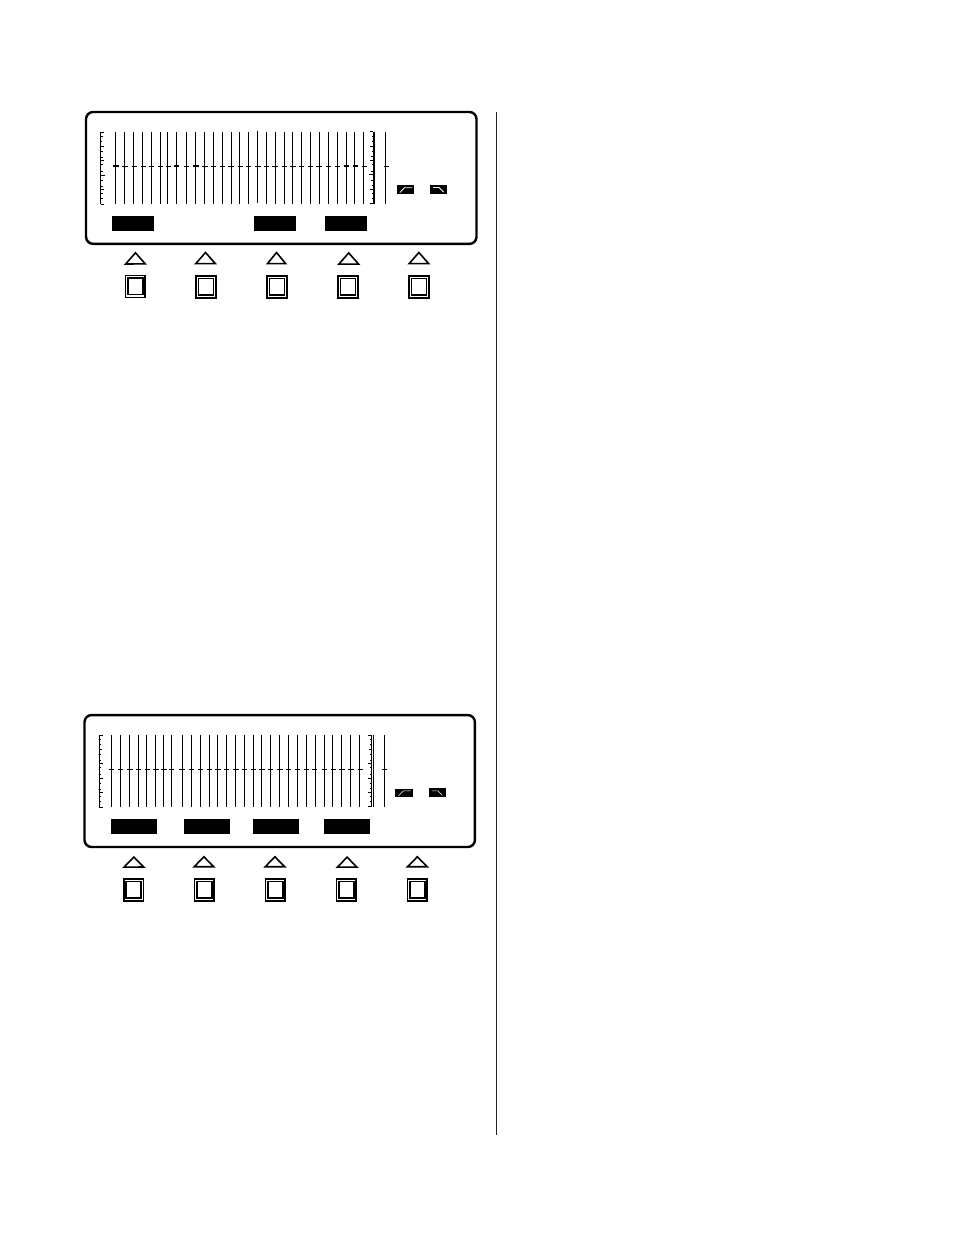
Also note that the LED indicator beside the Menu key
you pushed is now lit, and the EQUALIZE Menu key
indicator is no longer lit.
Finally, note that none of the filter sliders are now in
reverse-video, and the sections of the Status Area which
give frequency and setting information have been erased.
This denotes that there is no Active Filter Band, hence,
no band may be adjusted. Filter sliders (and high-pass
and low-pass filters) may be adjusted only while in the
EQUALIZE menu.
Now, change to the UTILITY menu by pressing the
UTILITY menu key (see Figure 1.9). Notice that the only
changes are that the appropriate Menu indicator is now
lit and the Softkeys have been relabeled. Finally, go back
to the EQUALIZE menu by pressing the EQUALIZE
menu key. Once in EQUALIZE, you may begin adjusting
the sliders.
ADJUSTING THE SLIDERS
While in the EQUALIZE menu, it is possible to adjust
the slider position. To adjust the active slider (the slider
that is in reverse-video) push the UP or DOWN cursor
key. Notice that each push of the button changes the
level in 0.5 dB increments. If the button is held, it will
begin to repeat just like a computer's keyboard.
Notice that the slug in the Active Filter Band has moved,
and that the band information in the Status Area (Active
Figure 1.8: Edit Menu Screen
DEQ
PRE
OUT
OUT
PASTE
CLEAR
TITLE
COPY
ENTER
1
1
DEQ 1
PRE 1
PASSWRD
DISPLAY
NAME
LOG OUT
ENTER
OUT
OUT
Figure 1.9: Utility Menu Screen
Filter Band frequency and slider position) has been
updated to reflect this change. Continue pushing the
UP and DOWN cursor keys to adjust the slider until
you are comfortable with the action of the keys and the
repeat rate. Notice that each time the UP or DOWN
cursor key is pressed, the Status Area is updated. Now,
let's change the slider settings in some other bands.
CHANGING THE ACTIVE FILTER BAND
To make another frequency band become the Active
Filter Band, press the RIGHT cursor key. Observe that
the Band Cursor has moved one position to the right,
and that the Status Area has been updated. Push the
RIGHT button several more times. Now push the
LEFT cursor key and notice that the Band Cursor has
moved back one position to the left. Each time the
LEFT or RIGHT cursor key is pressed the Band Cursor
moves and the Status Area is updated. Continue to use
the LEFT and RIGHT cursor keys to change the Active
Filter Band and make slider adjustments using the UP
and DOWN keys until you feel familiar with the
function. Now, move the Band Cursor until it rests on
the 16 kHz frequency band. Push the RIGHT cursor
key one time and notice that the Band Cursor has
skipped over the right graduation and now rests on
the GAIN band. The Gain slider may be adjusted exactly
like the bandpass filter sliders. Now, press the LEFT
cursor key once and notice that the Band Cursor again
rests on the 16 kHz band. Finally, push the RIGHT
cursor key one more time so that the Band Cursor
again rests on the GAIN band. We may now learn how
to adjust the high-pass and low-pass filters.
ADJUSTING HIGH-PASS & LOW-PASS FILTERS
The high- and low-pass filters are accessed just like the
bandpass filter bands, by using the LEFT and RIGHT
cursor keys to move the Band Cursor to the desired
band. With the Band Cursor resting on the GAIN band,
push the RIGHT cursor key one time. Notice that the
line in the Status Area that displays the high-pass filter
setting is now in reverse-video, which indicates that
the high-pass filter is now the Active Filter Band and
may be adjusted by using the UP and DOWN cursor
keys. Use the Up and DOWN cursor keys to adjust the
high-pass filter band. Now, push the RIGHT cursor
key one time and observe that the Band Cursor now
rests on the low-pass filter. Adjust the low-pass filter
with the UP and DOWN cursor keys.
Push the RIGHT cursor key once and notice that the
Band Cursor moves to the 25 Hz frequency band. The
Band Cursor “scrolls” in this fashion in both directions.
For instance, pushing the LEFT cursor key puts the
Band Cursor back on the low-pass filter band.