Crank pulley and supercha – Paxton Superchargers Small Block Carbureted Ford User Manual
Page 23
7-1
P/N: 4PFX020-010
©2007 Paxton Automotive
All Rights Reserved, Intl. Copr. Secured
26JAN07 v2.1 UnivSBFCarb(4PFXv2.1)
Section 7
CRANK PULLEY AND SUPERCHARGER DRIVE PULLEY INSTALLATION
7.1
CRANK PULLEY AND SUPERCHARG-
ER DRIVE PULLEY INSTALLATION
*** NOTE ***
Stock water pump pulleys are approximately 5.7" in
diameter (1965 Mustang). Larger pulleys may need
to be replaced.
A.
If the original crank pulley was secured
using three bolts, install the supplied crank
pulley and spacer using the correct bolt pat-
tern. If the original crank pulley was secured
with four bolts, mount the supplied crank
pulley directly onto the damper face.
*** NOTE ***
Some supplied crank pulleys may have multiple bolt
patterns to fit different applications. Be sure to select
the bolt pattern that matches the stock crank pulley.
B.
Select from the supplied bolts to get 1/2" to
3/4" thread engagement into the balancer.
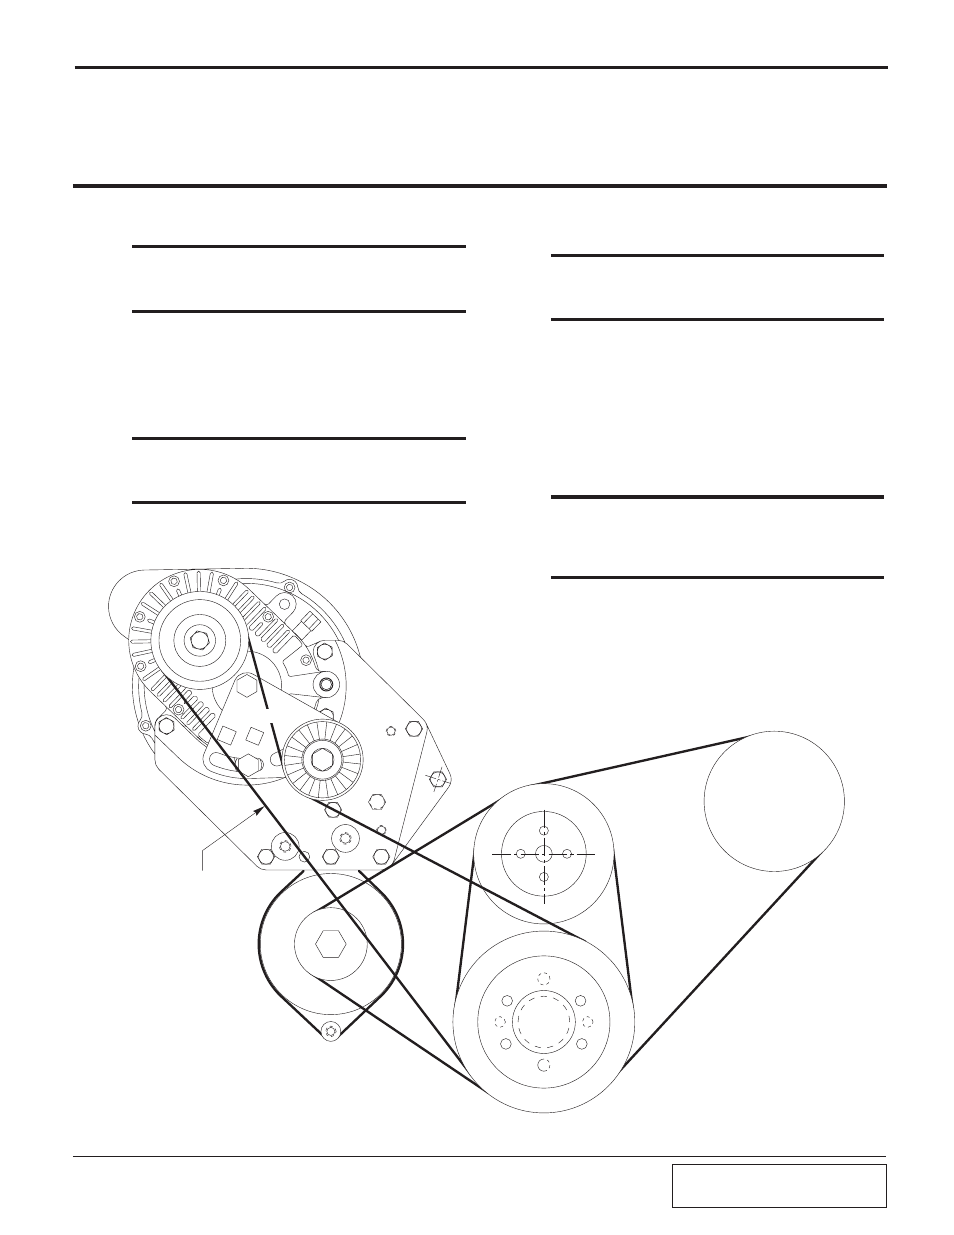
Fig. 7.2-a / Passenger Side Supercharger Belt Routing (Driver Side Similar)
WATER
PUMP PULLEY
POWER
STEERING
PULLEY
CRANK
PULLEY
TENSIONER
SUPERCHARGER
BELT
C.
Seat the crank pulley in the balancer pilot
and tighten the bolts in stages to factory
specs.
*** NOTE ***
Check the vehicle for radiator fan to crank pulley
clearance. If there is interference either space fan for-
ward or replace with a low profile electric fan.
D.
If the supercharger did not come with a pul-
ley already installed, lightly grease the
supercharger input shaft and/or the super-
charger drive pulley bore. Install the pulley
onto the supercharger input shaft and rotate
the pulley to align the keyways. Slide the
square key into the keyway. Install the pul-
ley retainer assembly into the input shaft and
hand tighten.
*** NOTE ***
If the supercharger drive pulley will not slide onto the
shaft DO NOT FORCE IT. Light heating of the super-
charger drive pulley with a propane torch will aid in
installation.
7.2
BELT TENSIONER INSTALLATION
A1.
(For vehicles WITHOUT air condition-
ing.) Loosely install the three supplied
12mm bolts through the tensioner plate and
into the supercharger cover. Install the idler
and spacer onto the front side of the plate in
one of the holes provided. (See Fig. 7.2-a.)
Skip to Step 7.3.