Vectronics VEC-121K User Manual
Page 19
VEC-121K Owner's Manual
Crystal Radio Set Kit
17
GND
EAR2
5”
5.5”
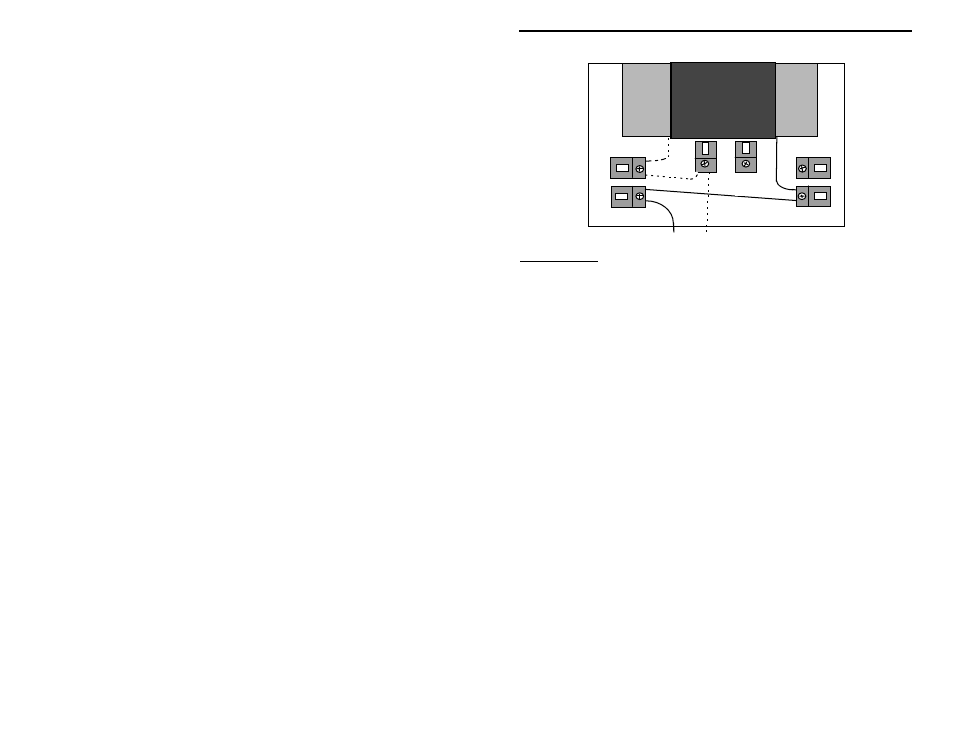
Important Note: The “dotted” lines show wiring done in previous steps.
! Mark the left-hand coil wire at 5” from where it exits the coil.
! At the 5” point, remove 1” of insulation from the wire.
! Form the area stripped of insulation into a through-connection half loop.
! Loosen the Fahnstock clip mounting screw for the EAR2 clip.
! Pass the through-connection between the EAR2 clip and breadboard, with
loop going around the Phillips screw shank, as shown above.
! Tighten the mounting screw for the EAR2 clip until snug.
! Measure the wire exiting from the EAR2 connection, and at the 5.5” point
remove 1” of insulation from the wire.
! Form the area of wire stripped of insulation into a second through-
connection half loop.
! Loosen the Phillips screw that mounts the Fahnstock clip used for the GND
connection.
! Pass the through-connection between the GND clip and breadboard, with
the loop going around the Phillips screw shank, as shown above.
! Tighten the GND Phillips mounting screw until snug.
! Several inches of wire should remain from the GND connection. Do not cut
this wire until instructed to do so!
This completes Phase 4. You’ve come a long way since first opening the kit.
Your little crystal receiving set is really starting to look like something.
Phase 5: Final wiring