Right-indent the last line of a paragraph, Use indent to here – Adobe InDesign CS3 User Manual
Page 239
INDESIGN CS3
User Guide
232
In most cases you’ll specify the negative equivalent of the value you entered in step 2; for instance, if you specified a
left indent of 2 picas, your first-line left indent will typically be –2 picas.
See also
“Create bulleted or numbered lists” on page 237
Right-indent the last line of a paragraph
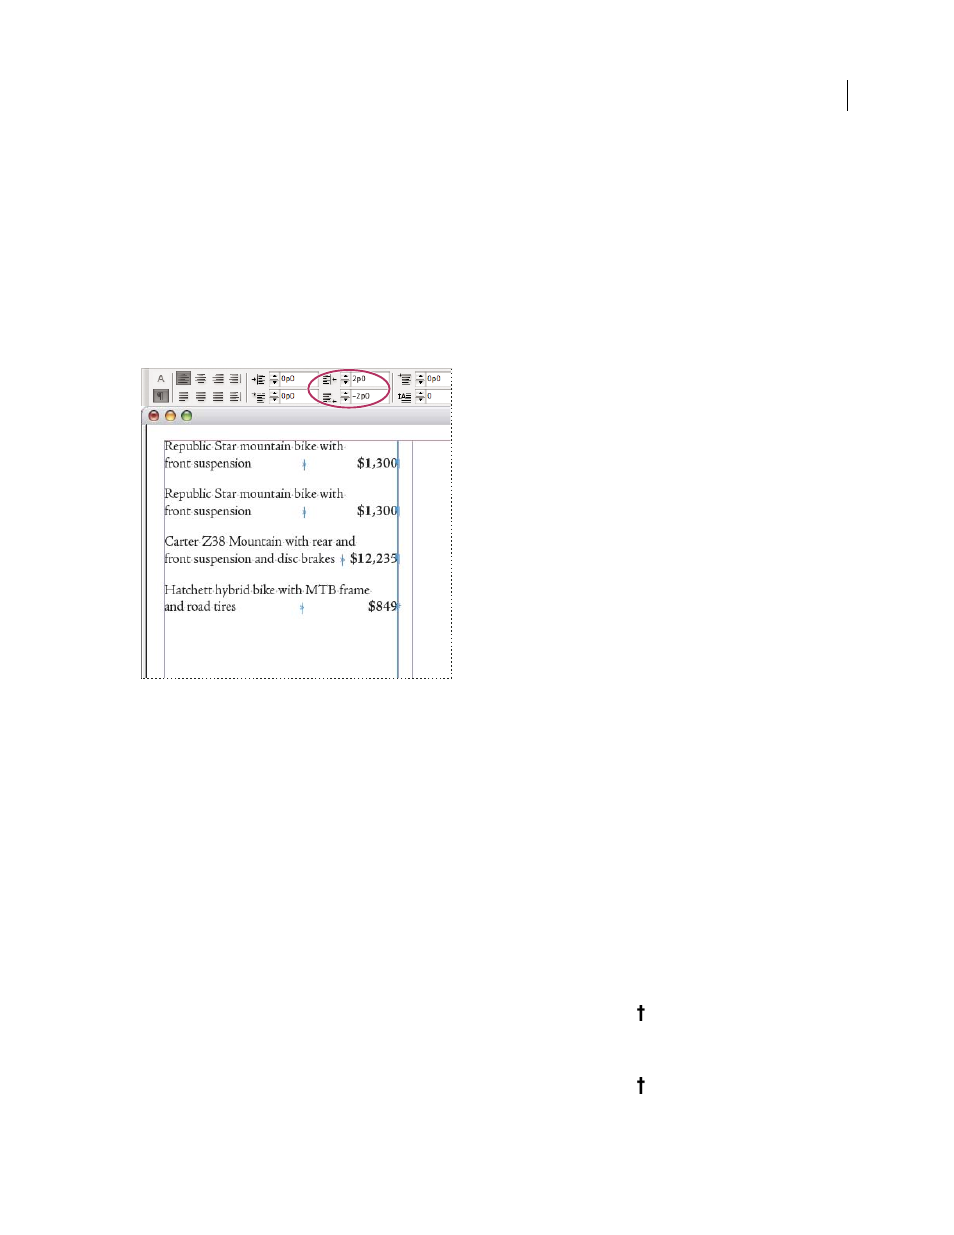
You can use the Last Line Right Indent option to add a hanging indent on the right side of the last line in a paragraph.
This option is especially useful for right-aligning prices in a sales catalog.
Last line right indent
1
Type your paragraphs. In the last line of each paragraph, place the insertion point before the text to be indented,
and choose Type > Insert Special Character > Other > Right Indent Tab.
2
Select the paragraphs.
3
To create a right indent for paragraphs, specify a value (such as 2p) in the Right Indent field of the Paragraph panel
or Control panel.
4
To offset the right indent value for the text that follows the tab, type a negative value (such as -2p) in the Last Line
Right Indent field of the Paragraph panel or Control panel.
Use Indent To Here
You can use the Indent To Here special character to indent lines in a paragraph independently of a paragraph’s left
indent value. The Indent To Here special character is different from the paragraph’s left indent in the following ways:
•
Indent To Here is part of the text flow, as if it were a visible character. If text reflows, the indent moves with it.
•
When you choose Type > Show Hidden Characters, the Indent To Here character
is visible.
•
Indent To Here affects all lines after the line where you’ve added its special characters, so you can indent just some
of the lines in a paragraph.
•
When you choose Type > Show Hidden Characters, the Indent To Here character
is visible.