Beurer GL 50 (mg/dL) User Manual
Page 18
18
Beurer GL50 mg/dL
3
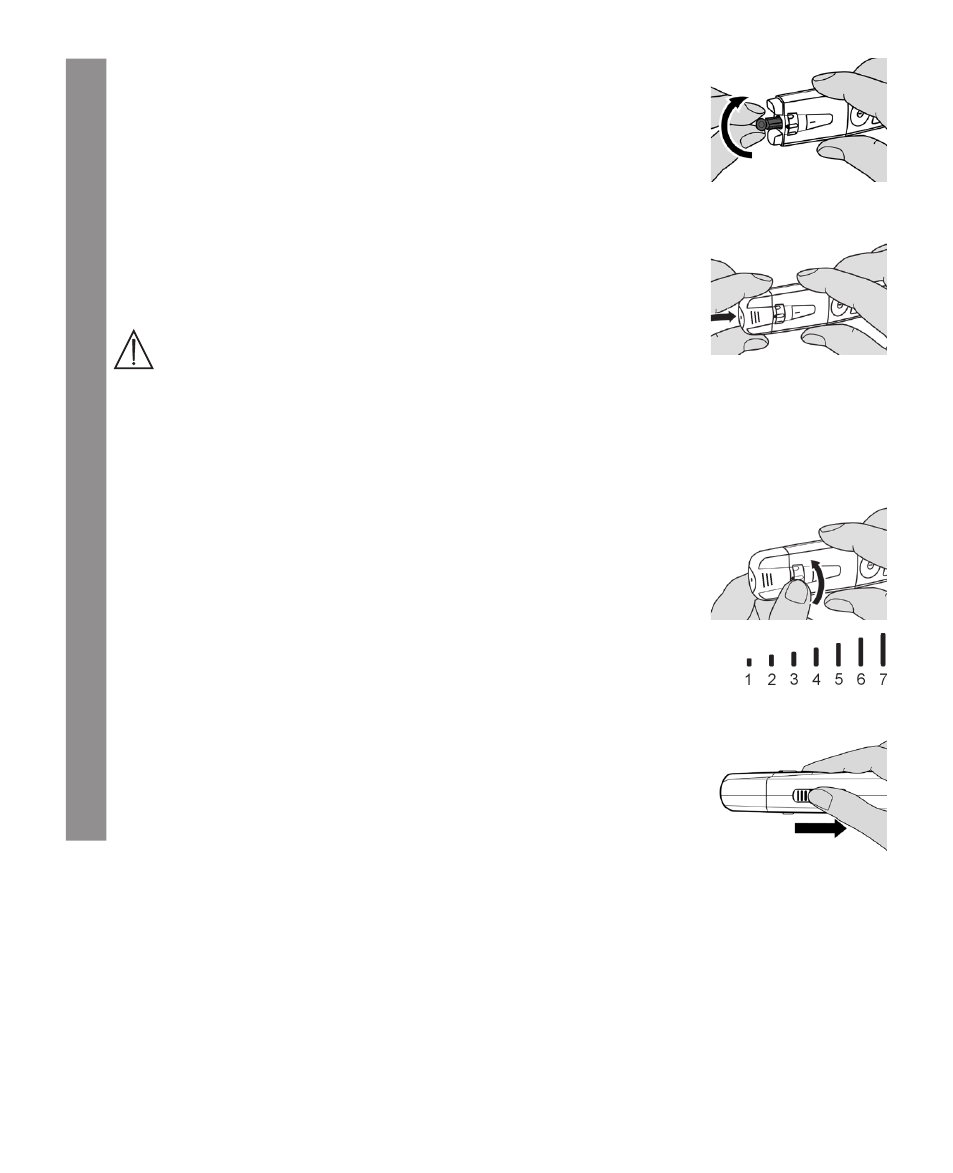
Remove the protective lancet disc
Remove the protective lancet disc by turning clockwise. Retain the
protective disc for the safe disposal of the used lancet needle after
taking a blood sample.
4
Select cap and attach.
You need to use a different cap depending on the area from which you
take the sample:
- Fingertip: Cap (black)
- Other body parts: AST cap (transparent)
Warning
Do not use the AST cap to take blood samples from the finger.
Place the selected cap on the lancing device. Make sure that the curved
part of the cap fits on the curved part of the lancing device. Press firmly
on the cap until it audibly engages.
5
Select the penetration depth
You can set seven different penetration depths on the lancing device
using the dial with raised bars. The length of the bar represents the re-
quired penetration depth.
• 1 to 2: soft or thin skin
• 3 to 5: normal skin
• 6 to 7: thick or callous skin
Turn the dial until the required bar is in the centre of the black mark-
ing.
6
Tension the lancing device
Pull the slider in the direction of the arrow (to the right in the image) un-
til it stops and then release. The slider automatically springs back into
position. The lancing device is now tensioned.