Beurer GL 50 (mg/dL) User Manual
Page 19
Beurer GL50 mg/dL
19
5.3 Taking a blood sample and measuring the glucose level
Warning
• Change the puncture area each time you take a measurement, e.g. use a different finger or the other
hand. Repeatedly using the same area may cause inflammation or scarring.
• If the cap is not in place, there is a risk of injury from the exposed lancet.
• Do not squeeze your finger to obtain a larger drop of blood. If squeezed, the blood is diluted with
tissue fluid and this may lead to an incorrect result.
• Please note that insufficient blood circulation at the puncture area, e.g. caused by cold temperatures
or illness, can lead to incorrect results.
Important
Do not apply any blood samples or control solutions to the test strip before inserting it in the moni-
tor.
1
Prepare the test strip
Take a test strip from the box and immediately close it again. Use the test strip within three
minutes of removing it from the box.
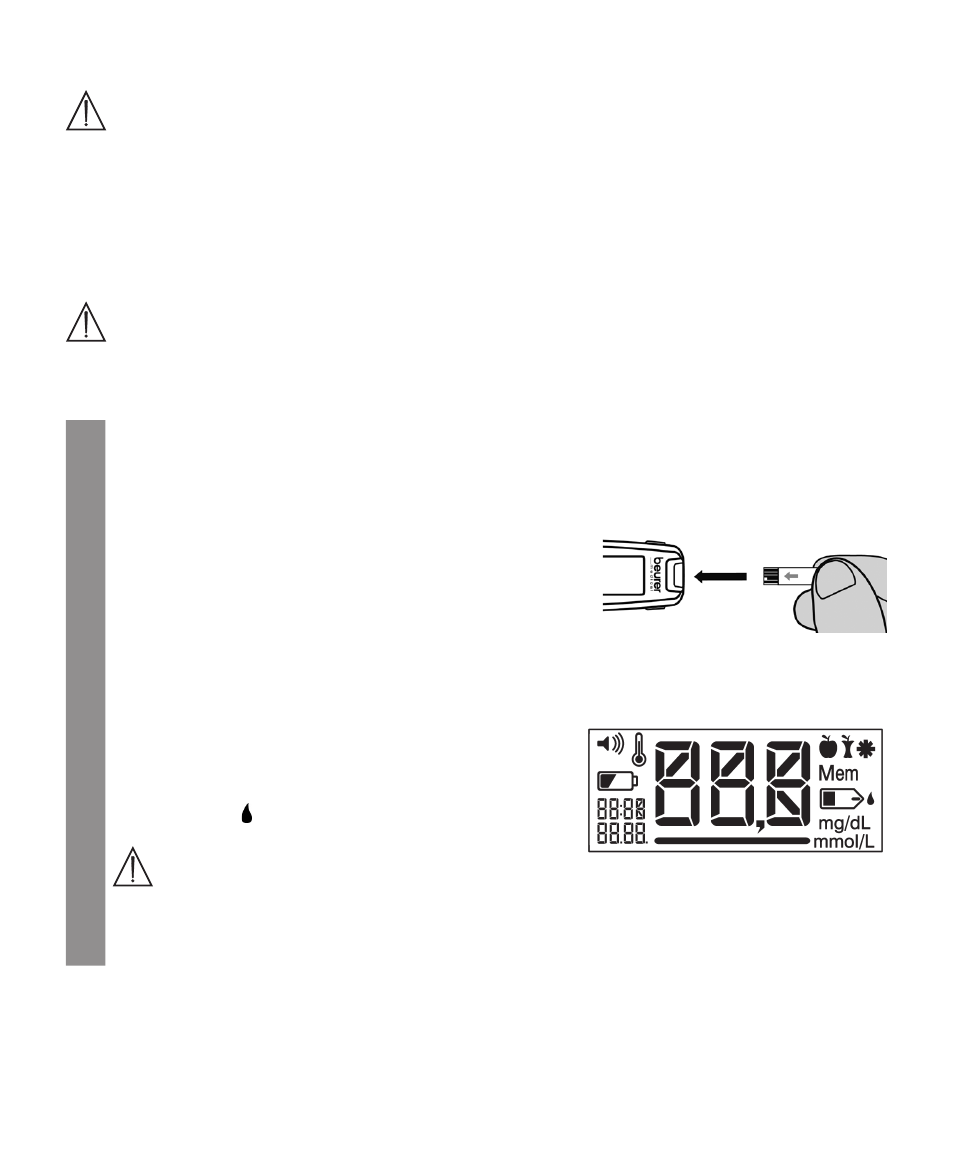
2
Insert test strip
Take the monitor in your left hand. Hold the blood glu-
cose monitor so that the display is facing you and the
Beurer logo is on the right-hand side.
Insert the test strip into the slot on the rear end of the
blood glucose monitor with the contacts first. Make
sure that the front of the test strip is facing you. You can
touch any part of the test strip with clean, dry hands.
3
The device switches on automatically
The device switches on automatically and briefly
shows the full display. The device is ready for use as
soon as the test strip symbol and the flashing blood
droplet symbol are displayed.
Warning
If segments are missing, stop using the device and immediately contact customer services. To
test whether the full display is completely displayed, pull the test strip out of the device and
hold the On/Off button when subsequently switching on the device.